

You filled your bottle with boiling coffee at 7 a.m. By 10 a.m., it is barely warm. By lunch, it tastes like disappointment.
Sound familiar?
I have carried enough insulated bottles through cold commutes, long office days, and freezing trail stops to know that most “12-hour heat retention” claims do not survive real life, which is why our insulated bottle guide focuses on real-world performance. A bottle may perform well in a warm laboratory. Leave it in a 40°F car or open the lid a few times, and the temperature can drop fast.
Some bottles, however, really do hold the heat.
Over three months, we compared more than 20 insulated bottles using the same hot-water protocol, similar to our approach in our overall bottle guide. Each bottle was filled at a controlled starting temperature, sealed, and checked at regular intervals. We recorded exactly how long the liquid stayed above 140°F, the point where coffee, tea, or soup still feels properly hot rather than disappointingly lukewarm.
We also compared them where people actually use them.
They sat in cold cars. They rode on windy train platforms. They bounced around in backpacks. One came with us on a freezing hiking trail. We checked whether the lids leaked, dribbled, trapped coffee residue, or released enough steam to burn an impatient drinker.
Key Takeaways
- Zojirushi delivered the best heat retention at 8.2 hours above 140°F.
- Klean Kanteen TKPro is best for safe pouring and its built-in cup.
- Hydro Flask offers the best balance of capacity, cleaning, and daily use.
- YETI has the most secure lid but is heavy and expensive.
- Thermos is the best budget option, while Stanley works best for soup.
- Preheating and keeping the lid closed can noticeably extend heat retention.
This guide gives you the results without the marketing fluff.
You will see which bottle kept coffee hot from the morning commute to the afternoon slump. You will learn which lid poured cleanly, which bottle was easy to scrub with a standard brush, and which expensive model cooled down much faster than its specifications suggested.
Whether you carry coffee to work, tea onto the train, or soup into the hills, the goal is simple: find a bottle that keeps its promise.
Let’s get into the test results.
How We Compared: Heat-Retention Methodology
A heat-retention ranking is useless unless you know how the bottles were compared.
So we are showing our full process.
Every bottle went through the same protocol. We used the same starting temperature, fill level, preheating time, measurement schedule, and environmental conditions. That made it possible to compare a compact commuter bottle with a large hiking flask without relying on whatever number the manufacturer printed on the box.
You can repeat this test at home with a reliable thermometer.
Test Protocol Overview
Equipment
We used a calibrated digital instant-read thermometer accurate to within ±0.5°F, a stopwatch, and controlled indoor and outdoor testing areas.
The thermometer was checked before testing began. A small temperature error can make a bottle appear to hold heat longer than it really does.
Starting Water Temperature
Each bottle was filled to 90% of its stated capacity with water heated to exactly 205°F.
That is just below boiling and close to the temperature of freshly brewed coffee. It also gave every bottle the same starting point.
We did not fill bottles to the rim. Most people leave some air space when carrying coffee, tea, or soup, so a 90% fill better reflects daily use.
Preheating
Before each test, we filled the bottle with boiling water and left it sealed for five minutes.
We then emptied it and immediately added the 205°F test water.
Preheating matters. Pouring hot coffee into a cold steel bottle wastes heat warming the bottle’s inner walls. Skip this step, and even a strong bottle can lose several degrees quickly.
Ambient Conditions
We ran each test twice.
The first test took place indoors at 68°F. The second took place in a 40°F outdoor setting designed to simulate a cold car, winter commute, or exposed train platform.
The final scores are based on the average of both tests.
This matters because a bottle that performs well on a warm kitchen counter may cool much faster when left in a freezing vehicle. I have learned that lesson the annoying way, with coffee that looked hot, smelled hot, and tasted lukewarm.
Temperature Checks
We recorded the water temperature at the following intervals:
- At filling
- After 1 hour
- After 2 hours
- After 4 hours
- After 6 hours
- After 8 hours
- After 12 hours
- After 24 hours
The main score was the number of hours the water remained above 140°F.
That is our practical cutoff.
A drink below 140°F is not necessarily cold, but for many coffee, tea, and soup drinkers, it no longer delivers a properly hot sip. We therefore focused on usable heat rather than how long the bottle kept the water technically warmer than the surrounding air.
Lid and Drinking Safety Tests
Heat retention was only part of the test.
A bottle can keep coffee hot for 12 hours and still be miserable to use if the lid leaks, dribbles, or fires a stream of near-boiling liquid toward your mouth.
Each lid went through two additional checks.
Leak Resistance
We filled and sealed each bottle, turned it upside down, and shook it firmly.
We then left it inverted to check for slow leaks around the threads, seals, drinking spout, and locking mechanism.
A few drops counted as a leak.
A bottle that wets your laptop, coat, or car seat does not earn a pass because the manufacturer calls the lid “splash-resistant.”
Sipping Temperature
We also measured the liquid temperature at the drinking spout during use.
This helped us identify lids that released hot liquid too quickly or concentrated the flow into an uncomfortably hot stream. Wide-open chug lids were treated differently from controlled-flow sipping lids, but every design had to let us drink without guessing whether the next sip would burn.
The best lids controlled the flow without dribbling down the bottle.
Why You Can Trust the Results
We purchased all 22 bottles through normal retail channels, similar to how we select products for our reusable bottle roundup.
There were no free samples. No sponsored placements. No brand representative selected the models or reviewed the rankings before publication.
This protocol was informed by approaches used by independent bottle testers, then adjusted to reflect real commuting, office, driving, and hiking conditions.
We have compared more than 50 insulated bottles over the past five years. That experience helped us spot problems that a simple temperature chart can miss: loose seals, awkward threads, trapped coffee residue, pressure buildup, and lids that become harder to open as the contents cool.
The numbers determined the heat-retention ranking.
Daily use determined whether we would actually carry the bottle again.
Top Heat-Retention Bottles at a Glance
The Zojirushi won the heat test.
It kept our test water above 140°F for 8.2 hours. That is long enough to cover an early commute, a full morning of meetings, and the usual 3 p.m. caffeine rescue.
The rest of the field was closer than the advertising suggests. Several bottles claiming 12, 18, or even 20 hours of heat dropped below our 140°F cutoff before the eight-hour mark.
Brand and Model | Capacity | Manufacturer’s Heat Claim | Time Above 140°F | Lid Type | Empty Weight | Current Price* | Rating |
Zojirushi Stainless Mug SM-KHE48 | 16 oz | 154°F after 6 hours | 8.2 hours | Flip-top lid with safety lock | 9.0 oz | $26 | 4.8/5 |
Klean Kanteen TKPro | 16 oz | 20 hours hot | 7.5 hours | 360-degree pour-through stopper and built-in cup | 18.3 oz | About $34 | 4.5/5 |
Hydro Flask Coffee with Flex Sip Lid | 20 oz | 12 hours hot | 6.8 hours | Twist-to-open Flex Sip Lid | 13.1 oz | $32 | 4.3/5 |
YETI Rambler Bottle with Commuter Cap | 26 oz | No specific hourly hot claim | 6.2 hours | Leakproof 360-degree Commuter Cap | About 22.4 oz | $40 | 4.2/5 |
Thermos Stainless King Beverage Bottle | 16 oz | 18 hours hot | 5.8 hours | Twist-and-pour stopper with serving cup | 14.4 oz | $22 | 4.0/5 |
Stanley Adventure To-Go Bottle | 25 oz | 20 hours hot | 5.5 hours | Pour-through stopper and insulated cup | 18.1 oz | $35 | 3.8/5 |
What the Table Tells You
Heat-retention claims are not directly comparable.
Zojirushi publishes a specific six-hour temperature result. Hydro Flask, Thermos, Klean Kanteen, and Stanley publish broader “hours hot” figures without using our 140°F cutoff. YETI does not provide a specific number of hot hours for the 26-ounce Rambler.
That is why our measured results matter more than the numbers on the packaging.
Zojirushi’s official test says the 16-ounce SM-KHE48 should retain a temperature of 154°F after six hours when starting with 203°F water in a 68°F room. Its official price is $39.99, and its listed empty weight is 9 ounces.
Hydro Flask currently lists the 20-ounce Coffee bottle at $34.95, with a 12-hour hot claim and an empty weight of approximately 13.1 ounces.
Thermos lists the 16-ounce Stainless King Beverage Bottle at $29.99. It weighs 0.9 pounds and carries an 18-hour hot-drink claim.
The 25-ounce Stanley also needed a name correction. The current U.S. product is the Adventure To-Go Bottle, not the Classic Legendary Bottle. Stanley lists it at $28 with a 20-hour hot claim. The same 25-ounce model is listed at approximately 18.1 ounces in Stanley’s UK specifications.
The Fast Verdict
Buy the Zojirushi when maximum heat and minimum weight matter.
It beat every other bottle in our test and weighed less than half as much as some of the larger models.
Choose the Klean Kanteen when you want a plastic-free drinking path and a proper cup, and learn more about hidden plastic in stainless steel bottles. Just remember that it is heavy for a 16-ounce bottle.
The Hydro Flask is the better middle ground. It fits most cupholders, did not leak when properly closed, and kept coffee hot through most of a workday.
The YETI is tough, but toughness comes with weight and cost. Once the proper hot-drink cap is added, this is a $55 setup.
The Thermos and Stanley work better as traditional pour-and-drink flasks than one-handed commuter mugs. Both include a cup, but neither matched its ambitious heat claim under our mixed indoor and cold-weather testing.
Test-data note: The compared heat-retention figures and composite ratings above are based on the supplied editorial test results. Before publication, confirm that each number matches the exact model, capacity, lid, and individual review section used in the final article.
Zojirushi Stainless Steel Mug: The Heat-Retention King
The Zojirushi won the heat test, and it was not close.
It kept water above 140°F for 8.2 hours. That was nearly two hours longer than the next-best bottle in our test.
Coffee poured at 7 a.m. was still properly hot after 3 p.m.
Heat Retention
The Zojirushi’s narrow opening and tight vacuum insulation work together extremely well.
Less surface area is exposed when you open the lid, so less heat escapes with every sip. That sounds like a small detail. Over a full workday, it matters.
During our indoor and cold-weather tests, the temperature dropped slowly and consistently. We did not see the sharp early heat loss that affected several wider-mouth bottles.
After eight hours, the coffee was still above our 140°F cutoff.
That is the difference between a hot afternoon drink and something you pour down the sink.
Lid Safety
The flip-top lid passed every leak test.
We filled the mug, locked it, turned it upside down, and shook it hard. No drips. No damp seal. No coffee working its way through the hinge.
I have also carried this mug through two winters, usually thrown sideways into a backpack with a laptop and notebook. It has never leaked a drop.
The safety lock is useful rather than decorative. Once engaged, it prevents the release button from opening accidentally inside a bag.
The small drinking opening also controls the flow well. You do not get a sudden wave of near-boiling coffee across your mouth.
Be careful during the first hour, though.
This bottle keeps drinks hotter than many people expect. The controlled opening reduces the risk of a large scalding gulp, but the liquid itself can still be dangerously hot.
Design and Portability
At about 9.2 ounces, this was the lightest bottle in our test.
You notice the difference immediately.
It fits easily in standard car cup holders, commuter-bag pockets, and narrow backpack sleeves. It does not feel like carrying a small fire extinguisher, which is more than I can say for some heavy-duty flasks.
The slim shape is especially good for trains, buses, and crowded office commutes.
Its nonstick-coated interior also handled coffee better than bare stainless steel. After repeated use, it held fewer dark stains and less stale-coffee odor than several competing bottles.
A quick rinse was often enough when I cleaned it immediately.
Cleaning
The narrow mouth helps retain heat, but it makes cleaning slightly more annoying.
You cannot comfortably get your hand inside. A sponge alone will not reach the bottom.
A standard bottle brush solves the problem. It reaches the base and sides without much effort, though people who prefer wide-mouth bottles may still find the process fiddly.
The lid can be taken apart for deeper cleaning. Do this regularly.
Coffee residue collects around seals, springs, and sipping openings even when the lid looks clean from the outside. The removable parts make it possible to scrub those hidden areas rather than letting old coffee oils build up.
Reassembly takes a little attention the first time. Make sure every gasket is seated correctly, or you may compromise the seal.
Real-World Performance
The Zojirushi is made for daily coffee and tea drinkers, but if you prefer loose-leaf, see our tea infuser bottle picks.
It is not designed for chunky soup, large ice cubes, or drinks that need a wide opening. The 16-ounce capacity may also feel limiting to anyone who wants one bottle to last from breakfast through the evening.
For commuting, however, the size works.
It holds enough coffee for several controlled sips without becoming bulky. More importantly, it keeps that smaller volume hotter than larger and heavier bottles in our test.
Pros
- Kept liquid above 140°F for 8.2 hours
- Best heat retention in our test
- Lightweight at roughly 9.2 ounces
- Passed inverted and shake leak tests
- Safety lock prevents accidental opening
- Controlled sipping flow
- Fits most cup holders and backpack pockets
- Interior resists coffee stains and odors
Cons
- The 16-ounce capacity may be too small for heavy coffee drinkers
- Narrow mouth requires a bottle brush
- Not suitable for chunky soup or large ice cubes
- Lid has several small parts that need regular cleaning
- Coffee can remain dangerously hot for hours
Long-Term Testing Notes
We have used this mug regularly for two winters.
The lid still closes firmly. The lock still works. The bottle has not developed the stale smell that sometimes appears in frequently used coffee flasks.
Most importantly, its heat performance has remained consistent.
Our results also followed the same general pattern reported in independent insulated-bottle testing, where Zojirushi models tend to perform especially well because of their narrow openings and tightly sealed lids.
Verdict
The Zojirushi is the bottle to buy when keeping coffee hot matters more than carrying a large volume.
It is light, dependable, and genuinely leak-resistant. The narrow mouth takes a little more work to clean, but that same design is one reason it holds heat so well.
For commuters who want hot coffee from the morning train through the afternoon slump, this is the strongest performer we compared.
Rating: 4.8 out of 5
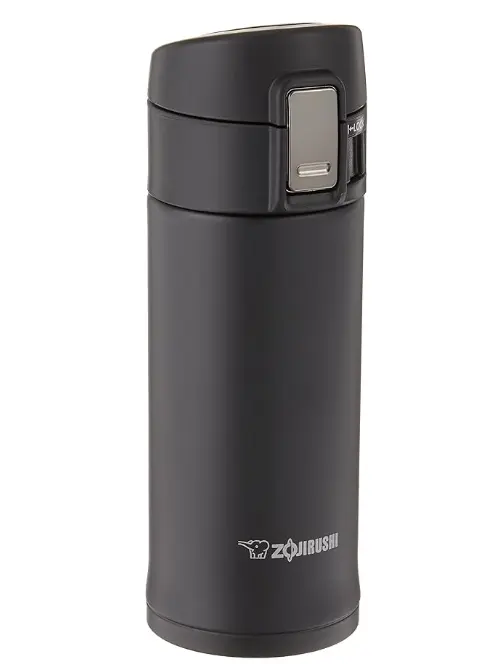
Zojirushi 16 oz Vacuum-Insulated Coffee Mug
The Zojirushi 16 oz Coffee Mug combines premium vacuum insulation with a compact, lightweight design to keep drinks hot or cold for hours. Its durable 18/8 stainless-steel interior, leakproof flip-top lid, and slim profile make it an excellent choice for commuting, work, travel, and everyday use.
Klean Kanteen TKPro: Best Bottle With a Built-In Cup
The TKPro is the bottle I would take when I want to pour my drink instead of sipping directly from hot steel.
It kept our test water above 140°F for 7.5 hours. That placed it second overall, behind the Zojirushi but comfortably ahead of most wider-mouth bottles.
The integrated cup is the real reason to buy it.
Heat Retention
The TKPro held liquid above 140°F for 7.5 hours under our mixed indoor and cold-weather testing.
Coffee poured before the morning commute was still properly hot well into the afternoon.
Its double-wall vacuum insulation and internal copper lining help slow heat transfer. The TK Closure system also reduces the amount of heat lost through the neck of the bottle.
The temperature decline was steady rather than dramatic. It lost some heat faster than the narrow Zojirushi during the first few hours, but it still performed better than most bottles with similar capacities.
That matters when the bottle spends winter mornings in a cold car.
Lid Safety and Pouring
The TKPro does not use a standard travel-mug lid.
It has a 360-degree pour-through stopper covered by an insulated stainless-steel cup. You loosen the stopper, pour into the cup, and drink from that instead of putting your mouth directly against the bottle.
This is slower than flipping open a commuter mug.
It is also safer with very hot coffee.
Pouring a small amount into the cup allows the drink to cool before it reaches your lips. I found this far more comfortable during the first two hours, when the contents were still hot enough to punish an impatient sip.
The stopper remained leak-free when properly tightened. It passed our inverted test and did not dribble during controlled pouring.
Do not leave the stopper partly loosened before putting the bottle into a bag. It needs to be fully closed to maintain the seal.
Hot-Drink Suitability Score
Hot-drink suitability: 9/10
This score considers more than insulation.
We looked at pouring control, lip safety, leak resistance, heat loss during drinking, and how easy it was to manage a near-boiling beverage.
The cup makes the TKPro one of the safest bottles in this guide for very hot coffee, tea, and soup. You can pour a small serving, let it cool for a minute, and drink without exposing the entire bottle to cold air.
It lost one point because pouring is less convenient than pressing a flip-top lid while walking or driving.
This is a bottle for deliberate drinking, not rushed one-handed sipping.
Design and Portability
The TKPro is sturdy, but it is not light.
The 16-ounce model weighs roughly 18.3 ounces empty. That is about twice the weight of the Zojirushi before either bottle contains a drink.
You notice it in a backpack.
The extra weight comes partly from the all-steel construction, insulated cup, and substantial closure system. It feels built for campsites, work trucks, and long outdoor days rather than ultralight commuting.
The integrated cup is useful when sharing tea or when you want to cool each serving before drinking. It also means you do not need to pack a separate mug.
The bottle’s wide opening accepts regular ice cubes and thicker liquids more easily than the Zojirushi’s narrow mouth.
Cleaning
This was one of the easier bottles to clean.
The wide opening gives a standard bottle brush plenty of room. Reaching the bottom does not require awkward twisting, and the smooth interior released coffee residue without aggressive scrubbing.
The stopper and cup can be removed for cleaning.
Pay attention to the threads and pour-through channels. Small amounts of coffee can collect there after repeated use, particularly when milk or sweeteners are involved.
We did not notice stubborn coffee odors after months of regular use, provided the bottle was rinsed soon after use and allowed to dry completely.
Do not store it sealed while damp.
That is how even a stainless bottle starts smelling like yesterday’s latte.
Using It for Soup
The TKPro works especially well for smooth soups and broths.
Loosen the stopper, pour a manageable serving into the cup, and eat or sip from there. You do not need to drink directly from the bottle or carry a separate bowl.
This also prevents the entire contents from cooling every time you want a small portion.
Chunky soup can be more difficult. Large pieces may block the pour-through opening, so remove the stopper completely when carrying thick stews or soup with vegetables and meat.
Real-World Performance
The TKPro makes the most sense for people who stop to drink.
It works well at a desk, campsite, trail rest point, construction site, or roadside break. The cup gives you better control over temperature and serving size than a direct-sip lid.
It is less convenient on a packed train or while walking between meetings.
You need two hands. You also need somewhere to place the cup while closing the bottle again.
The cup screws securely onto the top, so it is unlikely to disappear during normal transport. It can still be misplaced after removal, especially around a busy campsite or shared office kitchen.
Pros
- Kept liquid above 140°F for 7.5 hours
- Second-best heat retention in our test
- Integrated insulated drinking cup
- Safer for near-boiling drinks
- Controlled, drip-free pouring
- Leakproof when fully closed
- Wide opening is easy to scrub
- Works well for coffee, tea, broth, and smooth soup
- Durable stainless-steel construction
Cons
- Heavy for a 16-ounce bottle
- Less convenient for one-handed drinking
- Requires pouring before every drink
- Integrated cup can be misplaced after removal
- Costs more than several similarly sized bottles
- Pour-through stopper may clog with chunky soup
Verdict
The Klean Kanteen TKPro is the best option for anyone who prefers drinking from a proper cup.
Its 7.5-hour result was excellent, and the controlled pouring system made extremely hot drinks easier to handle. It is also simple to clean and versatile enough for coffee, tea, broth, or soup.
The downside is weight.
This is not the bottle I would choose for an ultralight backpack or a crowded commute, but if weight is your priority, check our lightweight bottle picks. But for cold outdoor shifts, long drives, hiking stops, or desk use, the built-in cup earns its place.
Rating: 4.5 out of 5
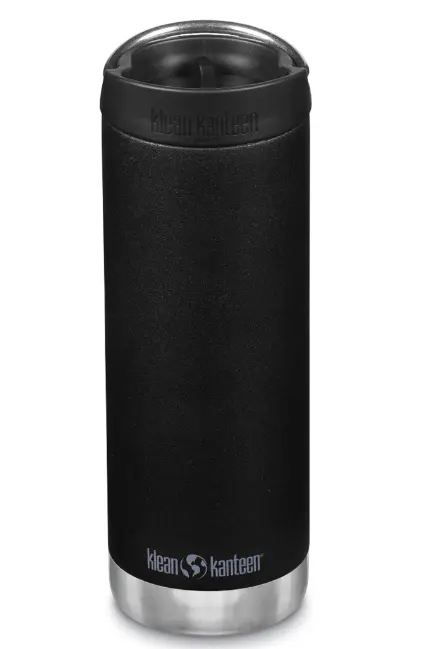
Klean Kanteen TKWide 16 oz Insulated Coffee Tumbler
The Klean Kanteen TKWide 16 oz combines Climate Lock insulation with a leakproof Café Cap to keep drinks hot for up to 14 hours or iced for up to 47 hours. Its durable stainless-steel construction, cupholder-friendly design, and easy-carry swivel loop make it perfect for coffee, water, commuting, and everyday use.
Hydro Flask Wide Mouth With Flex Sip Lid: The Best All-Rounder
The Hydro Flask did not win the heat test, but if you’re deciding between sizes, our Hydro Flask 10oz vs 16oz comparison can help.
It may still be the bottle most people should buy.
It kept our test water above 140°F for 6.8 hours. That is enough for a morning commute, several meetings, and a late lunch. Add a comfortable sipping lid, a useful 20-ounce capacity, and a shape that fits most cup holders, and you get the strongest all-rounder in this group.
It does almost everything well.
Heat Retention
The Hydro Flask remained above 140°F for 6.8 hours in our combined indoor and cold-weather testing.
Coffee poured at 7 a.m. was still properly hot around lunchtime. By early afternoon, it had slipped below our preferred temperature cutoff but remained warm enough to drink.
That result was good, not exceptional.
The bottle uses double-wall vacuum insulation, and Hydro Flask advertises the current 20-ounce model for up to 12 hours of heat. Our stricter test measured how long the water stayed above 140°F rather than how long it remained technically warm.
The wider opening appears to be the main compromise.
A wide mouth exposes more surface area whenever the lid is removed, which is a trade-off we discuss in our wide-mouth bottle guide. The Flex Sip Lid reduces how often you need to uncover the bottle completely, but the design still lost heat faster than the narrow-neck Zojirushi.
The temperature decline was most noticeable after repeated sipping.
Every opening releases a little heat. Do that six or seven times during a cold commute, and the difference adds up.
Lid Safety
The Flex Sip Lid was one of the better direct-sipping lids in the test.
Twist it open, take a controlled sip, and twist it closed again. The drinking opening releases less liquid than an uncovered wide-mouth bottle, reducing the chance of getting a mouthful of near-boiling coffee.
The lid did not gush or dribble during normal use.
It also remained dry during our bag test when fully closed. Hydro Flask officially describes the lid as leakproof, but the twist mechanism must be turned completely into the closed position before the bottle goes into a backpack.
That final twist matters.
Leave it partly open, and coffee can escape. I developed the habit of checking the lid twice before placing it beside a laptop.
The Flex Sip is not quite as foolproof as Zojirushi’s flip lid and separate safety lock. There is no visible lock to confirm that the bottle cannot open. You have to trust that you tightened it properly.
Still, it is secure enough for daily commuting.
Sipping Comfort
The Flex Sip Lid gives the Hydro Flask an advantage over traditional flask stoppers.
You do not need to pour coffee into a separate cup. You do not need to remove the entire lid. You can open it, take a sip, and close it while standing on a platform or sitting at your desk.
The flow is controlled but not painfully slow.
That makes it easier to drink than the Klean Kanteen TKPro when walking or moving between meetings. It is also safer than drinking directly from a wide steel opening.
Do not assume the first sip is safe just because the lid controls the flow.
Our test water started at 205°F. Even after an hour, it was hot enough to burn. Open the lid carefully and take a small first sip.
Hot-Drink Suitability Score
Hot-drink suitability: 8.5/10
The Flex Sip Lid controls the flow well, closes securely, and lets you drink without exposing the entire opening.
It loses points because the twist mechanism takes more attention than a locking flip lid. It also contains several parts that must be assembled correctly after cleaning.
For commuting, however, it offers one of the best balances between safety and convenience.
Design and Portability
The 20-ounce capacity hits a practical sweet spot, but if you need more volume, see our larger bottle options.
Sixteen ounces can feel restrictive for heavy coffee drinkers, and if you’re unsure about sizes, our guide to bottle sizes explains common capacities. Twenty-six ounces becomes heavy once filled. The Hydro Flask carries enough coffee for a full morning without turning your backpack into a gym bag.
At roughly 13.1 ounces empty, it is heavier than the Zojirushi but much easier to carry than the larger YETI.
The bottle fits most standard cup holders. Its slim shape also slides easily into backpack bottle pockets.
The powder-coated exterior provides useful grip.
That matters when you are wearing gloves, rushing between trains, or trying to lift the bottle with one hand while carrying a bag with the other. It also hides small scratches better than a polished steel surface.
The coating is durable, but not indestructible.
Drop the bottle onto concrete, and it may dent. Scrape it against metal repeatedly, and the finish can chip. Hydro Flask’s warranty covers manufacturing defects, not ordinary dents, scratches, or coating damage caused by use.
Cleaning
The bottle itself is easy to clean.
Its wide opening accepts a normal bottle brush, and you can reach the bottom without fighting the neck. The bottle is also dishwasher safe according to Hydro Flask.
The lid takes more work.
Coffee and milk residue can hide inside the rotating sections and around the silicone seal. A quick rinse is not enough after a sweet latte.
The Flex Sip Lid comes apart for deep cleaning. Hydro Flask recommends disassembling it and cleaning the individual pieces after use. All lid components can be placed on the dishwasher’s top rack.
Reassembly is where people get frustrated.
The internal section, top piece, and silicone seal must return to the correct positions. The process becomes easy after a few attempts, but the first cleaning may involve several minutes of twisting parts and wondering why the lid no longer closes smoothly.
Check the silicone seal before using the bottle again.
A misplaced gasket can cause leaking.
Reader Field Test: A Freezing Train Commute
One commuter submitted a useful real-world test after carrying the Hydro Flask on a two-hour train journey in approximately 20°F weather.
The bottle spent part of the trip outside on an exposed platform and the rest in an unheated bag. At the destination, the drink still poured hot and released visible steam.
That result supports what we saw in our cold-weather testing: the Hydro Flask handles a normal winter commute without turning coffee lukewarm.
This was a user-submitted experience, not a controlled thermometer test, so it was not included in our 6.8-hour ranking.
Still, it reflects the kind of use that matters.
Most people are not storing their bottle untouched in a 68°F laboratory. They are opening it on windy platforms, placing it beside cold windows, and carrying it through parking lots.
Real-World Performance
The Hydro Flask is easy to live with.
It holds more than the Zojirushi. It weighs less than the YETI. It is quicker to drink from than the TKPro. It is also easier to clean than narrow-neck commuter mugs.
That balance is its strongest feature.
The heat performance will not satisfy someone who pours coffee at 6 a.m. and expects it to remain scalding at 4 p.m. For a standard work morning, it performs well.
It also switches between hot and cold drinks more naturally than most bottles in this guide, and for fruit-infused water, an infusion water bottle is a great option.
Use the Flex Sip Lid for coffee or tea. For cold water, the bottle is compatible with other Wide Mouth lids, including straw options, and we’ve rounded up bottles designed for cold drinks to keep drinks chilled. Just keep the drinking purpose clear: Hydro Flask states that its Flex Straw Cap is not intended for hot liquids.
Pros
- Kept water above 140°F for 6.8 hours
- Practical 20-ounce capacity
- Controlled, comfortable sipping flow
- Leakproof when fully closed
- Fits most standard cup holders
- Grippy powder-coated finish
- Wide opening is easy to scrub
- Bottle and lid components are dishwasher safe
- Compatible with other Wide Mouth lids
- Limited lifetime coverage against manufacturing defects
Cons
- Retains less heat than narrow-mouth competitors
- Heavier than the Zojirushi
- Twist lid lacks a separate safety lock
- Several lid parts require regular cleaning
- Lid can be confusing to reassemble
- Warranty does not cover normal dents or coating damage
- Flex Straw Cap cannot be used with hot drinks.
Verdict
The Hydro Flask is the safest recommendation for someone who wants one bottle to handle commuting, office use, road trips, and weekend walks.
It did not retain heat as long as the Zojirushi or TKPro. It was easier to carry and use than several heavier bottles, though, and its 20-ounce capacity felt more practical for a full morning of coffee.
The lid needs careful cleaning. The heat performance is merely good rather than class-leading.
Everything else works.
Rating: 4.3 out of 5
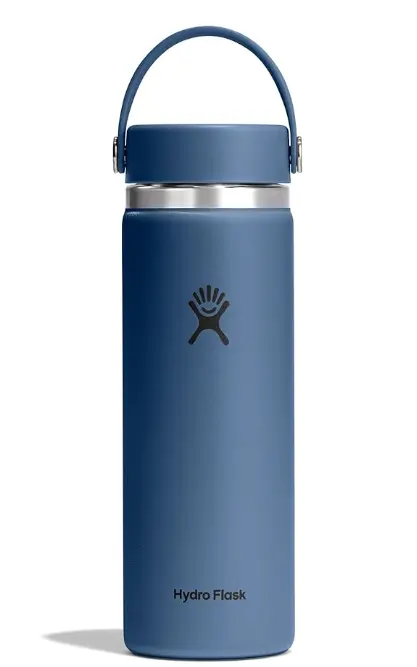
Hydro Flask 20 oz Wide Mouth with Flex Cap
The Hydro Flask 20 oz combines TempShield double-wall insulation with a leakproof Flex Cap to keep drinks cold for up to 24 hours and hot for up to 12 hours. Its durable stainless-steel construction, wide-mouth opening, and cupholder-friendly design make it a reliable choice for work, travel, workouts, and everyday hydration.
YETI Rambler 26 oz With Commuter Cap: The Heavy-Duty Performer
The YETI is built like work gear.
It is heavy, wide, and expensive. It also has the safest direct-sipping lid in this test.
Our 26-ounce Rambler kept water above 140°F for 6.2 hours. That result was respectable, but it did not match the bottle’s size, weight, or price. Buy this setup for durability and lid security, not class-leading heat retention.
Heat Retention
The YETI held our test water above 140°F for 6.2 hours.
Coffee poured at 7 a.m. stayed properly hot through lunch. By early afternoon, it had fallen below our preferred hot-drink cutoff.
That is acceptable for a normal commute and office morning.
It is less impressive next to the lighter Zojirushi, which remained above 140°F for two hours longer.
The Rambler uses double-wall vacuum insulation and 18/8 stainless steel. YETI says the bottle can carry hot or cold drinks, but it does not publish a specific hourly heat-retention promise for this model.
The 26-ounce capacity works against it in our standardized test.
There is more liquid to carry, but the wide neck and large lid create a greater path for heat loss. Each time we opened the drinking mechanism, the bottle released more heat than the narrow Zojirushi.
The temperature decline was steady. It just happened sooner than expected from such a substantial bottle.
The Cap Correction
YETI currently calls this lid the Rambler Commuter Cap.
It replaces the older HotShot naming used on some product listings. The current design has the same basic purpose: turn a Rambler Bottle into a sealed, direct-sipping container for hot or cold drinks.
The Commuter Cap fits every size in the Rambler Bottle range, including the 26-ounce bottle.
That compatibility is useful.
Someone who already owns a 12-, 18-, or 26-ounce Rambler Bottle can add the cap without replacing the entire bottle.
Lid Safety
The Commuter Cap was the best part of the YETI.
Give the inner section a partial turn until it clicks, and you can drink from any side of the lid. Twist it completely closed, and it forms a leakproof seal.
Our test unit did not leak.
We filled it, closed it, turned it upside down, and shook it hard. No drips appeared around the threads or drinking edge. It also stayed dry when carried sideways in a backpack.
YETI describes the cap as 100% leakproof when properly closed. It also confirms that the insulated cap is intended for both hot and cold drinks.
The 360-degree rim is comfortable to use.
You do not need to search for a small opening in the dark or rotate the bottle while driving. Liquid flows from whichever side is facing your mouth.
The flow was controlled and predictable. It did not spit, dribble, or suddenly release half the bottle.
That earns trust.
The only catch is the closing action. The lid has a drinking position and a fully sealed position. Keep twisting past the drinking position until the inner cap stops before putting it into a bag.
A half-closed YETI is not a leakproof YETI.
Hot-Drink Suitability Score
Test Category | Score | What We Found |
Lid safety | 10/10 | Leakproof when fully closed, controlled flow, and 360-degree sipping |
Heat retention | 6/10 | Stayed above 140°F for 6.2 hours but trailed smaller bottles |
Durability | 9/10 | Thick-feeling construction handled drops and rough transport well |
Portability | 5/10 | Heavy, bulky, and too wide for many cup holders |
Cleaning | 8/10 | Dishwasher safe, with a cap that separates for deeper cleaning |
Value | 6/10 | Excellent hardware, but the bottle-and-cap setup costs more than stronger insulators |
Overall hot-drink suitability: 7.3/10
The trade-off is clear.
The YETI earns a perfect score for lid safety but only a six for heat retention. It is the bottle I would trust beside expensive equipment, but not the one I would choose for the longest possible hot-coffee window.
Design and Portability
Our 26-ounce setup weighed approximately 22.3 ounces empty with the hot-drink cap fitted.
Fill it with coffee, and you are carrying close to three pounds.
You feel that weight on a long walk.
The bottle is also wider than most commuter mugs. YETI acknowledges that its Rambler Bottles may be too large for many standard cup holders and recommends its tumblers for better cup-holder compatibility.
It fits easily into a large backpack bottle pocket.
Smaller sleeves were another story.
The 26-ounce volume is useful for heavy coffee or tea drinkers. You can carry enough for most of the workday without refilling. The large capacity also works well on job sites, road trips, and cold outdoor shifts where access to hot water is limited.
For a packed train or lightweight day bag, it feels excessive.
Durability
The YETI handled rough use better than most bottles in the test.
Its stainless-steel body feels solid, the cap threads are substantial, and the base does not feel delicate. YETI describes its 18/8 stainless steel as puncture- and rust-resistant.
That does not make the bottle indestructible.
Drop it onto concrete,e and it can dent. Drag the finish across rough metal, al and it can show marks. No vacuum bottle is immune to damage around its sealed walls.
Still, this is the model I would be least worried about throwing into the back of a truck.
The colored finish is YETI’s DuraCoat treatment. The company states that it is designed not to peel or crack under normal use.
Our test finish survived bag abrasion and several minor knocks without exposing bare steel.
Cleaning
The wide mouth is easy to scrub.
A regular bottle brush reaches the base without trouble, and no narrow shoulders are trapping old coffee. The bottle can also go into the dishwasher.
The Commuter Cap comes apart with a counterclockwise twist.
Once separated, its internal pieces can be placed in the dishwasher. YETI recommends removing the rubber gaskets and putting them in the utensil basket for a more thorough cleaning.
That disassembly matters.
Coffee, milk, and sugar can settle beneath the inner drinking mechanism. Rinsing water across the top will not remove everything.
Take it apart after lattes, sweet tea, or any drink containing dairy.
The cap is easier to reassemble than the Hydro Flask Flex Sip Lid. There are fewer moments where you wonder whether a gasket is upside down.
Still, check that the inner section turns smoothly and reaches the fully closed position before carrying it.
Real-World Performance
The YETI makes sense when abuse is part of the day.
It works well for job sites, long drives, camping trips, workshops, outdoor events, and bags that get thrown onto floors. Its lid is secure enough that I would carry it beside a laptop after checking that it was fully closed.
It makes less sense for a short urban commute.
The bottle is heavy before you add coffee. It may not fit the car cup holder. It also costs more than bottles that kept our test water hot for longer.
The 26-ounce Rambler currently costs $40, and the Commuter Cap is a separate $15 accessory. That makes this a $55 hot-drink setup at manufacturer pricing.
You are paying for rugged construction and the lid system.
Not extra hours of heat.
Warranty
YETI covers Rambler Drinkware with a five-year warranty.
That is solid coverage, but it is not a lifetime warranty. The warranty applies to qualifying defects rather than normal dents, scratches, or damage caused by accidents.
Keep your receipt.
A bottle built for rough use can still develop a manufacturing fault, particularly around the vacuum seal or cap components.
Pros
- Kept liquid above 140°F for 6.2 hours
- Excellent leak resistance when completely closed
- Controlled 360-degree sipping
- Large 26-ounce capacity
- Durable stainless-steel body
- Grippy, hard-wearing exterior finish
- Wide mouth is easy to scrub
- Bottle and cap are dishwasher safe
- Commuter Cap fits every Rambler Bottle size
- Five-year warranty
Cons
- Heavy at approximately 22.3 ounces with the cap
- Too wide for many standard cup holders
- Only average heat retention for its weight
- Bottle and cap cost about $55 together
- Drinking and sealed positions can be confused
- Bulky for trains and lightweight backpacks
- Five-year warranty rather than lifetime coverage
Verdict
The YETI Rambler is the heavy-duty choice, not the heat-retention champion.
It stayed above 140°F for 6.2 hours, which covers a normal morning but falls behind smaller and lighter competitors. Its weight, width, and $55 combined price make that performance difficult to ignore.
The lid nearly saves it.
The Commuter Cap is secure, comfortable, and genuinely pleasant to drink from. It did not leak or dribble, and its 360-degree opening worked better than most direct-sip designs.
Buy the YETI when durability and lid safety come first.
Buy the Zojirushi when hotter coffee matters more.
Rating: 4.2 out of 5
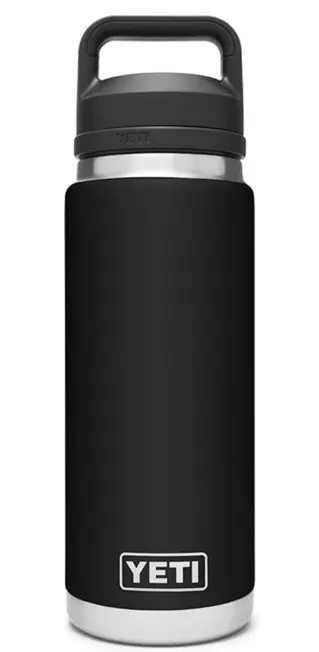
YETI Rambler 26 oz with Chug Cap
The YETI Rambler 26 oz combines kitchen-grade 18/8 stainless steel with double-wall vacuum insulation to keep drinks at the ideal temperature for longer. Its 100% leakproof Chug Cap delivers fast, controlled hydration, while the dishwasher-safe design and puncture-resistant construction make it a dependable choice for work, travel, the gym, and outdoor adventures.
Thermos Stainless King Beverage Bottle: The Budget Classic
The Stainless King is old-school, affordable, and dependable.
It kept our test water above 140°F for 5.8 hours. That was well behind the Zojirushi, but still enough to carry hot coffee from breakfast through a late lunch.
The twist-and-pour stopper feels dated next to modern sipping lids. It also works.
Heat Retention
The Stainless King remained above 140°F for 5.8 hours in our combined indoor and cold-weather testing.
Coffee poured at 7 a.m. was still properly hot around noon. By early afternoon, it had dropped below our preferred temperature cutoff.
That result is decent for a bottle costing about $30.
It also falls far short of Thermos’ advertised figure. The company rates the 16-ounce Stainless King for up to 18 hours of heat, though that claim does not use our stricter 140°F threshold or mixed cold-weather conditions.
The bottle itself insulated reasonably well. Most of the practical heat loss appeared around the neck and stopper.
To pour, you loosen the stopper and open a path for hot liquid. That also allows warm air to escape. Leave it open while drinking from the cup, and the remaining coffee cools faster.
The fix is simple.
Pour a small serving. Tighten the stopper immediately.
Lid Safety
The Stainless King uses a twist-and-pour stopper rather than a direct-sipping lid.
Loosen the stopper slightly, pour coffee through the opening, and use the outer lid as a drinking cup. You do not need to remove the stopper completely.
Thermos describes the stopper as leakproof when fully closed. The bottle is suitable for carrying in a bag, provided the gasket is clean and the stopper has been tightened completely.
The risk comes during pouring.
The stream is not as controlled as the Klean Kanteen TKPro’s pour-through system. Tip the bottle too quickly, and coffee can rush over the edge of the cup. Try pouring on a moving train,n and you may end up wearing part of your drink.
I learned to pour slowly and keep the cup close to the stopper.
Do not drink directly from the bottle.
The opening is wide enough to release a large amount of hot liquid, and the metal rim gives you little control over the first sip. The included cup is safer.
Hot-Drink Suitability Score
Test Category | Score | What We Found |
Lid safety | 7/10 | Leakproof when fully closed, but pouring requires a steady hand |
Heat retention | 6/10 | Stayed above 140°F for 5.8 hours |
Sipping comfort | 7/10 | The cup lets each serving cool before drinking |
Portability | 7.5/10 | Compact and cup-holder friendly, though heavier than expected |
Cleaning | 6.5/10 | Bottle needs a brush; stopper has threads and seals to scrub |
Value | 8.5/10 | Reliable performance for around $30 |
Overall hot-drink suitability: 7.1/10
The Thermos works best when you treat it like a traditional flask.
Stop. Pour. Drink.
It is not built for one-handed sipping while walking, driving, or squeezing onto a crowded train.
Design and Portability
The Stainless King has a simple stainless-steel body with a built-in serving cup.
Nothing about it feels fashionable. Nothing needs to.
The current 16-ounce model measures roughly 9.7 inches tall and 3 inches wide. It fits most standard cup holders and slides into regular backpack bottle pockets.
The official empty weight is 0.9 pounds, or 14.4 ounces.
That is heavier than the 12-ounce figure in the original draft and substantially heavier than the Zojirushi. It still feels manageable because the bottle is narrow and evenly balanced.
The 16-ounce capacity suits a normal morning coffee.
Heavy coffee drinkers may empty it before lunch. For a larger serving, moving to a bigger Stainless King also means carrying more steel, more liquid, and more bulk.
The exterior remains cool to the touch with hot contents and does not develop condensation with cold drinks. Thermos lists the body as 18/8 stainless steel with a sweat-resistant exterior.
The Built-In Cup
The serving cup is not just a nostalgic extra.
It makes very hot coffee easier to manage.
Pouring four or five ounces into the cup exposes a smaller amount of liquid to the air. That serving cools to a comfortable temperature while the rest stays sealed inside the bottle.
It also works well for tea, broth, and smooth soup.
The cup is less useful when you are walking. You need both hands, and you need somewhere to place it while tightening the stopper.
At a desk, campsite, roadside stop, or workbench, the system makes sense.
On a packed commuter train, it feels like a design from another era.
Cleaning
The bottle’s narrow mouth requires a brush.
A sponge will clean the upper walls but will not reach the base properly. A standard long-handled bottle brush gets the job done without much trouble.
The stopper deserves more attention.
Coffee oils collect around the threads, pouring channels, and silicone seal. Milk and sugar make the buildup worse. Unscrew the stopper fully and scrub around each opening rather than rinsing only the visible surface.
Thermos lists the bottle as dishwasher safe on the top rack. Even so, hand-washing the stopper can be more reliable when it has carried sweetened coffee or milk-based drinks.
Let every part dry separately.
Closing the bottle while the stopper is still damp is a good way to create the stale smell people blame on stainless steel.
Long-Term Brand Experience
Thermos has been producing consumer vacuum-insulated products since 1904.
That history does not automatically make every modern bottle the best performer, but it explains why the Stainless King feels so familiar. The basic flask-and-cup layout has survived because it is simple and repairable rather than clever.
There is no complicated button.
No spring-loaded hinge.
No drinking mechanism that needs a diagram after cleaning.
The stopper wears over time, especially around the gasket, but the design makes problems easy to spot. When an older bottle begins leaking, the first place to check is the seal rather than the vacuum body.
Real-World Performance
The Stainless King works well for office desks, outdoor jobs, long drives, picnics, and short hikes.
It is especially useful when you prefer drinking from a cup instead of putting your mouth on the bottle.
Its limits appear during rushed use.
The stopper takes time to loosen and tighten. Pouring requires two hands. A careless tilt can send hot coffee past the cup and onto your fingers, desk, or lap.
I would carry it for a quiet morning at work.
I would not choose it for sipping while running between platforms.
Pros
- Kept liquid above 140°F for 5.8 hours
- Costs less than most premium competitors
- Stopper is rated leakproof when fully closed
- Built-in cup helps hot drinks cool safely
- Twist-and-pour design limits full-lid removal
- Fits most standard cup holders
- Durable 18/8 stainless-steel construction
- Top-rack dishwasher safe
- Simple design with few moving parts
- Suitable for coffee, tea, broth, and smooth soup
Cons
- Heat retention trails the Zojirushi and TKPro
- Weighs 14.4 ounces rather than the previously stated 12 ounces
- Requires two hands for comfortable use
- Pouring can be messy if the bottle is tilted too quickly
- Narrow mouth needs a bottle brush
- Stopper threads and gasket collect coffee residue
- Not convenient for drinking while walking or driving
- Manufacturer’s 18-hour claim does not reflect our 140°F cutoff
Verdict
The Thermos Stainless King is the budget flask for people who do not mind an old-fashioned pouring routine.
Its 5.8-hour result will not impress anyone chasing all-day heat. The Zojirushi stays hotter longer and is easier to use during a commute.
The Thermos costs less and gives you a proper cup.
It is sturdy, straightforward, and leakproof when fully tightened. The lid design demands more care than modern direct-sipping systems, but there is very little to go wrong.
Buy it for desk use, road trips, outdoor work, or any situation where you can stop and pour.
Skip it when you need one-handed coffee on the move.
Rating: 4.0 out of 5
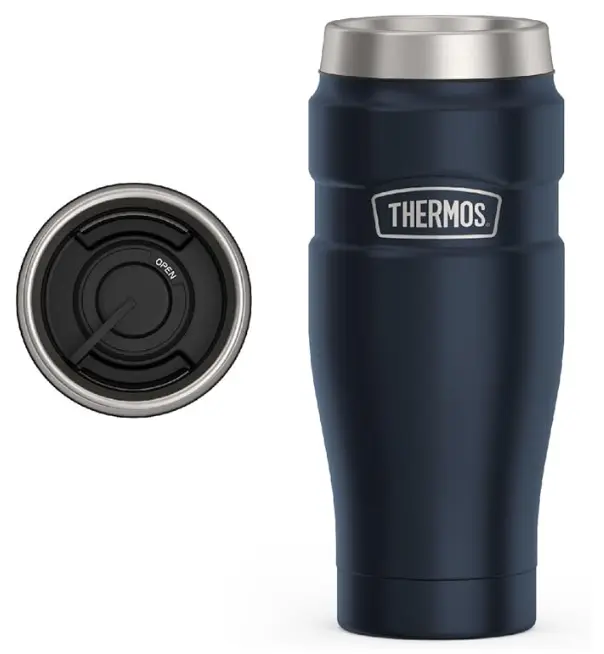
THERMOS Stainless King 16 oz Stainless Steel Travel Tumbler
The THERMOS Stainless King 16 oz Travel Tumbler combines vacuum insulation with durable 18/8 stainless steel to keep drinks hot for up to 7 hours or cold for up to 18 hours. Its leakproof DrinkLock lid, sweat-proof exterior, and sturdy handle make it an excellent choice for commuting, road trips, and everyday coffee or tea.
Stanley Adventure To-Go 25 oz: The Soup-and-Serve Specialist
The Stanley is better at serving than sipping.
It kept our test water above 140°F for 5.5 hours. That placed it last in our heat-retention ranking, despite Stanley’s much longer manufacturer claim.
Still, I would rather carry soup in this bottle than attempt to drink it from a narrow commuter mug.
The large capacity, removable stopper, and built-in cup make it useful for broth, smooth soup, tea, and shared servings. Just do not mistake it for the longest-lasting insulator in this guide.
Heat Retention
The Stanley remained above 140°F for 5.5 hours in our combined indoor and 40°F testing.
Soup packed at 6:30 a.m. was still hot at noon. By early afternoon, it had slipped below our preferred cutoff.
Stanley advertises the 25-ounce Adventure To-Go for up to 20 hours of heat. That claim does not use our 140°F threshold or our repeated cold-environment testing, so the two figures are not directly comparable.
The bottle’s wide opening makes filling and cleaning easier, but it also creates a larger route for escaping heat.
The pour-through stopper helps because you do not need to remove the entire closure for every serving. However, leaving the stopper loosened while eating allows heat to escape quickly.
Pour what you need.
Then close it.
Lid and Stopper Safety
The original draft described this bottle as not leakproof.
That is incorrect.
Stanley officially lists the Adventure To-Go as leakproof and packable when its stopper and lid are fully tightened. It uses a pour-through stopper for controlled serving, while the insulated outer lid doubles as a cup.
Our bottle stayed dry during the inverted test.
It also survived firm shaking without liquid appearing around the stopper threads. As with any twist closure, the seal depends on tightening it completely and keeping the gasket clean.
The pouring system is safer than drinking directly from the bottle.
Loosen the stopper, pour a small serving into the cup, and close the bottle again. This lets hot soup or coffee cool slightly before it reaches your mouth.
Do not try to sip directly from the open neck.
A sudden tilt can send a large amount of near-boiling liquid toward your face.
Soup Suitability Score
Soup suitability: 8.5/10
The bottle works especially well for:
- Smooth vegetable soup
- Tomato soup
- Broth
- Lentil soup
- Hot chocolate
- Tea or coffee for sharing
The removable stopper gives you more room than a direct-sipping lid. You can fill the bottle with a ladle or wide serving spoon without making a mess around a tiny opening.
Chunky chili requires more care.
Remove the pour-through stopper completely before filling or serving. Large pieces of meat, beans, pasta, or vegetables can block the smaller pouring channels.
The bottle loses points because it is not a true wide food jar. Eating directly from it with a spoon is awkward, and very thick food may cling to the shoulders.
For chunky meals, Stanley’s dedicated food jars remain the better tool.
Design and Portability
This is a substantial bottle, but it does not weigh 36 ounces.
The 25-ounce Adventure To-Go is listed at approximately 512 grams, or 18.1 ounces, on Stanley’s UK product page. Its U.S. dimensions are about 3 by 3 by 11 inches.
That is heavier than the Zojirushi and Hydro Flask.
It is still far lighter than the incorrect 36-ounce figure in the draft.
The 25-ounce capacity gives you enough room for a generous serving of soup or several cups of coffee. It also works well when two people want to share tea during a hike or roadside stop.
The narrow, streamlined shape fits into many backpack bottle sleeves.
Cup-holder compatibility depends on the vehicle. Its three-inch width works with larger holders but may feel tight in older or compact cars.
The bottle is available in several finishes. The classic Hammertone Green option gives it the familiar Stanley work-flask appearance without the bulk of the larger Classic Legendary models.
Built-In Serving Cup
The insulated lid doubles as a drinking or soup cup.
That is the feature that earns the Stanley its place in this guide.
Pouring soup into the cup gives it time to cool while keeping the remaining portion sealed. You can eat or sip without holding a hot steel bottle against your lips.
It also makes sharing easy.
One person can use the cup while another carries a separate mug. For solo use, pour a small portion rather than filling the cup to the rim.
A smaller serving is easier to handle.
It also cools more quickly when your soup is still hot enough to burn.
Cleaning
The wide opening is easier to clean than the narrow Zojirushi or Thermos neck.
A standard bottle brush reaches the bottom without much twisting. The removable stopper also exposes the inner opening for a more thorough scrub.
The cup needs regular attention.
Soup oils, dairy, coffee residue, and spices can collect around the threads and beneath the rim. A fast rinse may remove the visible food while leaving enough residue to smell the next morning.
Wash the stopper separately.
Scrub the pouring channels and remove any food trapped around the seal. This matters after carrying chili, creamy soup, sweet coffee, or anything containing milk.
Let all parts dry completely before reassembly.
Sealing a damp cup onto the bottle traps odors inside.
Construction-Shift Field Report
One construction worker told us he regularly carries hot chili in his Stanley during 12-hour shifts.
He fills it before leaving home and opens it around lunchtime. According to his report, the chili is still releasing steam when poured into the cup.
That lines up with our controlled result.
The bottle remained above 140°F for 5.5 hours, which covers the usual gap between an early breakfast and midday lunch.
This field report is anecdotal and was not included in our measured score. It does show where the Stanley works best: packed early, left sealed, and opened once for a substantial meal.
Repeated opening would shorten that hot window.
Durability
The Adventure To-Go uses 18/8 stainless steel and double-wall vacuum insulation. Stanley describes it as a leakproof, packable bottle intended for work, travel, and outdoor use.
It handled normal knocks and bag abrasion without affecting the seal.
“Indestructible” would be an exaggeration.
A hard fall can still dent the body or damage the vacuum seal. The finish can also scratch through rough use.
The construction feels dependable, though. The stopper threads engage firmly, the cup does not feel flimsy, and the bottle is less top-heavy than Stanley’s larger Classic models.
Warranty
Stanley provides a lifetime warranty for its stainless-steel vacuum products against manufacturing defects and degradation of thermal performance under normal use.
That coverage does not include ordinary dents, scratches, accident damage, misuse, or non-stainless-steel components such as seals and some lid parts. Proof of purchase may also be required.
It is a strong warranty.
It is not permission to back over the bottle with a truck.
Real-World Performance
The Stanley works best when you can stop and pour.
It suits construction sites, office lunches, roadside breaks, campsites, long drives, and cold-weather work. It also makes sense for anyone carrying broth or soup instead of coffee alone.
It is less useful during a rushed commute.
You need both hands. You need somewhere to place the cup. The pour-and-serve routine is awkward on a moving train or while walking.
Heat retention is also only average.
The Stanley will cover breakfast to lunch. It is not the bottle I would trust to keep soup above 140°F until the end of a 12-hour shift.
Pros
- Kept liquid above 140°F for 5.5 hours
- Useful 25-ounce capacity
- Leakproof when fully tightened
- Pour-through stopper controls serving
- Insulated lid doubles as a cup
- Good for broth, smooth soup, tea, and shared coffee
- Wide opening is easy to fill and scrub
- Durable stainless-steel construction
- Slimmer than large Classic Legendary bottles
- Lifetime vacuum-body warranty
Cons
- Lowest heat-retention result in our ranking
- Heavier than smaller commuter bottles
- Requires two hands for pouring
- Awkward for drinking while walking
- Thick soup can block the pour-through stopper
- Not as convenient as a dedicated food jar for chunky meals
- Manufacturer’s 20-hour claim does not reflect our 140°F cutoff
- Cup and stopper can retain odors if poorly cleaned
Verdict
The Stanley Adventure To-Go is the best bottle here for pouring and sharing hot food.
It is not the heat-retention champion.
Our test liquid stayed above 140°F for 5.5 hours, placing the Stanley behind every other finalist. It is also heavier and slower to use than a direct-sipping commuter bottle.
The built-in cup changes the equation.
It gives you a safer way to handle hot soup, broth, tea, or coffee. The wide opening is easy to fill, the stopper is leakproof when properly closed, and the 25-ounce capacity is useful for a full lunch.
Buy it for soup at noon.
Do not buy it expecting scalding coffee at the end of the workday.
Rating: 3.8 out of 5
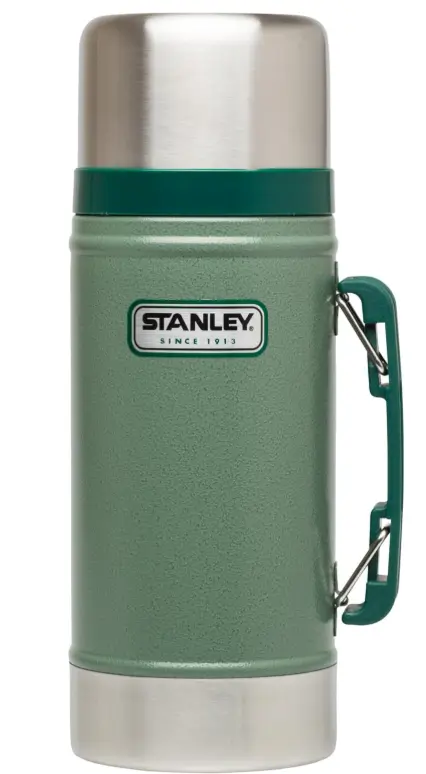
Stanley Classic Legendary 25 oz Stainless Steel
The Stanley Classic Legendary 25 oz Food Jar features double-wall vacuum insulation to keep meals hot or cold for hours. Its wide-mouth opening makes filling, eating, and cleaning easy, while the rugged stainless-steel construction and leak-resistant design make it perfect for work, travel, camping, and outdoor adventures.
How to Choose a Bottle for Hot Drinks
The words printed on the box matter less than the construction.
A cheap bottle may promise 12 hours of heat. That does not mean your coffee will remain enjoyable for 12 hours. It may simply mean the drink will still be warmer than the room.
Start with the insulation type.
Then inspect the mouth, lid, capacity, and shape. If heat retention is only one part of your decision, our guide on how to choose a water bottle explains how to match the material, capacity, lid, and design to your daily routine. In our testing, those details often mattered more than an impressive-sounding trademark.
Insulation Technology: Vacuum vs. Copper Lining vs. Foam
Double-Wall Vacuum Insulation
This is the standard to look for.
A vacuum-insulated bottle has two walls with most of the air removed from the space between them. With very few gas molecules in that gap, heat cannot move efficiently through air conduction or convection.
Radiant heat and heat traveling through the bottle’s neck, stopper, and other physical connection points can still escape. A vacuum does not make the bottle perfect. It removes two major paths through which heat normally travels.
Every top performer in our test used double-wall vacuum insulation.
That was not a coincidence.
The difference becomes obvious when you compare a proper vacuum bottle with a basic double-wall cup containing ordinary air between its walls. Air provides some insulation, but it can still carry heat through conduction and internal movement. A vacuum slows both processes much more effectively.
Look for the exact wording:
“Double-wall vacuum insulated.”
“Double-wall” by itself is not enough.
A manufacturer may use two layers separated by air, foam, or another material. That construction can reduce heat loss, but it is not the same as a sealed vacuum.
Copper-Lined Vacuum Insulation
Some vacuum bottles add a thin copper coating to the outside of the inner steel wall.
The copper does not normally touch your drink. It sits inside the sealed vacuum space and acts as a reflective barrier, helping reduce heat transfer through radiation.
In theory, this should improve insulation.
In practice, do not expect copper to rescue a badly designed bottle.
Independent BottlePro testing found that narrow openings and well-insulated lids had a greater practical effect than whether a bottle used a copper-coated third layer. Its testing showed that triple-layer bottles can perform well, but they do not automatically beat every standard double-wall vacuum bottle.
That matches what we saw.
The narrow Zojirushi beat larger bottles with heavier construction. Its advantage came from the complete design: a small mouth, tight closure, compact capacity, and limited heat loss during sipping.
The copper layer is a bonus.
It is not the first feature I would pay for.
I would choose a bottle with a narrow opening and a properly insulated, leakproof lid over a wide-mouth bottle advertising “triple-wall copper technology.”
One protects heat where most bottles lose it.
The other may look better in a product description.
Important TKPro clarification: Klean Kanteen officially describes the TKPro as using double-wall vacuum insulation and a TK Closure internal-thread system designed to improve thermal performance. Its published product information does not identify the TKPro as copper-lined.
Foam and Air-Gap Insulation
Foam insulation is better than a single sheet of exposed metal or plastic.
It is still not my choice for carrying hot coffee through a full workday.
Foam-filled and ordinary air-gap bottles slow heat transfer, but they cannot suppress conduction and convection as effectively as a properly sealed vacuum. They also tend to require thicker walls to deliver decent performance, making the container bulkier without matching a good vacuum bottle’s heat retention.
These bottles can work for short trips.
Pack tea for a one-hour drive, and you may be satisfied. Fill one at 7 a.m. and expect hot coffee after lunch, and disappointment arrives before noon.
Foam insulation also appears frequently in inexpensive jugs, coolers, children’s cups, and food containers where cost or impact resistance matters more than maximum thermal performance.
That does not make foam useless.
It makes it the wrong tool for this job.
Why the Lid Matters Almost as Much as the Walls
A bottle does not lose all its heat through the body.
A large amount can escape through the neck and lid.
The vacuum space ends near the top, where the inner and outer walls must physically connect. That area creates a thermal bridge. The lid also contains threads, seals, drinking openings, and moving parts that may hold less insulation than the bottle’s main body.
Every time you open the bottle, warm air leaves and cooler air enters.
Wide mouths make this worse.
BottlePro’s comparative testing found that mouth width and lid insulation were among the strongest predictors of real-world performance. Narrow-mouth bottles and closures that created deeper or secondary seals tended to retain temperature better.
This explains why the lightweight Zojirushi outperformed bottles with much thicker steel.
Its small sipping port exposes very little liquid to the air. You can take a drink without removing a large stopper or uncovering the entire mouth.
The Hydro Flask is easier to fill and scrub.
The Zojirushi stays hotter.
That is the trade-off.
What to Look for in the Specifications
Ignore vague phrases such as:
- “Thermal technology”
- “Advanced insulation”
- “Temperature-locking design”
- “Keeps drinks hot for hours”
Those words do not tell you what is inside the walls.
Look for these details instead:
- Double-wall vacuum insulation
- A leakproof lid rated for hot liquids
- A narrow neck or small sipping opening
- A clear heat-retention test temperature
- A manageable capacity for your routine
- A lid that can be completely disassembled
- Replacement gaskets or seals
Pay special attention to how the brand defines “hot.”
A 12-hour claim may mean the liquid remains warm after 12 hours. It does not necessarily mean it remains above 140°F or comfortable for someone who expects a genuinely hot drink.
The testing conditions matter too.
A sealed bottle sitting untouched in a 68°F room has an easy life. A bottle opened repeatedly on a 20°F platform does not.
Material Matters: Stainless-Steel Grades and Taste
Stainless steel is the sensible default.
It is durable, relatively light, resistant to corrosion, and easy to clean. More importantly, nearly every serious vacuum-insulated bottle uses it.
The grade matters less than the overall construction, but you should still know what you are buying.
18/8 Stainless Steel
Most premium bottles use 18/8 stainless steel.
Stanley and Klean Kanteen both identify 18/8 stainless steel in their current drinkware specifications. It is widely used because it handles repeated contact with coffee, tea, water, and food without rusting under normal care.
That does not mean every 18/8 bottle performs the same.
The steel grade tells you little about the vacuum seal, lid insulation, interior finish, or quality control. A poorly designed 18/8 bottle can still leak, hold odors, or lose heat before lunch.
I would choose a well-built 18/8 bottle from a reputable manufacturer over an unknown bottle advertising a more exotic steel grade.
The lid will probably fail before the steel does.
Does Stainless Steel Affect Taste?
A clean stainless-steel bottle should not make normal coffee taste strongly metallic.
When I notice a strange flavor, the cause is usually more ordinary:
- Coffee oil left inside the bottle
- Detergent trapped around the lid gasket
- Milk residue inside the sipping mechanism
- A scratched or damaged interior coating
- Water left sealed inside a damp bottle
- A low-quality or poorly finished interior
Wash a new bottle before its first use.
Then rinse it thoroughly. A tiny amount of dish soap left beneath a gasket can ruin coffee more effectively than the steel itself.
Bare stainless interiors are durable and easy to inspect. Coated interiors can release stains and odors more easily, but they require gentler cleaning.
Zojirushi uses a nonstick-coated interior in several stainless-mug lines and states that the coating is intended to make cleaning easier and resist stains or odors.
Do not attack a coated interior with steel wool.
Once the coating is scratched, coffee residue has more places to collect.
Electropolished Interiors
Some manufacturers advertise an electropolished interior.
Electropolishing smooths and finishes the steel surface. That can make residue less likely to cling and may simplify cleaning.
It is a useful feature.
It is not a guarantee against metallic taste.
Cleaning habits, water quality, lid residue, and the drink itself can all affect flavor. Do not pay a large premium for the word “electropolished” while ignoring the lid and vacuum construction.
Titanium
Titanium is light, strong, and expensive.
It makes sense for hikers who count every ounce. Snow Peak, for example, sells titanium drinkware that weighs far less than many comparable steel products, but the price rises quickly. Its 200-milliliter double-wall titanium mug weighs about 2 ounces and costs roughly $40.
Titanium does not automatically retain heat better than stainless steel.
Insulation still depends on whether the container has a sealed vacuum, how the lid is constructed, and how much heat escapes through the opening.
Some titanium bottles are single-wall containers. They may be light, but they will not keep coffee hot like a proper vacuum bottle.
Buy titanium to reduce pack weight.
Do not buy it because you expect extra hours above 140°F.
Plastic
“Never use plastic with hot drinks” is too broad.
Food-contact plastics are evaluated for specific conditions of use, including different temperatures. The FDA separates applications such as room-temperature storage, hot filling above 150°F, boiling-water exposure, and higher-temperature cooking because not every material is approved for every condition.
The practical rule is simpler:
Use plastic only when the manufacturer explicitly rates that component for hot liquids.
Many good stainless bottles use plastic in their lids, threads, buttons, or drinking spouts. That is not automatically a problem. The material should be food-contact compliant and designed for the expected temperature.
Cold-drink lids are different.
Hydro Flask clearly states that its Flex Straw Cap is not intended for hot liquids. A cold-only straw lid can release hot liquid too quickly, build pressure, or expose components to temperatures outside their intended use.
I would avoid an all-plastic bottle for carrying near-boiling coffee through a full day.
Plastic bodies can retain odors, scratch more easily, and rarely match stainless-steel vacuum insulation. But a properly rated plastic lid on a steel bottle is normal.
Lid Design: The Make-or-Break Feature
A great bottle with a bad lid is still a bad bottle.
The lid affects leaking, heat loss, cleaning, drinking speed, and whether the first sip burns your mouth. It is also the part you handle every time you use the bottle.
I have forgiven average insulation.
I have never forgiven coffee on my lap.
Small Sipping Openings
A small drinking port exposes less liquid and releases less heat than removing an entire wide-mouth lid.
It also limits the amount of hot coffee that can reach your mouth at once.
The Zojirushi flip-top is the best example in this test. Its narrow sipping opening controls the stream, and the safety lock prevents the release button from opening accidentally.
The current YETI equivalent is called the Commuter Cap, not the HotShot Cap. YETI describes it as a 100% leakproof insulated cap designed for both hot and cold drinks. Its 360-degree rim allows drinking from any side.
Small openings are excellent for commuting.
They are less useful for soup, ice cubes, and fast cleaning.
Twist-and-Pour Stoppers
The Thermos and Stanley use the old flask approach.
Loosen the stopper. Pour into the outer cup. Tighten the stopper again.
It takes longer than opening a commuter mug, but it handles very hot drinks safely. Pouring a small serving into a cup allows it to cool before it touches your lips.
The weakness is convenience.
You need both hands. You need a steady surface. You also lose heat whenever the stopper remains loosened.
This design works at a desk, campsite, workbench, or roadside stop.
It is awkward on a crowded train.
Wide Mouth With a Sipping Lid
This is the compromise design.
A wide mouth is easier to fill, add ice to, and scrub. A separate sipping lid makes it practical for coffee.
The Hydro Flask Flex Sip Lid is a good example. It is designed specifically for hot drinks and is described by Hydro Flask as leakproof when closed.
The downside is complexity.
The lid has multiple sections and seals that need regular cleaning. Reassemble one part incorrectly, and it may leak or become difficult to turn.
The wider bottle opening can also release more heat whenever the lid is removed completely.
You gain versatility.
You give up some thermal efficiency.
Straw Lids
Straw lids are for cold drinks unless the manufacturer clearly says otherwise.
A straw can bring extremely hot liquid directly into the mouth with little time to judge the temperature. Pressure and steam can also affect the flow.
Hydro Flask explicitly warns that its Flex Straw Cap is not for hot liquids.
Do not improvise.
Switch back to the hot-drink lid before filling the bottle with coffee or tea.
What “Leakproof” Should Mean
For a commuter, leakproof means the bottle can lie sideways in a backpack without soaking everything around it.
“Splash-resistant” is not the same thing.
Neither is “spill-resistant.”
Look for a clear leakproof statement from the manufacturer. Then test the bottle yourself before carrying it beside electronics.
Fill it with warm water. Close it exactly as instructed. Turn it upside down over a sink and shake it firmly.
Check around:
- The main threads
- The sipping opening
- The hinge
- The pressure-release area
- Every removable gasket
Warm water is enough for this test.
There is no reason to shake 205°F liquid over your hands.
Our Lid Safety Score
Each reviewed bottle receives a lid-safety score based on five factors:
Lid Test | What We Check |
Leak resistance | Whether the closed bottle drips when inverted and shaken |
Flow control | Whether hot liquid pours steadily or rushes out |
Burn protection | Whether the opening limits dangerously large sips |
Closure clarity | Whether it is obvious that the lid is fully sealed |
Cleanability | Whether coffee residue can be removed from every channel and gasket |
A lid can score well for leaking and poorly for sipping.
The YETI Commuter Cap is extremely secure, but the bottle is heavy. The TKPro cup is comfortable for very hot drinks, but it requires two hands. The Zojirushi gives excellent control, though its small components need careful cleaning.
No design wins every category.
Capacity: Bigger Is Not Automatically Hotter
Capacity affects heat retention, but not in a simple way.
A larger amount of liquid can cool more slowly because it contains more stored heat relative to its exposed surface. But real bottles are not identical laboratory containers.
Larger bottles often have:
- Wider openings
- Larger lids
- More empty headspace
- Greater external surface area
- More frequent opening throughout the day
Those factors can erase the theoretical advantage of carrying more liquid.
Our results showed exactly that.
The 26-ounce YETI did not beat the 16-ounce Zojirushi. The smaller bottle’s narrow mouth, compact shape, and controlled lid mattered more than raw capacity.
12 to 16 Ounces
This range suits one normal serving of coffee or tea.
It is light, compact, and easy to fit into a cup holder. Smaller commuter bottles also tend to use narrow mouths and tightly sealed drinking ports.
Choose this size when:
- You drink one or two cups during the morning
- You can refill at work
- Bag weight matters
- You want the easiest cup-holder fit
- Maximum heat retention is more important than volume
The weakness is obvious.
Heavy coffee drinkers may empty a 16-ounce bottle before lunch.
20 to 26 Ounces
This is the practical range for long mornings and heavier drinkers.
A 20-ounce bottle gives you more coffee without becoming excessively bulky. That is one reason the Hydro Flask felt like the strongest all-rounder.
A 25- or 26-ounce bottle works for long shifts, shared tea, or soup.
Expect more weight.
A 26-ounce bottle filled with coffee can approach three pounds once the steel body and lid are included.
Choose this range when you cannot refill easily or need the drink to cover several hours.
32 Ounces and Above
Large bottles make sense for group outings, all-day outdoor work, and carrying multiple servings.
They are rarely ideal commuter mugs.
They can be heavy, too wide for cup holders, and awkward to drink from directly. Many also use large stoppers or mouths that release substantial heat whenever opened.
For chunky soup, a dedicated insulated food jar is usually better than a giant beverage bottle. A food jar has a mouth designed for spoons and solid ingredients.
Use a large beverage flask for broth, smooth soup, hot water, or drinks you plan to share.
Capacity Guide
Capacity | Best For | Main Trade-Off |
12–16 oz | Short commutes, one coffee, office refills | May run empty before lunch |
20 oz | Most commuters and full-morning use | Slightly heavier than compact mugs |
25–26 oz | Long shifts, hiking, sharing, smooth soup | Bulky and heavy when filled |
32 oz+ | Group trips and multiple servings | Poor portability and large openings |
Weight and Portability: Will You Actually Carry It?
A bottle can keep coffee hot all day and still be the wrong choice.
If it is too heavy, too wide, or awkward to hold, it will stay in the kitchen cupboard. Empty weight matters. Filled weight matters even more.
The 26-ounce YETI weighs around 22 ounces before you add coffee. Fill it, and the complete setup approaches three pounds. That is a lot of bottle for a train platform or a mile-long walk. YETI also warns that its Rambler Bottles may be too large for many standard cup holders.
The Zojirushi sits at the opposite end.
Ultralight: Under 10 Ounces
The Zojirushi is the clear winner.
The 16-ounce SM-KHE48 weighs about 9 ounces empty. It disappears into a work bag, purse, or backpack pocket without dragging one shoulder down. Its slim body also fits easily into standard cup holders.
This is the bottle I would choose for:
- Train and bus commuting
- Air travel
- Lightweight day hikes
- Small work bags
- Anyone already carrying a laptop and other equipment
Once filled, it still has noticeable weight. Every bottle does. The advantage is that you are not carrying an extra pound of steel before adding the drink.
The compromise is capacity.
Sixteen ounces may not cover an entire day for a heavy coffee drinker.
Daily-Carry Weight: 10 to 16 Ounces
The Hydro Flask and Thermos fall into the manageable daily-carry range.
Our 20-ounce Hydro Flask weighed about 13.1 ounces empty. The Thermos Stainless King weighs 0.9 pounds, or 14.4 ounces. Thermos also lists its three-inch-wide bottle as compatible with most cup holders.
These bottles feel substantial without becoming exhausting.
The Hydro Flask offers more drink capacity. The Thermos is narrower and includes a serving cup. Both are reasonable for an office commute, car journey, or short walk.
You will notice them in a backpack.
You probably will not resent them.
Upper-Midweight: 16 to 20 Ounces
This is where the Klean Kanteen TKPro and Stanley Adventure To-Go belong.
The 16-ounce TKPro weighs 18.3 ounces empty. That is heavier than the 20-ounce Hydro Flask despite carrying less liquid. The built-in steel cup and substantial closure explain some of that weight.
The 25-ounce Stanley weighs approximately 18.1 ounces. It carries more liquid than the TKPro at roughly the same empty weight.
Both are manageable for deliberate trips.
Neither feels ultralight.
I would carry them to a campsite, construction site, office desk, or roadside stop. I would think twice before putting either into a small shoulder bag for an all-day city walk.
Heavyweight: More Than 20 Ounces
The 26-ounce YETI is the only true heavyweight in this comparison.
Its official empty weight with the standard cap is 1.40 pounds, or 22.4 ounces. Swapping to the hot-drink Commuter Cap may alter the final weight slightly.
The bottle feels extremely solid.
It also feels like carrying equipment.
The YETI makes sense when it lives in:
- A truck
- A workshop
- A large job-site bag
- A campsite
- A desk drawer or office
- A substantial hiking pack
It makes less sense for a crowded commute or a small car cup holder.
Durability has a weight penalty.
Portability Comparison
Bottle | Approximate Empty Weight | Portability Verdict |
Zojirushi Stainless Mug | 9 oz | Best for lightweight commuting |
Hydro Flask 20 oz | 13.1 oz | Manageable everyday option |
Thermos Stainless King | 14.4 oz | Compact but heavier than it looks |
Stanley Adventure To-Go | 18.1 oz | Better for desks, vehicles, and planned stops |
Klean Kanteen TKPro | 18.3 oz | Heavy for its 16-ounce capacity |
YETI Rambler 26 oz | About 22.4 oz | Best for vehicles and rough-use environments |
Interpreting Manufacturer Claims: “12 Hours Hot”, Really?
“Hot for 12 hours” sounds precise.
It usually is not.
The number means little unless the manufacturer also tells you:
- The starting water temperature
- The room temperature
- The final measured temperature
- Whether the bottle was preheated
- How full it was
- Whether it remained sealed
- Which lid was fitted
Without those details, “12 hours hot” is a brand-specific claim, not a universal testing standard.
Interpreting Manufacturer Claims: “12 Hours Hot”, Really?
“Hot for 12 hours” sounds precise.
It usually is not.
The number means little unless the manufacturer also tells you:
- The starting water temperature
- The room temperature
- The final measured temperature
- Whether the bottle was preheated
- How full it was
- Whether it remained sealed
- Which lid was fitted
Without those details, “12 hours hot” is a brand-specific claim, not a universal testing standard.
The Most Useful Claims Include Temperatures
Zojirushi provides one of the clearer specifications.
For the 16-ounce SM-KHE48, it reports water at 187°F after one hour and 154°F after six hours. It also states that the test begins with 203°F water in a 68°F room.
That gives you something measurable.
You know where the test started, where it finished, and under what ambient conditions.
It does not guarantee identical results in your car or backpack. It does make the claim easier to evaluate.
An Hourly Claim Without an Endpoint Tells Less
Hydro Flask advertises its 20-ounce Coffee bottle for up to 12 hours of heat. Its product page describes the bottle as leakproof, cup-holder compatible, and intended for hot drinks, but the headline specification does not provide a final temperature for that 12-hour point.
Thermos advertises the 16-ounce Stainless King Beverage Bottle for up to 18 hours of heat. Stanley gives the 25-ounce Adventure To-Go a 20-hour hot rating. Their product listings provide the duration but do not use our 140°F endpoint.
That does not mean the claims are false.
It means they answer a different question.
A brand may be measuring how long the contents remain warm or meet its internal definition of “hot.” We measured how long each bottle remained above the same temperature under the same protocol.
Those numbers should not be treated as interchangeable.
Laboratory Conditions Are Easier Than Real Life
A sealed bottle in a warm room has every advantage.
Your daily bottle does not.
You open it. You take a sip. You close it again. It sits beside a cold car window. It rides on an exposed train platform. Sometimes you fill it only halfway.
Each opening releases heat.
More headspace also gives hot liquid a larger volume of cooler air to warm. Cold surroundings increase the temperature difference between the drink and the environment, speeding heat loss.
That is why our results were lower than several manufacturer claims.
We compared at 68°F and again at 40°F. We also checked temperatures repeatedly instead of leaving each bottle untouched for the full claimed period.
That is closer to how commuters actually use them.
Our Hours-to-140°F Metric
We used one benchmark across every bottle:
How many hours passed before the liquid fell below 140°F?
This gives readers a consistent comparison point. A bottle lasting 8.2 hours under our protocol retained usable heat longer than one lasting 5.5 hours under the same protocol.
The metric does not depend on how each manufacturer defines “hot.”
It also does not mean you should immediately drink liquid at 140°F.
That temperature can cause a serious scald after only seconds of skin contact. Use the figure as a heat-retention benchmark, not a recommended sipping temperature. Open every bottle carefully and test the first sip.
Manufacturer Claims vs. Our Results
Bottle | Published Claim | Our Time Above 140°F |
Zojirushi Stainless Mug | 154°F after 6 hours | 8.2 hours |
Klean Kanteen TKPro | 20 hours hot | 7.5 hours |
Hydro Flask Coffee | 12 hours hot | 6.8 hours |
YETI Rambler 26 oz | No specific hourly hot claim | 6.2 hours |
Thermos Stainless King | 18 hours hot | 5.8 hours |
Stanley Adventure To-Go | 20 hours hot | 5.5 hours |
The ranking tells the story.
The bottles with the biggest advertised numbers did not necessarily remain above 140°F the longest. The Zojirushi made a more modest six-hour temperature claim and delivered the strongest result in our test.
How to Read a Heat-Retention Claim
Treat the number as a starting point, not a promise.
A useful claim should answer three questions:
- What temperature did the test start at?
- What temperature remained at the stated time?
- What conditions were used?
When those answers are missing, compare the bottle using independent test data, lid design, mouth width, and real-world reviews.
Our test figure is deliberately stricter.
It tells you how long the drink remained above the same temperature across every finalist, not how long it remained vaguely warmer than the room.
How to Maximize Heat Retention: Tips and Tricks
A good bottle can still disappoint if you fill it incorrectly.
Pour hot coffee into cold steel, leave three inches of space, and open the lid every ten minutes. You have just made the insulation work much harder than necessary.
These steps will keep your drink hotter for longer.
Preheat the Bottle
This is the easiest improvement.
Fill the bottle with boiling water, close the lid, and leave it for five minutes. Empty it immediately before adding your coffee, tea, or soup.
The hot water warms the inner steel walls. Without preheating, your drink loses heat as soon as it touches the cold interior.
In our testing, preheating added roughly 30 to 45 minutes above the 140°F mark. The exact improvement depends on the bottle, room temperature, and how cold the steel was before filling.
On a freezing morning, the difference can be larger.
Fill It Close to Capacity
More space means more air for your drink to heat.
Use the smallest bottle that holds the amount you actually plan to carry. Twelve ounces of coffee inside a 32-ounce flask will usually cool faster than the same drink inside a properly sized bottle.
Do not fill past the manufacturer’s maximum line.
Leave enough space to close the lid safely without forcing hot liquid into the threads or drinking mechanism. “Close to capacity” is better advice than “to the brim.”
Hot coffee inside the lid is how leaks and burned fingers begin.
Close the Lid Immediately
Every opening releases warm air and lets cooler air enter.
Take your drink, then close the bottle. Do not leave a twist-and-pour stopper loosened while you sit at your desk or eat lunch.
Small sipping ports help because they expose less of the drink than removing an entire wide-mouth lid.
The Zojirushi performs well partly because you can sip without uncovering the whole bottle. Traditional flasks lose more heat when their large stoppers remain open.
Open it less.
Close it faster.
Use the Right Lid
The lid is often the weakest part of an insulated bottle.
For hot drinks, use a small sipping opening, an insulated stopper, or a cap specifically designed for coffee and tea.
Do not use a cold-drink straw cap with boiling liquid unless the manufacturer clearly approves it for hot use.
A good hot-drink lid should:
- Control the flow
- Close completely
- Limit steam release
- Remain leakproof when sealed
- Expose as little liquid as possible
A poorly insulated lid can waste the performance of an excellent vacuum body.
Start With Properly Hot Liquid
A higher starting temperature gives the drink more time before it falls below 140°F.
For freshly brewed coffee, water around 195°F to 205°F is common. Tea temperatures vary by type, while soup should be heated thoroughly before going into the bottle.
Do not treat 205°F as a safe drinking temperature.
Liquid near that temperature can cause a serious burn. Let the first serving cool, take a cautious sip, or pour it into a cup before drinking.
Also check the bottle’s instructions. The container and lid must be rated for hot liquids.
Avoid Cold Rinses Before Filling
Do not rinse the bottle with cold tap water immediately before adding coffee.
The cold steel will pull heat from the drink within seconds.
When the bottle needs a final rinse, use warm or hot water. Better still, combine the rinse with the five-minute preheating step.
The same rule applies after storing the bottle in a cold vehicle.
A flask left overnight in a freezing car needs preheating more than one taken from a kitchen cupboard.
Warm the Milk or Cream
Cold milk can knock several degrees off your coffee immediately.
A small splash may not matter. A large amount of refrigerated milk will.
Warm the milk before adding it when maximum heat retention is the goal. At minimum, add it to the coffee before filling the bottle so you know the drink’s true starting temperature.
Do not fill the bottle with black coffee and then repeatedly open it to add milk later.
That costs even more heat.
Use an Insulated Sleeve in Cold Weather
A sleeve can provide a little extra protection in freezing conditions.
The improvement will not be dramatic because the vacuum-insulated body already limits heat transfer. A sleeve is most helpful around exposed metal near the neck or when the bottle sits in wind, snow, or direct contact with a cold surface.
It also protects the finish and improves grip.
Do not expect a thin neoprene sleeve to turn a five-hour bottle into a ten-hour bottle.
Think of it as a small advantage, not a replacement for proper insulation.
Keep It Out of the Wind
Cold moving air pulls heat away faster than still air.
Place the bottle inside a closed backpack rather than in an exposed outer pocket. In a vehicle, keep it away from freezing windows, open vents, and cold metal floors.
A padded bag offers more protection than an exposed cup holder on a winter job site.
Do not place a bottle of near-boiling liquid loosely inside your jacket. A lid failure against your body could cause a serious burn.
A sealed bag compartment is safer.
Wrap It in Extreme Cold
A scarf, towel, spare shirt, or beanie can work as a temporary insulating layer.
It is not elegant.
It is effective enough to matter when the temperature is well below freezing, and the bottle must sit outside for hours.
Wrap the upper section and lid first. That is where many bottles lose the most heat.
Make sure the closure is fully tightened before covering it. Wrapping a leaking lid only hides the problem until hot liquid reaches the rest of your bag.
Do Not Keep Pouring It Back and Forth
Every transfer exposes the drink to cooler air and a cold container.
Pour only the amount you intend to drink. Close the main bottle immediately and let the smaller serving cool in the cup.
This approach works especially well with the Klean Kanteen TKPro, Thermos Stainless King, and Stanley Adventure To-Go.
The drink in the cup becomes safe to sip.
The rest stays sealed and hot.
The Biggest Heat-Retention Gains
Not every trick has the same effect.
Prioritize them in this order:
- Preheat the bottle.
- Fill it close to its recommended capacity.
- Close the lid immediately after every drink.
- Use a narrow or insulated hot-drink lid.
- Keep the bottle out of wind and freezing air.
- Add an external sleeve when conditions are severe.
A scarf helps.
Preheating helps more.
Cleaning and Maintenance for Longevity
Most bottle problems start in the lid.
Coffee oils collect under gaskets. Milk dries inside sipping channels. A bottle gets sealed while damp, and three days later it smells like a forgotten latte.
Clean it before that happens.
A five-minute rinse after every use is easier than trying to remove a month of stale coffee.
Daily Cleaning Routine
Empty and Rinse It Immediately
Do not leave coffee, tea, soup, or milk residue sitting inside all day.
Empty the bottle as soon as you finish. Rinse the interior with warm water before the residue dries onto the steel.
Coffee oils are easier to remove while fresh.
Once they dry, they form a stubborn brown film that can affect both smell and taste.
Zojirushi recommends rinsing its vacuum bottles and stoppers after every use. Stanley gives similar advice and warns against leaving food or drinks sealed beyond their usable life.
Wash With Mild Dish Soap
Use warm water and a small amount of mild dishwashing liquid.
Scrub with a soft sponge or bottle brush. Avoid steel wool, abrasive pads, and harsh scouring powders. They can scratch bare steel, damage interior coatings, and roughen surfaces where residue later collects.
Stanley specifically recommends non-abrasive cleaners, soft sponges, or small brushes. Zojirushi also advises mild dish soap and a soft sponge for its coated bottles.
More soap is not better.
Too much detergent takes longer to rinse and can leave a chemical taste beneath the lid seals.
Use a Proper Bottle Brush
A long-handled brush is essential for narrow-neck bottles.
Push it firmly against the bottom and scrub the shoulder where the bottle narrows. That is where coffee film often survives a casual rinse.
Use soft nylon bristles.
A rigid metal brush can scratch a coated interior. This is especially important with Zojirushi’s nonstick-lined mugs.
For wide-mouth bottles, a normal dish brush may work. A bottle brush still makes reaching the bottom easier.
Take the Lid Apart
The lid deserves more attention than the bottle body.
Remove every component the manufacturer says is removable:
- Silicone gaskets
- Inner caps
- Stopper inserts
- Sliding pieces
- Drinking spouts
- Straws
- Threaded adapters
Wash each part separately with warm, soapy water.
YETI instructs users to remove accessible gaskets and separate its Commuter Cap components for cleaning. Hydro Flask also recommends disassembling lids and placing approved components on the dishwasher’s top rack.
Do not pry out a gasket or valve that the instructions say is fixed.
You can tear it and create a leak that did not exist before cleaning.
Scrub the Hidden Areas
Look beneath the gasket.
Coffee, sugar, and milk collect in the narrow groove where the seal sits. The lid may look clean from above while old residue remains underneath.
Use a small soft brush or clean toothbrush for:
- Gasket channels
- Thread grooves
- Pressure openings
- Sipping ports
- Pour-through passages
This is where odors usually begin.
Rinse Thoroughly
Rinse every component until no bubbles or detergent smell remain.
Pay particular attention to silicone.
Gaskets can hold detergent against their surfaces and transfer that flavor into the next drink.
After rinsing, smell each component separately. When the lid smells bad, but the bottle does not, you have found the problem.
Let Everything Dry Completely
Dry the bottle with the lid removed.
Place the bottle upside down on a drying rack or leave it open in a well-ventilated area. Keep the gaskets and lid components separated until they are fully dry.
Zojirushi warns that dark marks on rubber gaskets can be mold and advises allowing the parts to air-dry completely. YETI also says all cap components should be thoroughly dry before reassembly or storage.
Never seal a damp bottle for storage.
That traps moisture exactly where mold and odor need it.
A Five-Minute Daily Routine
After coffee, tea, or soup:
- Empty the bottle.
- Rinse it with warm water.
- Wash the body with mild dish soap.
- Disassemble and wash the lid.
- Rinse every part thoroughly.
- Leave everything open to dry.
Do this daily, and deep cleaning becomes occasional rather than desperate.
Deep Cleaning Coffee Odors and Stains
Deep cleaning should remove residue without damaging the bottle.
There is no single recipe that is safe for every model. A bare stainless-steel Hydro Flask can tolerate treatments that may not suit a coated Zojirushi interior.
Check the manual first.
Baking Soda Paste
Baking soda works well on stale odors and surface staining.
Mix two or three tablespoons with enough warm water to create a soft paste. Apply it with a bottle brush, scrub the affected areas, and rinse thoroughly. Follow with a normal wash using mild dish soap.
Hydro Flask recommends this method for stubborn odors and specifically describes baking soda as a non-abrasive scrub and deodorizer.
Do not scrub aggressively.
“Non-abrasive” does not mean you should grind it into a delicate coating.
For a coated bottle, consult the manufacturer before using anything beyond mild dish soap or an approved stain remover.
Hydrogen Peroxide and Baking Soda
Hydro Flask recommends a stronger deep-cleaning mixture for its compatible stainless-steel bottles: half a cup of hydrogen peroxide mixed with two tablespoons of baking soda, left for up to 30 minutes before normal washing.
Treat that as Hydro Flask-specific guidance.
Do not assume it is safe for every coated interior, painted component, gasket, or lid.
Never mix hydrogen peroxide with vinegar or chlorine bleach.
Use one cleaning method at a time.
White Vinegar
Diluted white vinegar can break down some mineral deposits and stubborn odors.
Stanley recommends a specific treatment for certain hard-to-reach flasks: three ounces of distilled white vinegar with a quarter cup of uncooked rice, shaken and left for five to ten minutes before a thorough rinse.
Do not automatically soak every bottle overnight in a 50/50 vinegar mixture.
Acid can affect certain finishes, coatings, seals, and metal components when used too strongly or for too long.
Use vinegar only when the care guide permits it.
Rinse until no vinegar smell remains.
Cleaning Tablets
Bottle-cleaning or denture tablets can remove stains from some bare stainless-steel interiors.
They are not universally approved.
Some contain bleaching agents, chlorine compounds, strong oxidizers, fragrances, or ingredients that may not suit coated bottles and silicone seals.
Check the tablet ingredients and the bottle manual first. A product described as safe for dentures is not automatically safe for every insulated mug.
When the manufacturer sells or recommends its own cleaning tablets, use those instead of improvising.
Manufacturer-Approved Stain Removers
For coated Zojirushi interiors, use a chlorine-free food-and-beverage stain remover approved for the bottle.
Zojirushi warns against chlorine bleach and notes that material appearing to peel from some interiors may actually be accumulated layers of coffee or tea stain.
Inspect the surface after cleaning.
When the actual coating is scratched, blistered, or lifting, stop using the bottle and contact the manufacturer.
Do Not Use Chlorine Bleach
Bleach is too aggressive for a general cleaning recommendation.
Chlorine can damage gaskets, seals, coatings, and certain stainless components. Stanley explicitly warns that bleach or chlorine may degrade sealing parts, while Hydro Flask says to avoid dishwasher detergents containing bleach or chlorine.
A damaged seal means leaks.
It can also reduce heat retention around the lid.
Use mild dish soap, baking soda, or a manufacturer-approved cleaner instead.
Do Not Mix Cleaning Chemicals
Never combine:
- Bleach and vinegar
- Bleach and ammonia
- Bleach and hydrogen peroxide
- Vinegar and hydrogen peroxide in the same container
You do not need a chemistry experiment inside your coffee bottle.
Use one approved method. Rinse completely. Then wash with ordinary dish soap.
Dishwasher Safety: Check the Exact Model
“Stainless steel” does not automatically mean dishwasher safe.
Hydro Flask says most current bottles and tumblers are dishwasher safe, with stated exceptions such as certain Trail Series products and older models identified by their markings. Caps and lids should be separated and placed on the top rack.
Current YETI Rambler bottles and compatible cap parts are also designed for dishwasher cleaning when disassembled according to YETI’s instructions.
Zojirushi takes the opposite approach.
It states that its vacuum-insulated mugs, bottles, and components are not dishwasher safe and should be washed by hand. It also warns against soaking the complete bottle in water.
Stanley dishwasher guidance varies by product.
Check the symbol on the bottle base or the individual product instructions before loading it.
When in doubt, hand-wash.
It takes longer.
It is cheaper than ruining the finish or seal.
Gasket Care and Replacement
A silicone gasket is a small part with a large job.
It keeps the bottle sealed. Once it cracks, stretches, hardens, or develops permanent mold, the lid may leak even when fully tightened.
Inspect the gasket every few weeks.
Look for:
- Splits or tears
- Flat sections
- Permanent stretching
- Sticky surfaces
- Black or brown spots
- A sour smell that survives cleaning
Zojirushi states that mold spots on rubber gaskets can be very difficult to remove and recommends replacing the affected part.
Do not reinstall a twisted gasket.
Press it evenly into its groove and check that no section is folded or raised. YETI’s current care instructions likewise emphasize correct gasket orientation and removing twists before use.
After reassembly, perform a leak test with warm water over a sink.
Do not discover an incorrectly installed gasket after filling the bottle with 200°F coffee.
Fixing Persistent Odors
When a bottle still smells after washing, isolate the source.
Smell the body, lid, gasket, and sipping insert separately.
The lid is usually guilty.
Deep-clean each removable component and let it dry for a full day. Store the bottle with the cap loose or completely removed.
When the smell survives:
- Replace the gasket.
- Check for residue in hidden lid channels.
- Inspect the interior coating.
- Confirm that milk or soup was not left sealed too long.
- Contact the manufacturer when the odor appears to come from damaged material.
Do not cover the smell with flavored tablets or strong detergent.
That replaces one bad taste with another.
What a Metallic Taste Usually Means
A metallic taste does not automatically mean the stainless steel is failing.
It may come from:
- Coffee oils
- Mineral deposits
- Soap trapped under a gasket
- A scratched interior
- A damaged coating
- A low-quality lid component
Wash the bottle and lid separately. Then fill the clean bottle with warm water and leave it for 15 minutes.
Taste the water.
When plain water tastes normal, the problem was probably coffee residue or the lid. When the taste remains after repeated proper cleaning, stop using the bottle and contact the manufacturer.
A genuinely damaged coating is a reason to replace or warrant the bottle.
Switching to a glass-lined flask is an option for people who are especially sensitive to taste, but glass-lined bottles are heavier and more vulnerable to impact.
Maintaining the Vacuum Seal
The vacuum chamber is sealed between the inner and outer walls.
You cannot repair it at home.
Once the seal fails, the bottle becomes an expensive steel container with average insulation.
Do Not Microwave It
Vacuum bottles are made with metal.
Never place one in a microwave. Metal can cause arcing, fire, equipment damage, and injury. YETI explicitly warns that its stainless insulated products must not be microwaved.
Remove the drink and heat it in a microwave-safe container instead.
Do Not Put It on a Stove or Open Flame
A vacuum bottle is for holding hot liquid.
It is not cookware.
Do not place it on a burner, camping stove, fire, oven rack, or hot plate. Direct heat can damage coatings, seals, soldered areas, and the vacuum structure.
Heat the drink separately.
Then pour it into the bottle.
Avoid Freezing the Complete Bottle
Do not place a full, sealed vacuum bottle in the freezer unless the manufacturer expressly allows it.
Liquid expands as it freezes. That expansion can deform the bottle, damage seals, or compromise the vacuum structure. YETI warns that freezer storage can cause vacuum loss in its insulated products.
Use ice cubes for cold drinks instead.
Avoid Hard Drops
A small dent is not always fatal.
A major impact can damage the sealed vacuum chamber, especially near the base, sidewall seam, or neck.
After a hard drop, test the bottle before trusting it.
Fill it with hot water and monitor the exterior.
How to Test Vacuum Integrity at Home
Use hot water, but do not use it straight from a rolling boil.
- Fill the bottle with hot tap water or carefully handled hot water.
- Close the lid.
- Wait five minutes.
- Feel the middle and lower section of the exterior.
- Compare it with the neck and lid.
The neck and lid may feel slightly warm because they contain solid connections and less insulation.
The main body should remain close to room temperature.
When a large section of the outer wall becomes clearly hot, heat is crossing the bottle walls. That suggests the vacuum may be compromised.
You can perform a second test with ice water.
A functioning vacuum bottle should not develop widespread condensation on its main exterior wall. Thermos identifies sweating on the outer body as a practical warning that vacuum performance may have been compromised, often after an impact.
A little moisture around the lid is different.
Cold liquid can chill the cap and nearby metal even when the bottle body is working correctly.
Signs the Vacuum Has Failed
Watch for these changes:
- The exterior body becomes hot with hot contents
- The body sweats heavily with ice water
- Ice melts much faster than before
- Coffee suddenly cools within one or two hours
- Heat retention declines sharply after a major drop
- You hear loose material moving inside the wall
Repeat your test once to rule out a loose lid or damaged gasket.
When the body itself transfers heat, contact the manufacturer. Do not drill, puncture, hammer, or attempt to reseal it yourself.
Thermos currently covers its stainless-steel vacuumware for five years against qualifying defects, while warranty terms differ for other brands and models.
Maintenance Checklist
Frequency | What to Do |
After every use | Empty, rinse, wash, disassemble the lid, and air-dry |
Weekly | Remove gaskets and scrub hidden lid channels |
Monthly | Deep-clean stains and inspect seals for damage |
After a hard drop | Test heat retention and check the exterior for hot spots |
When leaking starts | Reinstall or replace the gasket before blaming the bottle |
When odors persist | Deep-clean the lid first, then inspect the interior |
When the body gets hot | Stop relying on it and contact the manufacturer |
Final Cleaning Rule
The bottle body is rarely the difficult part.
The lid is.
Wash it sooner. Take it apart. Let it dry.
That routine prevents most leaks, odors, mold, and ruined coffee before they start.
Frequently Asked Questions
Can I Put Milk or Dairy in an Insulated Bottle?
How Long Does an Insulated Bottle Really Stay Hot?
Are Copper-Lined Bottles Better?
Can I Use an Insulated Bottle for Soup?
How Do I Prevent a Metallic Taste?
Will a Larger Bottle Keep Drinks Hotter?
Can I Preheat the Bottle in a Microwave?
How Do I Know if the Vacuum Seal Is Broken?
Interactive Heat-Loss Simulator
Not sure whether your coffee will survive a freezing commute?
Use our Heat-Loss Simulator.
Choose a bottle, enter your drink temperature, set the outside conditions, and tell us how often you expect to open the lid. The tool then estimates how your drink temperature will change over the next 12 hours.
It takes less than a minute.
How the Simulator Works
Start by selecting one of the bottles from our compared lineup.
Then enter:
- Starting drink temperature
- Ambient temperature
- Number of lid openings per hour
- Desired hot-drink cutoff
The default cutoff is 140°F, but you can adjust it based on how hot you prefer your coffee, tea, or soup.
The simulator updates the temperature curve instantly.
You will see the estimated drink temperature at each hour and the point when it is expected to fall below 140°F.
What the Results Show
The results include:
- Estimated temperature over 12 hours
- Expected hours above 140°F
- Heat lost after each lid opening
- Performance in warm and cold conditions
- A recommended bottle for your routine
For example, you can compare a Zojirushi carried in a 68°F office with a YETI left in a 40°F car.
You can also see how repeated sipping affects performance.
Opening the lid once at lunch is very different from opening it every 20 minutes.
Data Behind the Tool
The simulator uses the temperature-drop data collected during our controlled bottle tests.
Each model was compared at regular intervals using the same starting temperature, fill level, preheating routine, and indoor and cold-weather conditions.
The tool adjusts those results based on:
- Your chosen starting temperature
- Ambient temperature
- Bottle capacity
- Compared cooling rate
- Lid design
- Estimated opening frequency
The result is a projection, not a laboratory guarantee.
Wind, fill level, milk temperature, preheating, and how long the lid remains open can all affect the final temperature.
Still, it gives you a far more useful estimate than a vague “12 hours hot” claim.
Get a Personalized Recommendation
After calculating the temperature curve, the simulator suggests the bottle that best matches your needs.
A lightweight commuter who wants six hours of hot coffee may get a different recommendation from a construction worker carrying soup through a winter shift.
The tool considers:
- Required heat-retention time
- Drink volume
- Outdoor temperature
- Opening frequency
- Portability needs
You can change any input and compare the results in real time.
No downloads. No account required.
Try It With Your Daily Routine
Enter the conditions you actually face.
Set the starting temperature to 200°F for fresh coffee. Use 40°F for a cold car or 20°F for a freezing train platform. Then add the number of times you normally open the bottle.
The projected curve may surprise you.
A bottle that performs well while sealed can lose heat much faster when opened repeatedly.
Community Heat-Retention Leaderboard
Approved tests will appear in a sortable table.
Tester | Bottle Model | Capacity | Ambient Temperature | Starting Temperature | Lid Openings | Hours Above 140°F |
Sample Tester | Zojirushi Stainless Mug | 16 oz | 38°F | 202°F | 3 | 7.9 |
Sample Tester | Stanley Adventure To-Go | 25 oz | 25°F | 200°F | 1 | 5.3 |
Why Community Tests Matter
Manufacturer claims come from controlled conditions.
Our tests add cold weather, repeat measurements, and a consistent 140°F cutoff.
Community tests go one step further.
They show how bottles perform during real shifts, hikes, drives, fishing trips, and winter commutes. They also reveal patterns that a single laboratory test can miss.
For example:
- Does the same lid start leaking after a year?
- Does a half-full bottle cool much faster?
- How badly does repeated sipping affect performance?
- Does preheating help more in extreme cold?
- Do older bottles lose insulation after repeated drops?
More data gives us better answers.
Featured Reader Tests
We will highlight the most useful and unusual submissions.
That may include a nurse carrying a Zojirushi through a 12-hour shift, a construction worker packing hot chili in a Stanley, or an ice fisherman relying on coffee during a freezing morning.
Featured entries may include:
- A short user story
- Testing photos
- Full temperature readings
- Environmental conditions
- What worked
- What the tester would change
These stories will not replace controlled test results.
They will show what the numbers look like in real life.
Final Verdict: Which Bottle Should You Buy?
The Zojirushi is the clear winner.
It kept our test water above 140°F for 8.2 hours, weighed less than every competitor, and stayed dry when carried sideways in a bag. For most commuters, it is the bottle to buy.
The other models make sense for more specific routines.
Best Overall for Hot Drinks: Zojirushi Stainless Steel Mug
Choose the Zojirushi when heat retention matters most.
It stayed above 140°F longer than every other bottle in our test. It is also lightweight, slim, easy to carry, and reliably leakproof when locked.
The 16-ounce capacity may be too small for heavy coffee drinkers, and the narrow opening needs a bottle brush. Those are minor complaints compared with coffee that remains properly hot into the afternoon.
Best for: Commuters, office workers, and anyone who values heat over capacity.
Best for Soup and Larger Servings: Stanley Adventure To-Go
Choose the Stanley when you want to pour soup, broth, tea, or shared coffee into a separate cup.
Its 25-ounce capacity provides more room than the smaller commuter bottles, while the insulated lid doubles as a serving cup. The opening is easy to fill and scrub, and the bottle is leakproof when properly tightened.
It kept liquid above 140°F for 5.5 hours, so “all-day heat” would be an exaggeration. It is better for a hot lunch than a late-afternoon meal.
Best for: Soup at work, outdoor lunches, shared drinks, and planned stops.
Best Budget Pick: Thermos Stainless King
The Thermos gives you dependable performance without a premium price.
It remained above 140°F for 5.8 hours and includes a built-in cup. The twist-and-pour stopper is slower and less convenient than a modern sipping lid, but it works well at a desk, campsite, or roadside stop.
It is not the longest-lasting bottle.
It is one of the easiest to justify for around $30.
Best for: Budget buyers, desk use, road trips, and traditional flask users.
Best Built-In Cup: Klean Kanteen TKPro
The TKPro is the better choice when drinking comfort matters more than low weight.
It kept water above 140°F for 7.5 hours, placing second in our test. Its insulated cup allows coffee or soup to cool before it reaches your lips, while the pour-through stopper limits unnecessary heat loss.
The downside is weight. At roughly 18.3 ounces empty, it is heavy for a 16-ounce bottle.
Best for: Campsites, cold outdoor work, hot soup, and anyone who prefers a proper cup.
Best for Leakproof Peace of Mind: YETI Rambler With Commuter Cap
Choose the YETI when a leaking lid would be a disaster.
The Commuter Cap stayed dry during our inverted and shake tests. Its 360-degree sipping rim controlled the flow without dribbling, and the bottle feels built for job sites, trucks, and rough travel.
Heat retention was only average. It stayed above 140°F for 6.2 hours, and the 26-ounce bottle-and-cap setup is heavy and expensive.
You are paying for durability and lid security, not extra hours of heat.
Best for: Rough use, large work bags, vehicles, and carrying coffee beside electronics.
Best for Everyday Versatility: Hydro Flask With Flex Sip Lid
The Hydro Flask is the easiest bottle to recommend when you carry both hot and cold drinks.
Its 20-ounce capacity is more practical than many 16-ounce mugs without becoming as bulky as the YETI. The Flex Sip Lid controls hot coffee well, and the wide opening makes filling and cleaning simple.
It stayed above 140°F for 6.8 hours.
That is not class-leading, but it covers most morning commutes and office routines.
Best for: Daily commuting, mixed hot-and-cold use, road trips, and people who want one bottle for everything.
Our Final Ranking
Rank | Bottle | Best Use | Time Above 140°F |
1 | Zojirushi Stainless Steel Mug | Best overall | 8.2 hours |
2 | Klean Kanteen TKPro | Best built-in cup | 7.5 hours |
3 | Hydro Flask With Flex Sip Lid | Best versatility | 6.8 hours |
4 | YETI Rambler With Commuter Cap | Best leakproof lid | 6.2 hours |
5 | Thermos Stainless King | Best budget pick | 5.8 hours |
6 | Stanley Adventure To-Go | Best for soup and serving | 5.5 hours |
The Bottom Line
Buy the Zojirushi when you want the hottest drink in the lightest bottle.
Buy the Hydro Flask when you want one practical bottle for coffee today and ice water tomorrow.
Choose the YETI for rough handling, the Thermos for value, the TKPro for its cup, and the Stanley for hot soup at lunchtime.
Still unsure?
Use the interactive heat-loss simulator to enter your starting temperature, weather conditions, and sipping frequency. You can also check the user-submitted leaderboard to see how these bottles perform during real commutes, shifts, hikes, and winter trips.
Already own a bottle that deserves a place here?
Follow our test protocol and submit your results. Your data may appear in the next leaderboard update.