

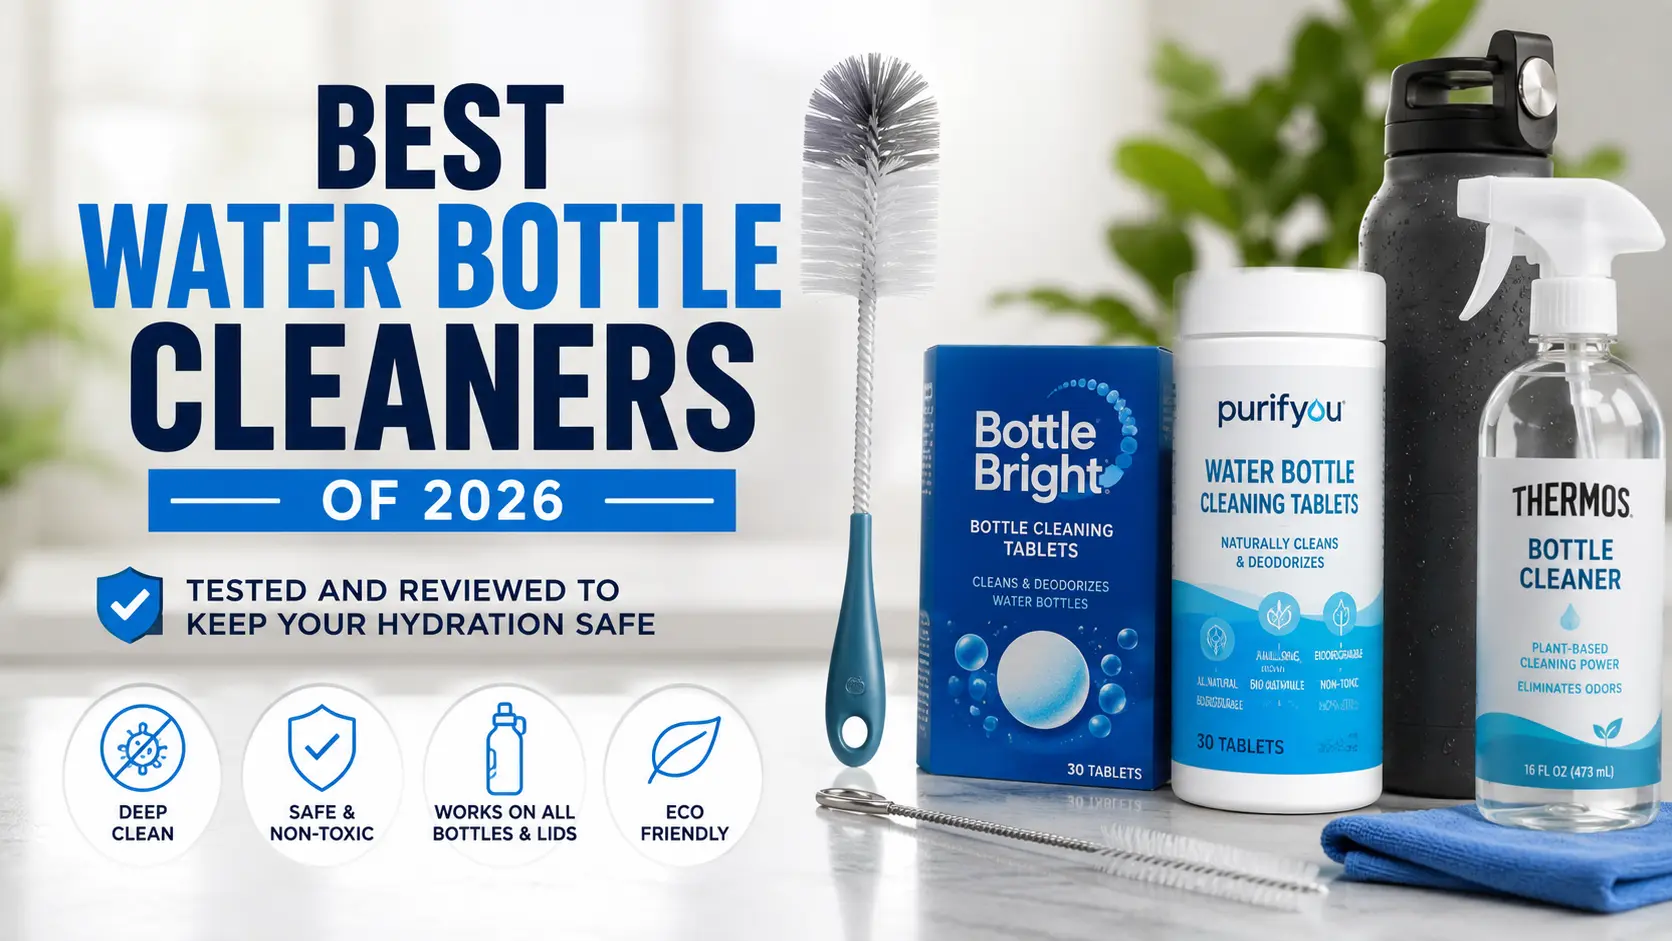
Your reusable water bottle can become a breeding ground for bacteria in just 24 hours. A 2025 BBC report found that microbial counts may reach millions per milliliter.
That musty smell is not always stale water.
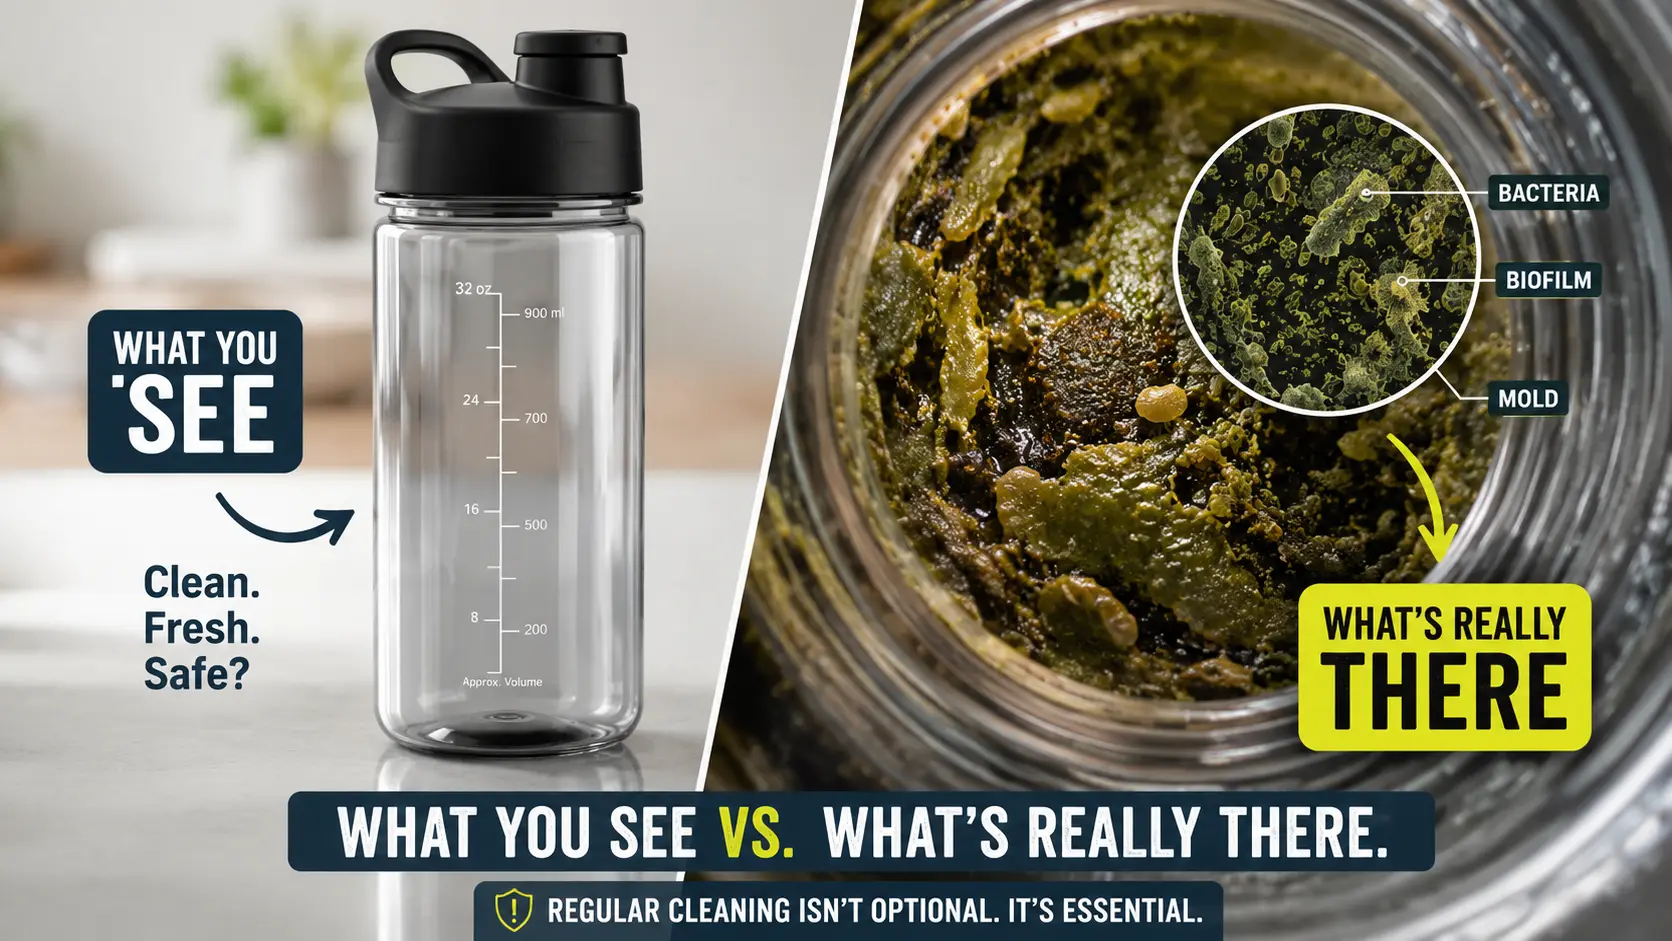
It can be a sticky biofilm made from bacteria, saliva, drink residue, and other gunk clinging to the inside of your bottle. A quick rinse will not remove it.
Most people empty their bottle, splash in some water, and refill it. I used to do the same. But after comparing different cleaning methods, I found that regular scrubbing matters far more than occasional deep cleaning.
A dirty bottle may develop stubborn odors, visible mold, slimy buildup, or residue around the lid and drinking spout. Bottles used for protein shakes, juice, milk, or flavored drinks need even more attention because leftover sugars and proteins give bacteria more material to feed on, an infusion water bottle can be a great way to add natural flavor without the extra sugar.
The good news is that keeping a bottle clean does not take much time.
Key Takeaways
- Scrub your bottle daily with warm, soapy water.
- Deep-clean weekly to remove stains, odors, and hidden buildup.
- Clean lids, straws, gaskets, and threads separately.
- Let every part dry completely before reassembling.
- Replace damaged bottles, worn brushes, and moldy seals.
- Choose cleaners based on bottle material and what you drink.
In this guide, you will learn how to clean stainless steel, plastic, glass, insulated, and straw-lid bottles, and if you’re also shopping for a new one, our guide to bottles that keep drinks cold is a good starting point. You will also see which brushes, tablets, soaps, and sanitizing methods actually work—and which ones are unnecessary.
By the end, you will know which cleaner suits your bottle and daily habits, how often each part should be washed, and how to remove odors, stains, biofilm, and hidden gunk.
Whether you carry plain water, protein shakes, coffee, or your children’s drinks, you will have a simple routine that keeps every bottle fresh, safe, and odor-free, and if you’re tracking your daily intake, our guide on how many water bottles make up a gallon can help.
Let’s give your bottle the proper scrub it needs.
Why You Need to Clean Your Water Bottle: The Science of Bacteria and Biofilms
The 24-Hour Bacteria Explosion
Your bottle may hold clean water, but it does not stay clean once you start drinking from it.
Every sip introduces saliva and microorganisms from your mouth. Your hands add more germs when you touch the cap, straw, handle, or mouthpiece. Tiny traces of skin cells, food, lip balm, and drink residue provide enough material for microbes to survive.
Even plain water is not a free pass.
A BBC Future report published on March 17, 2025, described research in which bacterial levels in reusable bottles rose from around 75,000 cells per milliliter during the day to approximately one to two million per milliliter after 24 hours. Warm temperatures and long periods at room temperature gave the bacteria more opportunity to multiply.
Some bacteria, including E. coli, can double about every 20 minutes under ideal warm, nutrient-rich conditions. A real water bottle is not always an ideal laboratory environment, so growth rates vary. Still, a closed, damp bottle offers three things microbes need: moisture, time, and small amounts of organic matter.
Research from Purdue University gives us an even clearer picture. Scientists tested 90 reusable bottles and found that 70% contained more than 100 colony-forming units of heterotrophic bacteria per milliliter. Sixty percent exceeded 500 CFU/mL, and coliform bacteria were detected in some bottles. Bottles used for coffee, tea, juice, or other drinks generally carried more contamination than bottles reserved for water.
That does not mean every bacterium in your bottle is dangerous. Most environmental and oral microbes will not make a healthy person sick.
The problem is that you cannot identify harmful bacteria by looking at the water.
A bottle can appear clear while bacteria are multiplying around the threads, under the gasket, inside the straw, and across the bottom. By the time you notice slime, cloudiness, or a musty odor, the buildup is already well established.
You may have seen claims that an unwashed bottle contains more bacteria than a toilet seat or a pet’s food bowl. These comparisons usually come from small commercial swab tests. They may grab attention, but they do not reveal which organisms were present or how much health risk they created.
The bottle research is concerning enough without exaggeration.
Health Risks You Cannot Ignore
A dirty bottle does not guarantee illness. It increases the opportunity for contamination.
If disease-causing bacteria enter the bottle through dirty hands, backwash, spoiled drink residue, or an unsafe refill source, swallowing them may cause nausea, stomach cramps, vomiting, diarrhea, or fever. The exact symptoms depend on the organism and the amount consumed.
Sharing bottles creates another problem.
The CDC warns that illnesses spread through saliva can pass when people share water bottles, cups, food, or eating utensils. Mumps and Epstein–Barr virus, which causes most cases of infectious mononucleosis, are two clear examples.
Viruses can also remain on objects after an infected person touches them. CDC material notes that influenza viruses may survive on some surfaces for up to 48 hours. Norovirus spreads through contaminated hands, food, water, and surfaces, and only a small number of particles may be enough to cause illness.
This is why bottles should not be shared casually, especially during cold and flu season or when someone in the household has vomiting, diarrhea, fever, or a sore throat.
Mold deserves attention too. Spores are naturally present in the environment. When they land on trapped drink residue inside a damp lid or straw, they may begin to grow. Mold exposure can trigger coughing, wheezing, nasal irritation, or allergic reactions in sensitive people. Those with asthma, chronic lung conditions, or weakened immune systems may face greater risks.
Children, older adults, and immunocompromised people need more careful bottle hygiene. They may become dehydrated faster during stomach illness and can be more vulnerable to serious infections.
This is not a reason to throw away your reusable bottle.
It is a reason to wash it properly.
Biofilms: The Stubborn Slime You Cannot See
Biofilm is not simply loose dirt floating in the water. It is an organized community of microorganisms attached to a surface.
The bacteria produce a sticky protective layer that helps them remain in place. Researchers have isolated a potentially harmful, antibiotic-resistant strain of Klebsiella grimontii from a reusable bottle and confirmed that it could form biofilms on polypropylene, a plastic commonly used in food and drink containers.
Biofilm often begins in the areas most people miss:
Inside cap threads.
Under silicone seals.
Around bite valves.
Inside straws.
Along narrow necks and bottom corners.
These areas stay damp and receive less friction during a quick rinse. Over time, the buildup may create a slippery feel, unpleasant taste, or musty smell.
Water alone will not reliably remove it.
You need friction. Use a bottle brush to scrub the inner walls and base. Use a narrow straw brush for tubes, valves, and tight lid channels. Remove silicone gaskets whenever the manufacturer allows it, then scrub both the gasket and the groove underneath.
Dish soap helps lift oils, residue, and loosened gunk. Scrubbing physically breaks the biofilm away from the surface so it can be rinsed out.
Cleaning tablets can support an occasional deep clean, especially in bottles with narrow openings. Follow the product’s contact time and rinsing instructions. Vinegar may help with odors and mineral deposits, but it should not be treated as a guaranteed disinfectant. It does not replace detergent, scrubbing, or a food-safe sanitizing method when sanitation is necessary.
The practical rule is simple:
Rinse removes loose residue. Scrubbing removes attached buildup. Sanitizing reduces the germs left behind.
Do all three when your bottle has held milk, juice, coffee, a protein shake, or another drink that leaves behind sugar, fat, or protein. Then let every part dry completely before reassembling it.
A clean, dry bottle gives bacteria far less opportunity to return.
Types of Water Bottle Cleaners: Brushes, Tablets, UV, and DIY Methods
Bottle Brushes: The Workhorse of Daily Cleaning
A bottle brush is still the most reliable tool for everyday cleaning.
Soap loosens residue, but the brush provides the friction needed to remove saliva, drink residue, and early biofilm from the bottle walls. A quick rinse cannot do that.
Not all bottle brushes work equally well. Focus on three features:
Bristle stiffness: The bristles should be firm enough to scrub away gunk but flexible enough to move around curved walls. Very soft bristles may glide over buildup without removing it.
Handle length: The brush should reach the bottom of the bottle without forcing your fingers into the opening. A longer handle gives you better control in tall or insulated bottles.
Head shape: A rounded or slightly angled head cleans bottom corners better than a straight, narrow brush. For bottles with small openings, choose a slim brush that can enter without bending excessively.
Nylon bristles are a practical choice. They are durable, rinse clean easily, and are less likely to scratch stainless steel, glass, or plastic than metal cleaning tools.
Use hot, soapy water and scrub the sides, base, shoulder, and neck of the bottle. Pay extra attention to the bottom edge, where residue often collects.
The brush also needs cleaning.
Rinse it thoroughly after every use, shake out excess water, and store it upright where air can circulate. Do not leave it sitting in a damp sink or sealed container, as the bristles can develop their own odor and bacterial buildup.
Replace the brush every three to six months, or sooner if the bristles become bent, frayed, discolored, or difficult to rinse clean. A worn brush loses contact with the bottle surface and becomes less effective.
Pros: Affordable, reusable, chemical-free as a tool, and effective at physically removing buildup.
Cons: Requires some scrubbing and may not reach inside narrow straws, valves, or complicated lid channels.
Best for: Daily cleaning of wide-mouth bottles, standard bottles, tumblers, and insulated flasks; see our top wide-mouth bottle picks for recommendations.
For most people, a bottle brush and regular dish soap are all that is needed for a dependable daily cleaning habit.
Cleaning Tablets: The Effortless Deep Clean
Cleaning tablets are useful when a brush cannot reach every corner.
Drop one into a bottle filled with warm water, let it dissolve, and the fizzing action helps loosen stains, odors, and drink residue from the walls, base, threads, and narrow neck.
Many tablets use sodium percarbonate. When mixed with water, it releases oxygen-based cleaning agents that break down organic matter. This makes tablets especially effective against coffee stains, tea marks, protein shake residue, and stubborn smells.
The bubbles also help move the cleaner into tight areas that are difficult to scrub.
But tablets are not magic.
They work well on light buildup and routine stains, but they may not remove thick slime or an established biofilm without physical scrubbing. If the bottle feels slippery, has visible gunk, or still smells after soaking, follow up with a bottle brush.
Check the product label before using a tablet as a sanitizer. Some formulas are designed mainly to clean and deodorize, while others are tested to reduce bacteria when used for a specific contact time.
After soaking, rinse the bottle thoroughly with clean water. Poor rinsing may leave a slight taste or smell behind.
Pros: Easy to use, reaches narrow crevices, removes odors, and requires little effort. Many formulas also use biodegradable ingredients.
Cons: Costs more than dish soap over time, may not remove heavy buildup, and can leave an aftertaste if the bottle is not rinsed properly.
Best for: Weekly deep cleaning, travel, narrow-neck bottles, and bottles used for coffee, tea, juice, or protein shakes.
UV-C Sanitizers: High-Tech Germ Control
UV-C sanitizers use short-wavelength ultraviolet light to damage the genetic material of microorganisms. This prevents many bacteria, viruses, and mold spores from reproducing.
The process is fast and chemical-free.
But UV-C sanitizing is not the same as cleaning.
The light may reduce germs on exposed surfaces, but it cannot remove saliva, protein residue, stains, oils, or visible gunk. It also cannot scrub away an established biofilm. Any debris left inside the bottle may shield microorganisms from the light.
That is why UV-C works best after washing.
Clean the bottle with dish soap and a brush first. Rinse it well. Then use the UV-C cycle as an added sanitizing step.
Exposure matters. UV-C light must reach the surface directly and remain there for the manufacturer’s recommended cycle. Threads, silicone seals, straws, cloudy plastic, and deep lid crevices may remain partly shaded. A weak battery, dirty lamp, or shortened cycle can also reduce effectiveness.
Choose a sanitizer from a reputable manufacturer that clearly states its wavelength, cycle time, safety features, and testing standards. Never look directly at an exposed UV-C lamp or use a damaged device.
Pros: Fast, portable, chemical-free, and effective against a broad range of microorganisms when used correctly.
Cons: More expensive than brushes or tablets, requires charging or batteries, does not remove residue, and only treats areas reached directly by the light.
Best for: Travel, on-the-go sanitizing, tech-focused users, and anyone who wants an extra layer of protection after washing.
💡Expert Tip: A UV-C sanitizer can be helpful when soap and water are not immediately available. Still, treat it as temporary germ control—not a replacement for your normal scrub, rinse, and dry routine.
DIY and Eco-Friendly Solutions: Vinegar, Baking Soda, and More
You do not always need a specialty cleaner.
White vinegar and baking soda can handle light stains, mineral buildup, and stubborn odors with ingredients already in your kitchen. They are cheap, widely available, and create less packaging waste than single-use cleaning products.
But they have limits.
DIY cleaners are useful for maintenance. They are not reliable substitutes for proper scrubbing or an approved sanitizer when a bottle has visible mold, heavy slime, or a well-established biofilm.
White Vinegar Soak
White vinegar contains acetic acid. It can help loosen mineral deposits, reduce some odor-causing microbes, and break down light residue.
Mix:
1 part white vinegar
3 parts warm water
Fill the bottle and let it soak for several hours or overnight. Pour out the solution, scrub the inside with a bottle brush, and rinse several times with clean water.
Leave the bottle open until it is completely dry.
This method works well for musty smells, hard-water marks, and light coffee or tea stains. A vinegar odor may remain if the bottle is not rinsed thoroughly.
Do not rely on vinegar alone to sanitize a heavily contaminated bottle. Household vinegar varies in strength and does not reliably kill every type of bacteria, virus, mold, or spore.
Baking Soda Paste
Baking soda is useful for odors and stubborn residue. Its mild abrasive texture adds extra friction without being as harsh as metal scrubbers.
Mix baking soda with a small amount of water until it forms a thick paste. Apply it to stained areas with a soft bottle brush or sponge. Scrub gently, then rinse well.
For general deodorizing, add one or two teaspoons of baking soda to warm water and leave it in the bottle for a few hours before scrubbing.
Avoid aggressive scrubbing on painted, printed, or coated surfaces. Even a mild abrasive can dull a delicate finish over time.
Lemon Juice and Salt
Lemon juice contains citric acid, which can loosen light stains and mineral deposits. Salt adds scrubbing power.
This combination can help clean the uncoated interior of some stainless-steel bottles. Add a small amount of lemon juice and fine salt, then scrub gently with a soft brush.
Rinse immediately and thoroughly.
Do not leave salty mixtures soaking inside stainless steel. Salt contains chlorides that may contribute to pitting or corrosion when left in prolonged contact with the metal. Avoid this method on plastic bottles, painted surfaces, aluminum, or any bottle whose manufacturer advises against acidic cleaners.
Never Mix Vinegar With Bleach
Do not combine vinegar, lemon juice, or any other acid with chlorine bleach.
The mixture can release toxic chlorine gas.
Also avoid mixing vinegar and baking soda in the bottle and expecting a stronger cleaner. The fizz looks impressive, but the two ingredients largely neutralize each other. Use them separately so each one can do its job.
Pros: Affordable, easy to find, low in packaging waste, and useful for odors, mineral marks, and light stains.
Cons: Requires longer soaking, may leave a lingering smell, and is less dependable against mold, pathogens, or heavy biofilm.
Best for: Routine deodorizing, light stains, mineral buildup, and sustainability-conscious households.
For a bottle with a persistent odor, soak it overnight in a solution of 1 part white vinegar to 3 parts water. Scrub it the next morning, rinse thoroughly, and let every part air-dry before reassembly.
How to Choose the Right Cleaner for Your Bottle and Lifestyle
Decision Framework: Bottle Material, Usage, and Habits
The best bottle cleaner is not the most expensive one.
It is the one that matches your bottle material, what you drink, and how much cleaning you will realistically do.
If your current bottle is difficult to scrub or has too many hidden parts, our guide on how to choose a water bottle can help you compare materials, mouth openings, lid designs, and cleaning requirements before buying a replacement.
Start with these five questions.
What Is Your Bottle Made Of?
Stainless Steel
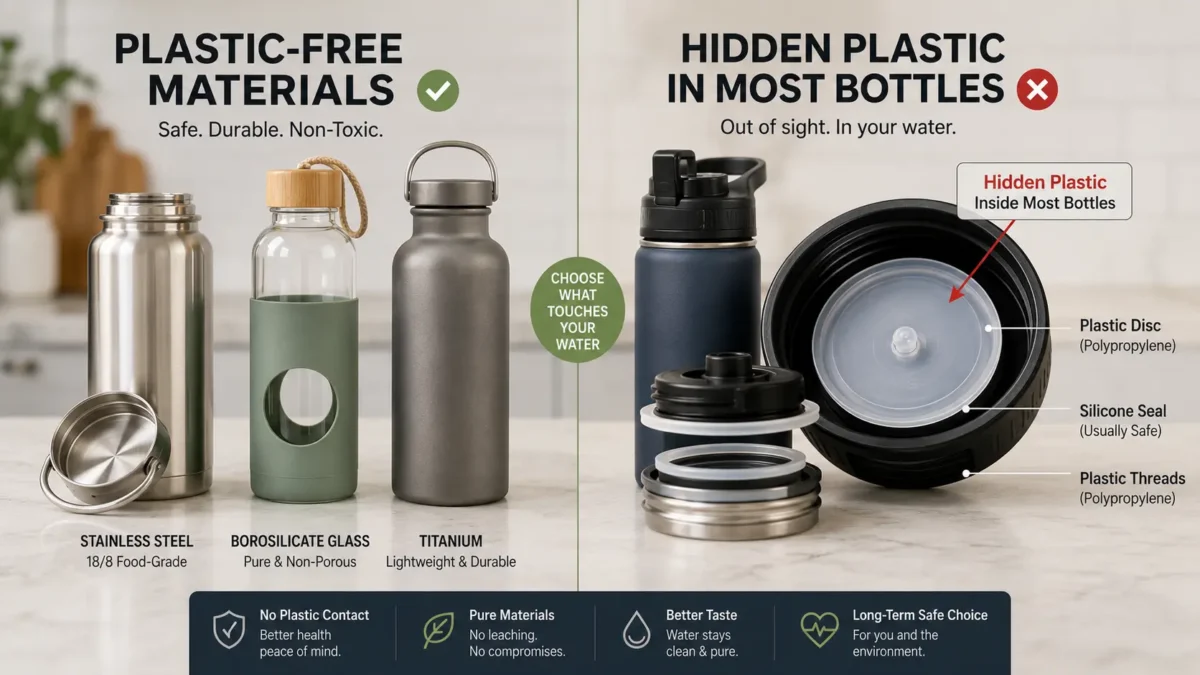
Stainless steel is durable and handles regular scrubbing well, but some bottles may contain hidden plastic components. Use a nylon bottle brush with dish soap for daily cleaning.
Cleaning tablets are useful for coffee, tea, and protein stains. A vinegar soak can also help with odors and mineral buildup.
Avoid metal brushes and steel wool. They can scratch the interior and damage protective surfaces.
Best setup: Nylon bottle brush for daily use, plus a cleaning tablet or vinegar soak once a week.
Plastic
Plastic needs gentler care.
Use a soft nylon brush or non-abrasive sponge. Hard bristles, metal scrubbers, and rough powders may create scratches. Those tiny grooves can trap moisture, residue, and bacteria.
Plastic also absorbs odors more easily than glass or stainless steel. If the smell remains after repeated cleaning, the bottle may need replacing.
Check whether the bottle is dishwasher-safe before placing it on the top rack. Heat can warp some plastics.
Best setup: Soft brush, mild dish soap, and occasional baking soda deodorizing.
Glass
Glass is easy to clean because it does not hold odors or stains as readily as plastic.
Use a soft or medium nylon brush. Avoid hitting the bottom too hard with a stiff brush, especially if the glass is thin.
Many glass bottles are dishwasher-safe, but silicone sleeves, lids, and seals may need separate handwashing.
Best setup: Dish soap and a soft bottle brush, with dishwasher cleaning when approved by the manufacturer.
Aluminum
Aluminum bottles often have an internal liner that protects the metal from direct contact with drinks.
Use mild dish soap and a soft brush. Avoid abrasive powders, metal tools, prolonged acidic soaks, and harsh chemical cleaners unless the manufacturer specifically approves them.
Damaging the liner may expose the metal underneath.
Best setup: Gentle handwashing with a soft brush and thorough drying.
What Do You Drink?
Plain Water
A daily wash with dish soap and a bottle brush is usually enough.
Scrub the mouthpiece, threads, gasket, and lid as carefully as the bottle itself. These areas receive the most contact from your mouth and hands.
Use a cleaning tablet or vinegar soak occasionally if odors develop.
Coffee or Tea
Coffee and tea leave pigments, oils, and tannins behind; if you enjoy loose-leaf tea, a dedicated tea infuser bottle can make brewing on the go easier. These can stain the bottle and create a stale smell.
Wash immediately after use. Do not leave the drink sitting overnight.
Use a bottle brush daily and a cleaning tablet, baking soda paste, or manufacturer-approved deep cleaner once or twice a week.
Smoothies and Juice
Smoothies and juice contain sugar, fruit pulp, and organic residue that bacteria can feed on.
Rinse the bottle as soon as you finish drinking. Then scrub it with hot, soapy water the same day.
Pay close attention to straws, seals, and blender-style lids.
Protein Shakes and Milk-Based Drinks
Protein shakes need the most aggressive routine.
Milk proteins and fats cling to surfaces and begin smelling quickly. Dried protein residue can also settle into threads, corners, and lid channels.
Rinse immediately. Wash with dish soap and a firm nylon brush. Remove and clean every gasket, straw, and valve.
Use a cleaning tablet or oxygen-based cleaner weekly, or more often if the bottle is used every day.
Never leave a protein shake bottle sealed in a gym bag overnight.
How Often Are You Willing to Clean?
Be honest about your routine.
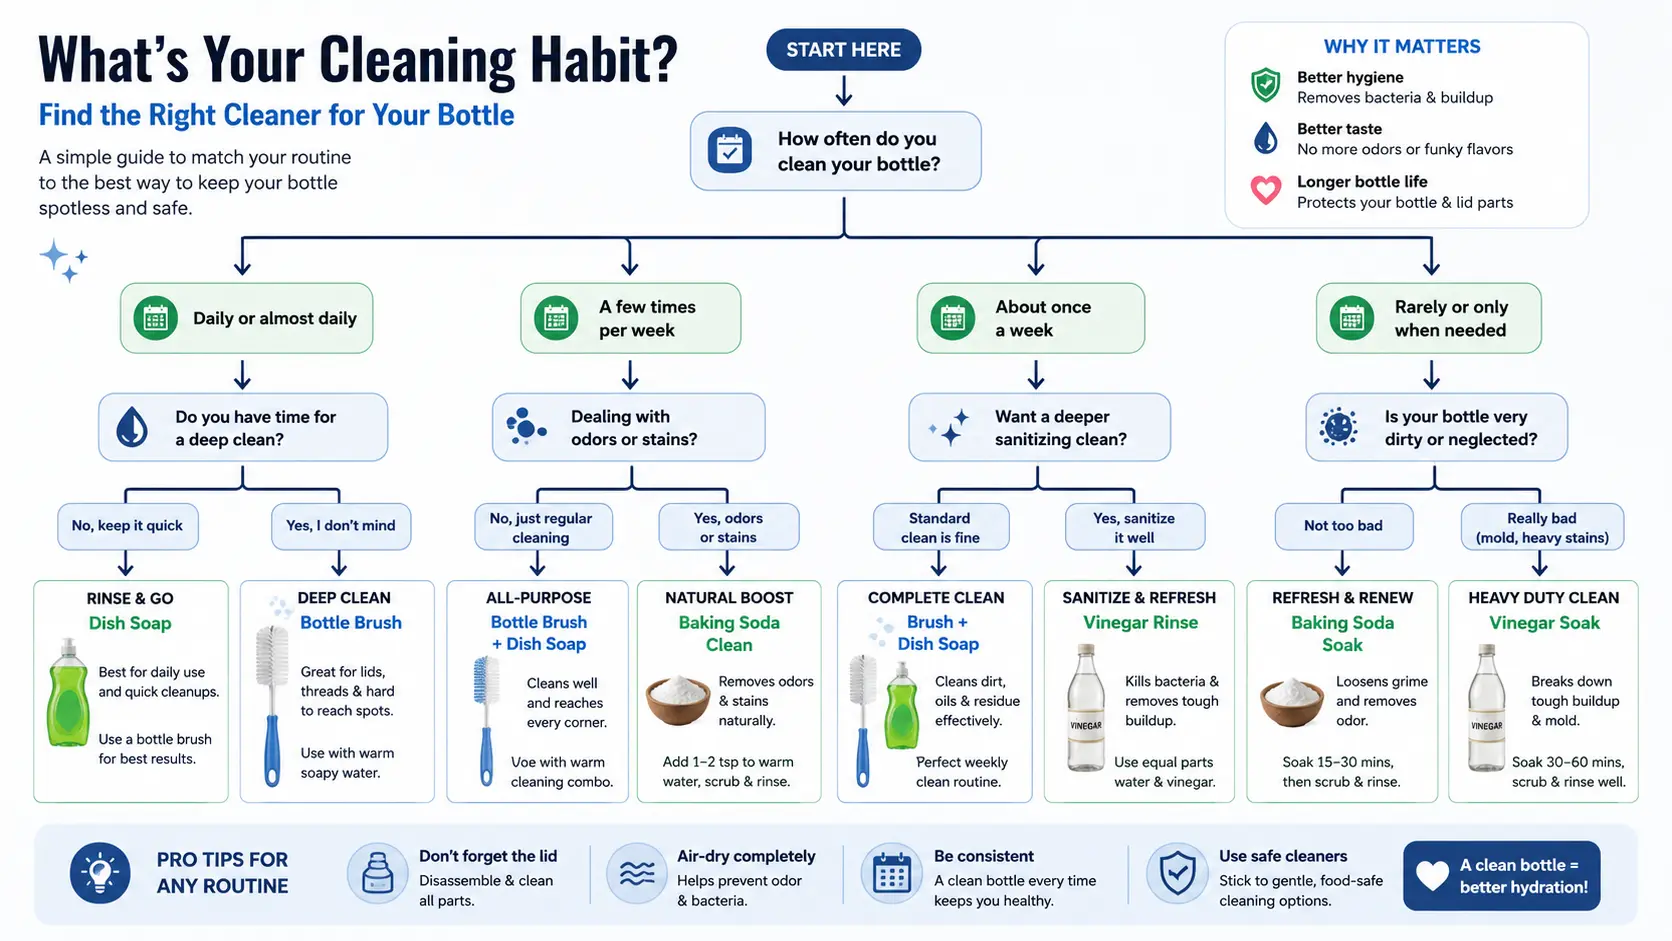
Daily Scrub
Choose a bottle brush and dish soap.
This is the cheapest and most reliable option. It works best when you clean the bottle shortly after use.
Weekly Deep Clean
Add cleaning tablets, a vinegar soak, or baking soda to your routine.
These methods help remove stains and odors, but they should support daily washing rather than replace it.
Minimal-Effort Routine
Choose a wide-mouth, dishwasher-safe bottle with a simple lid, or consider an ultralight water bottle for easy carrying.
Complicated straws, bite valves, and silicone parts require more hands-on cleaning. A dishwasher-safe design reduces the effort, although small lid parts may still need brushing.
UV-C can add an extra sanitizing step, but it does not remove residue or replace washing.
Do You Have Access to a Dishwasher?
A dishwasher can save time, but only when every part is dishwasher-safe.
Check the care instructions for:
- The bottle body
- The lid
- The straw
- Silicone seals
- Painted or printed finishes
Place small parts in a dishwasher basket so they do not fall onto the heating element.
Even dishwasher-safe bottles may need occasional hand scrubbing. Narrow straws, deep threads, and hidden gasket grooves do not always receive enough water pressure.
Let each part dry completely before putting the bottle back together.
What Is Your Budget and Eco-Preference?
A reusable nylon brush and dish soap are the lowest-cost option. They also create less waste than single-use tablets.
Cleaning tablets cost more over time but provide convenience, especially for travel and narrow-neck bottles. Look for individually unwrapped or low-packaging options when sustainability matters.
DIY cleaners such as vinegar and baking soda are affordable and widely available. They work well for odors, light stains, and mineral deposits, but they are not complete replacements for soap and scrubbing.
UV-C sanitizers have the highest upfront cost. They may suit frequent travelers or people who want an extra sanitizing step, but they still require regular washing.
Quick Cleaner Match Guide
Choose a bottle brush if: You use your bottle daily and want the most reliable cleaning method.
Choose cleaning tablets if: You drink coffee, tea, juice, smoothies, or protein shakes.
Choose a soft brush and mild soap if: Your bottle is plastic, aluminum, coated, or easily scratched.
Choose DIY cleaners if: You want an inexpensive way to manage odors, stains, and mineral buildup.
Choose UV-C if: You travel often and want an extra layer of germ control after washing.
For most people, the best routine is simple:
Scrub daily. Deep-clean weekly. Dry completely.
Quick Match: Cleaner Type by User Profile
Not everyone needs the same cleaning setup.
Match your cleaner to your daily routine, the drinks you carry, and the amount of scrubbing you will realistically do.
The Busy Commuter
Try: Cleaning tablets and a quick-dry rack.
You need a method that works while you answer emails, prepare dinner, or get ready for the next day. Fill the bottle with warm water, drop in a tablet, and leave it for the recommended contact time.
Rinse thoroughly, then place the bottle upside down on a ventilated drying rack. Keep the lid and gasket separate so moisture does not remain trapped inside.
Tablets are convenient, but they should not completely replace brushing. Give the bottle and lid a proper scrub whenever you notice residue, slime, or a lingering odor.
The Gym Regular
Try: A firm nylon brush, a narrow detail brush, and a weekly tablet soak.
Protein shakes leave behind fats, sweeteners, and dried powder. That residue quickly develops the familiar gym-bag smell when it sits inside a sealed shaker.
Rinse the bottle immediately after finishing your shake. Scrub the cup, mixing ball, lid threads, spout, and gasket with hot, soapy water.
Use a cleaning tablet once a week to loosen stains and residue in areas your main brush may miss.
A stiff nylon brush provides stronger friction without the scratching risk of metal bristles.
The Eco-Minimalist
Try: One durable bottle brush and occasional vinegar soaks.
A well-made, replaceable-head brush can last longer and create less waste than disposable cleaning products. Use it daily with a small amount of dish soap.
When odors or mineral deposits appear, soak the bottle overnight in a mixture of one part white vinegar and three parts water. Scrub and rinse it thoroughly the next morning.
This setup is inexpensive, simple, and low-waste.
The Tech Lover
Try: A UV-C sanitizer after regular washing.
UV-C adds a quick, chemical-free sanitizing step. It may reduce microorganisms on surfaces reached directly by the light.
Use it only after removing physical residue with soap and a brush. UV-C cannot wash away coffee stains, protein buildup, oils, or biofilm.
Think of it as an extra layer of protection—not a replacement for cleaning.
The Parent
Try: A set of brushes in different sizes and dishwasher-safe bottles.
Children’s bottles often contain milk, juice, flavored water, or drinks with added sugar. They may also have narrow straws, bite valves, silicone seals, and complicated lids.
Use a full-size brush for the bottle, a straw brush for tubes, and a small detail brush for threads and gasket grooves.
Dishwasher-safe bottles can reduce daily work, but check every component separately. The bottle body may be dishwasher-safe while the lid or insulated parts require handwashing.
Inspect small pieces regularly. Replace damaged straws, cracked seals, and parts that remain stained or musty after cleaning.
The Best Match for Most People
A basic cleaning kit does not need to be complicated; a reliable bottle like the CamelBak Chute Mag makes cleaning even easier.
Start with:
- One nylon bottle brush
- One narrow straw brush
- Mild dish soap
- A ventilated drying rack
Add cleaning tablets, vinegar soaks, or UV-C only when they suit your bottle and routine.
The best cleaner is the one you will use consistently.
Top 7 Water Bottle Cleaners of 2026: Detailed Reviews and Comparison
Quick Comparison Table
Product Name | Type | Best For | Key Features | Price Range | Rating |
OXO Good Grips Bottle Brush | Brush | Best overall daily cleaner | Dual-action nylon bristles, flexible neck, non-slip handle | About $15 | 4.7/5 |
Bottle Bright Cleaning Tablets | Tablet | Weekly deep cleaning and stains | Oxygen-based fizz, chlorine-free formula, 15–30-minute soak | $10–$15 | 4.6/5 |
Hydro Flask Bottle Brush | Brush | Tall and large-capacity bottles | Long reach, nylon bristles, non-slip grip | About $12.95 | 4.8/5 |
BlenderBottle x EcoBrite Tablets | Tablet | Protein shakers and gym bottles | Sodium percarbonate formula, 5–10-minute clean, biodegradable | From $8.99–$9.99 | 4.6/5 |
Full Circle Glass Act Cleaning Wand | Sponge brush | Glass and delicate surfaces | Replaceable cellulose sponge, upright drying design | About $6.99 | 4.3/5 |
LARQ Bottle PureVis 2 | UV-C smart bottle | Travel and extra germ reduction | UV-C cycle, filtration, hydration tracking, USB-C charging | About $109–$115 | 4.3/5 |
OXO Water Bottle Drying Rack | Drying accessory | Families and multiple bottles | Holds four bottles, four lids, and four straws | About $19.99 | 4.7/5 |
1. OXO Good Grips Bottle Brush — Best Overall
The OXO Good Grips Bottle Brush is the most practical choice for everyday cleaning.
Its head combines stiff upper bristles for scrubbing the bottom and corners with softer side bristles for cleaning the walls without scratching glass or stainless steel. The long neck flexes as you move around curved bottles, while the rubberized handle remains comfortable when wet.
The standard model is approximately 12.5 inches long and is dishwasher-safe. Unlike some bottle-brush kits, however, it does not include a separate straw brush or gasket tool.
Cleaning Performance
This brush is best at removing fresh drink residue, loose gunk, and early-stage buildup before it becomes stubborn. The shaped head makes good contact with the bottle base, which is where ordinary dish sponges usually fail.
Current Target feedback gives it 4.6 out of 5 stars. Owners frequently praise its reach, comfortable grip, and ability to clean narrow containers. A few reviewers consider it slightly expensive for a single brush, but its current $9.99 price remains reasonable for a tool used every day.
It is less effective on narrow straws, bite valves,s and deep lid channels. You will still need a detail brush for those parts.
Durability and Value
The nylon bristles should last longer than a sponge head when rinsed and dried correctly. Replace the brush when the bristles become flattened, frayed, or permanently discolored.
OXO now also sells more expensive steel-handled models with replaceable heads, but the basic Good Grips version provides better value for most kitchens.
What users love: Comfortable handle, flexible reach and strong everyday scrubbing.
What could be better: No straw cleaner or replaceable head on the standard version.
Best suited for: Daily washing of stainless-steel, glass and wide- or standard-mouth plastic bottles.
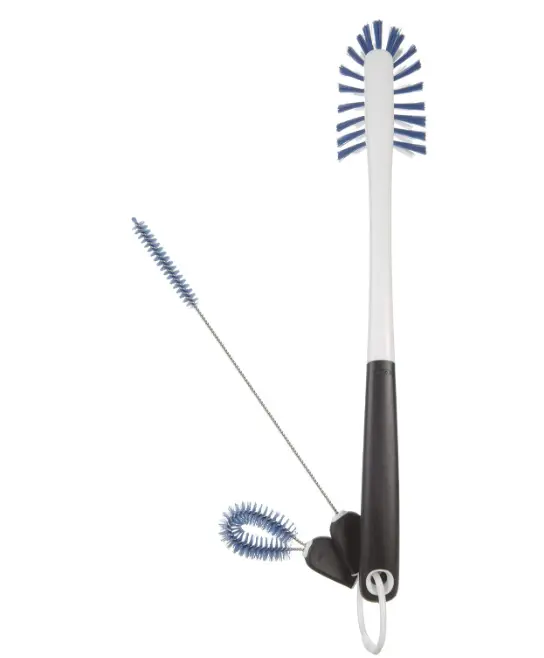
OXO Good Grips Water Bottle Cleaning Set
The OXO Good Grips Water Bottle Cleaning Set includes a long bottle brush, straw brush, and detail cleaner to tackle every part of your bottle. Durable nylon bristles remove buildup with ease, while the compact snap-together design keeps the tools organized and ready for everyday cleaning.
2. Bottle Bright Cleaning Tablets — Best for Weekly Deep Cleaning
Bottle Bright tablets are made for stains and odors that daily dish soap leaves behind.
Each tablet contains an oxygen-releasing formula built around sodium carbonate peroxide, also known as sodium percarbonate. The formula also includes baking soda and citric acid. Once placed in warm water, the tablet fizzes through the bottle and loosens organic residue from areas a brush may struggle to reach.
Bottle Bright recommends one tablet per liter of water and a contact time of 15 to 30 minutes. The tablets are chlorine-free, scent-free,e,e and designed for stainless steel, plastic, glass, silicone,ne and other common bottle materials.
Cleaning Performance
These tablets perform particularly well against coffee rings, tea stains, and stale odors.
In an independent test published by BottlePro, one tablet was used in a stained 20-ounce Hydro Flask for 30 minutes, see our guide to bottle sizes and ounce conversions if you need help choosing the right capacity. Most of the visible coffee and tea staining disappeared, and the tester reported no noticeable aftertaste after rinsing.
Bottle Bright is also easy to use. Fill, drop, wait, and rinse.
It is less dependable against thick slime or an established biofilm. Heavy residue may still require a brush after soaking. Tablets also clean the surfaces reached by the solution, but they do not replace the friction needed around sticky gaskets and heavily soiled threads.
Durability and Value
The standard 12-tablet pack currently costs about $10. A 78-tablet bulk pack costs approximately $38, lowering the cost per clean. The bulk version also avoids individual wrappers, making it the better choice for frequent home use.
What users love: Strong stain removal, simple instructions, and little or no scrubbing.
What could be better: Higher ongoing cost than soap, and severe buildup may still need brushing.
Best suited for: Weekly deep cleaning, narrow-neck bottles, travel mugs, and bottles used for coffee or tea; for our top picks, see our travel mug recommendations.
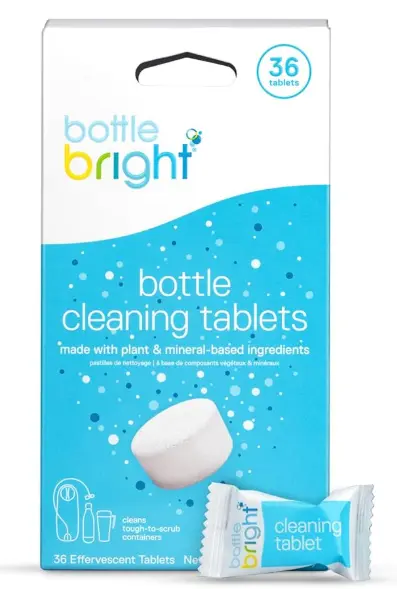
Bottle Bright Cleaning Tablets for Stainless Steel Bottles and Tumblers
Bottle Bright Cleaning Tablets make deep cleaning reusable bottles effortless. Simply drop a tablet into warm water to remove stubborn coffee and tea stains, eliminate lingering odors, and restore fresh taste. Safe for stainless steel bottles, tumblers, thermoses, lids, straws, and other reusable drinkware with biodegradable, bleach-free ingredients.
3. Hydro Flask Bottle Brush — Best for Tall Bottles
The Hydro Flask Bottle Brush is designed for the brand’s tall bottles, tumblers and mugs, although it can be used with other large drink containers.
It has a long handle, nylon bristles,s and a non-slip grip. The brush head is large enough to scrub the bottom and walls of high-capacity bottles without forcing your hand into the opening.
Cleaning Performance
Its main advantage is reach.
Owners report that it can reach the bottom of 40-ounce bottles and clean areas missed by shorter kitchen brushes. The bristles are firm enough for routine residue but not so aggressive that they should scratch a normal stainless-steel interior.
Major-retailer feedback places the brush at approximately 4.5 out of 5 stars from 156 ratings. Positive reviews focus on its effectiveness in large bottles, while less enthusiastic buyers describe it as a fairly ordinary brush carrying a brand-name price.
This is not the best option for a truly narrow-neck bottle. The head is built around Hydro Flask-style drinkware and may not pass through small openings.
Durability and Value
The current $14.95 price is high compared with the standard OXO brush.
Durability feedback is also mixed. Several users report long service, but others say the metal rod eventually loosened or separated from the handle. Hydro Flask customer service has responded to some of these complaints, but the handle connection remains the main weakness mentioned by owners.
What users love: Excellent reach inside tall and large-capacity bottles.
What could be better: Higher price and recurring complaints about the handle connection.
Best suited for: Hydro Flask owners and anyone cleaning 32- to 40-ounce wide-mouth bottles.
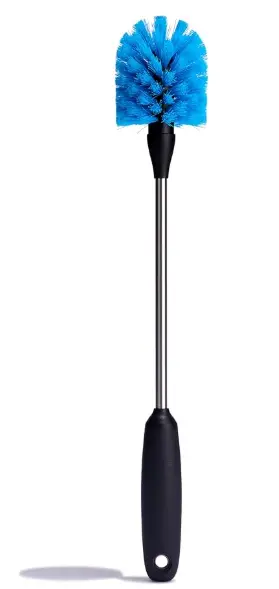
Hydro Flask Bottle Brush & Straw Cleaning Set
Keep your reusable bottles fresh with the Hydro Flask Bottle Brush & Straw Cleaning Set. Durable bristles reach deep inside bottles and straws for thorough cleaning, while the dishwasher-safe, BPA-free design makes maintenance quick, easy, and convenient.
4. BlenderBottle x EcoBrite Cleaning Tablets — Best for Protein Shakers
The originally proposed BottlePro tablets could not be verified as a current product. BlenderBottle x EcoBrite is a more credible replacement for gym bottles and protein shakers.
The tablets contain sodium percarbonate, sodium bicarbonate, te and citric acid. They are chlorine-free, phosphate-free, and described by the manufacturer as biodegradable.
One tablet treats a bottle up to 32 ounces. The normal cleaning time is five to ten minutes, although the manufacturer recommends a longer or overnight soak for stubborn stains and odors.
Cleaning Performance
EcoBrite is particularly useful for the sour smell left by forgotten protein shakes.
The fizz reaches around shaker-ball wires, lid threads, and corners that may be missed during a rushed wash. Current owner feedback includes reports of removed coffee stains, fresher shaker bottles, and less scrubbing.
The product holds a 4.6 out of 5 rating from 225 reviews on the manufacturer’s website. Some users report strong results after an overnight soak, while others still need brushing when residue has dried into thick layers.
Rinsing matters. Any cleaning tablet may leave an unpleasant taste when the bottle is refilled without a thorough rinse.
Durability and Value
A ten-tablet pack is normally about $9.99, with occasional sale pricing around $8.99. That makes it slightly more expensive per tablet than buying Bottle Bright in bulk, but the shorter standard soak time may appeal to gym users.
What users love: Quick soak time and good control of protein-shake odors.
What could be better: Small pack size and recurring cost.
Best suited for: Shaker bottles, smoothie containers and bottles that regularly hold milk-based drinks.
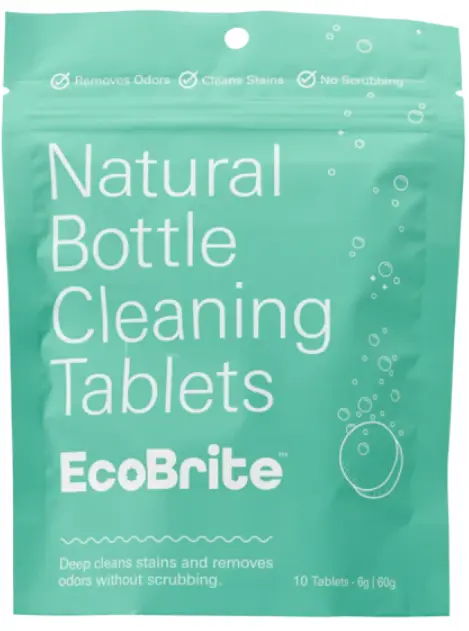
BlenderBottle x EcoBrite Cleaning Tablets
Keep your water bottle fresh with these powerful yet gentle cleaning tablets. Simply drop one into warm water and let the fizzing action reach hard-to-clean areas, helping remove stains, residue, and lingering odors. The result is a cleaner bottle and fresher-tasting drinks with almost no effort.
5. Full Circle Glass Act Cleaning Wand — Best for Delicate Glass
The product, once marketed as the Full Circle Magic Wand, is now listed as the Glass Act Cleaning Wand.
It uses a layered cellulose sponge rather than nylon bristles. The slim handle is designed to reach into tall glasses, champagne flutes and delicate drinkware without scratching the surface.
The head can be replaced instead of discarding the entire tool. It also stands upright for faster drying, and the removable sponge head is top-rack dishwasher-safe.
Cleaning Performance
The soft sponge is good at wiping away lipstick, fresh smoothie residue, and light film from glass.
It does not scrub as aggressively as a firm-bristle brush. That makes it safer for delicate surfaces but less effective against dried protein, thick coffee stains, or established biofilm.
The sponge head is approximately 2.36 inches wide. Despite its slim profile, it will not fit through every narrow bottle opening. Measure the bottle neck before buying.
Durability and Value
The wand costs $11.99, while a replacement head costs $6.99. Replacing only the sponge reduces waste, but the ongoing refill price is fairly high.
Its displayed 5.0 rating is encouraging but comes from only six reviews, so it should not be treated as stronger evidence than products with hundreds of ratings.
What users love: Gentle cleaning, replaceable head and upright drying.
What could be better: Limited heavy scrubbing and a head that is too wide for some narrow-neck bottles.
Best suited for: Glass bottles, wine glasses, carafes and scratch-sensitive drinkware.
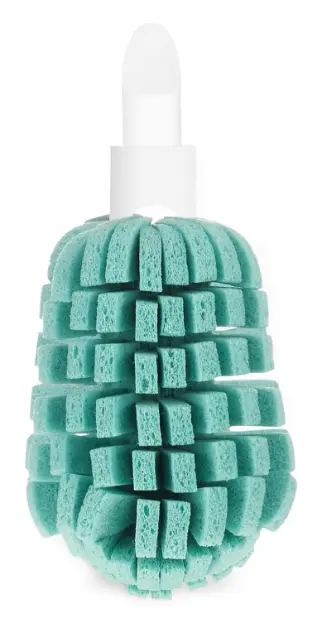
Full Circle Replacement Sponge for Glass Cleaning Wand
The Full Circle Magic Wand Replacement Sponge Head restores your glass cleaning wand with a soft, non-scratch sponge that safely removes stains and residue from bottles, wine glasses, and drinkware. Made from cellulose and recycled plastic, it’s dishwasher-safe, easy to replace, and built for long-lasting, eco-friendly cleaning.
6. LARQ Bottle PureVis 2 — Best UV-C Option
The LARQ Bottle PureVis 2 is not a universal $25 sanitizer that fits most bottles.
It is a complete smart bottle system. The 23-ounce version normally costs around $129, while the 34-ounce version is listed around $139 before temporary promotions. It combines UV-C treatment, an optional filter straw, hydration tracking, insulation and USB-C charging.
LARQ also sells replacement PureVis caps, but the current PureVis 2 cap costs $85 and works only with specific LARQ models.
Sanitizing Performance
The UV-C cycle is designed to reduce microorganisms in the water and on illuminated interior surfaces. LARQ reports laboratory reductions of up to 99.999% for Salmonella and 99.99% for E. coli during a 60-second cycle under its stated test conditions.
That claim does not mean the bottle never needs washing.
UV-C cannot physically lift protein, oil, coffee residue or visible gunk from the bottle. Cloudy water, sediment and debris may also interfere with treatment. The bottle still needs regular soap, scrubbing and rinsing.
The PureVis 2 currently holds a 4.6 out of 5 rating from more than 1,200 reviews. Many owners like the bottle design, filtration and reminders. Recurring complaints include unreliable app tracking, Bluetooth delays, sensor fogging and difficulties with the straw system.
Durability and Value
This is the most expensive option in the comparison.
Its value depends on whether you will use the filtration, hydration tracking and UV-C functions. Buying it only to avoid washing a bottle would be poor value because manual cleaning remains necessary.
What users love: UV-C treatment, filtration, insulated construction and hydration tracking.
What could be better: High price, proprietary compatibility and inconsistent app or sensor performance.
Best suited for: Frequent travelers and technology-focused users who want an additional UV-C step alongside normal washing.
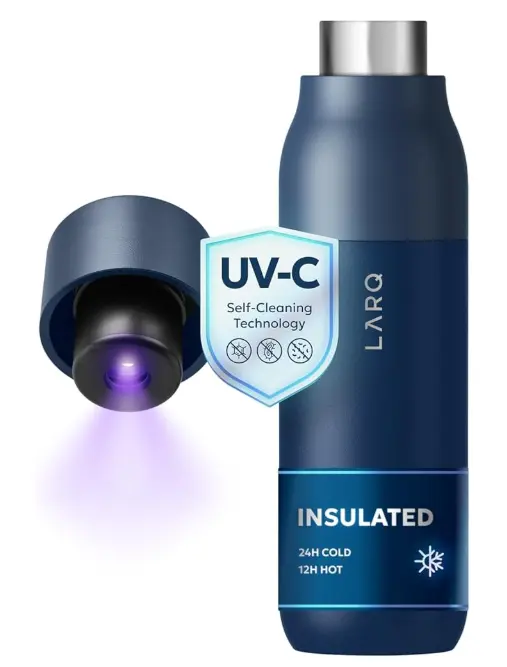
LARQ PureVis 2 34 oz Self-Cleaning UV Water Bottle with Filter Straw
The LARQ PureVis 2 34 oz combines UV-C self-cleaning technology with a built-in filter straw for cleaner, better-tasting water wherever you go. Double-wall insulation keeps drinks cold for up to 24 hours, while app-based hydration tracking and USB-C charging make it a premium choice for travel, work, and everyday wellness.
7. OXO Good Grips Water Bottle Drying Rack — Best Drying Accessory
The OXO Water Bottle Drying Rack does not clean a bottle.
It completes the cleaning routine by allowing washed parts to drain and dry separately.
The rack holds up to four bottles, four lids and four straws. Raised sections keep components elevated, while dedicated straw holders improve airflow through narrow tubes. The rack also disassembles and stores inside its base when not in use.
Drying Performance
Leaving a clean bottle closed while it is still damp creates the conditions for musty odors to return.
The OXO rack keeps bottles upright and separates the lids, straws and caps instead of allowing them to sit in a puddle beside the sink. Current retailer feedback gives it 4.7 out of 5 stars, with owners praising its stability, compact footprint and ability to hold insulated tumblers.
Its main limitation is capacity. Four bottle spaces may not be enough for a large family, and oversized handled tumblers may take up more than one position.
Durability and Value
At $25.99, the rack costs more than a basic dish mat. However, the aluminum frame adds stability, and the dishwasher-safe drain board is easier to maintain than absorbent fabric mats.
What users love: Organized drying, strong support and separate storage for straws and lids.
What could be better: Limited capacity and a relatively high price for a drying accessory.
Best suited for: Families, shared kitchens and anyone who rotates several bottles, travel mugs or reusable straws.
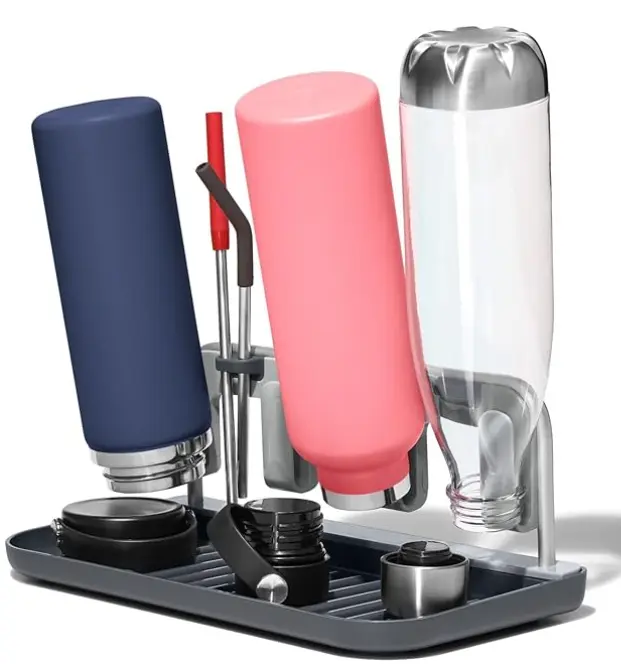
OXO Good Grips Water Bottle Drying Rack
The OXO Good Grips Water Bottle Drying Rack is designed to dry up to four water bottles or travel mugs at once while keeping lids and straws neatly organized. Its compact, fold-flat design saves counter space, and the dishwasher-safe drain board makes cleanup quick and easy.
Final Verdict
For most households, the OXO Good Grips Bottle Brush is the best place to start. It is affordable, comfortable and effective enough for daily cleaning.
Add Bottle Bright Cleaning Tablets when you need help with coffee stains, tea marks, or stubborn odors.
Choose the BlenderBottle x EcoBrite tablets when protein-shake smell is your main problem. The Hydro Flask Bottle Brush makes more sense for tall, high-capacity bottles, while the Full Circle Glass Act Wand is better for delicate glass.
The LARQ PureVis 2 provides the most technology, but it is an expensive extra—not a replacement for scrubbing.
Whatever cleaner you choose, the routine matters most:
Scrub daily. Deep-clean when needed. Rinse thoroughly. Let every part dry completely.
Step-by-Step Cleaning Guide: Daily, Weekly, and Monthly Routines
Daily Cleaning Routine: About 2 Minutes
Wash your bottle after every day of use.
The CDC does not publish a bottle-specific “after every use” rule for personal reusable bottles. However, it recommends washing water-storage containers with soap and water and rinsing them completely. Its general cleaning guidance also explains that soap, water, and scrubbing remove dirt and most germs from surfaces.
For a bottle you drink from throughout the day, that makes a daily wash the safest practical habit.
1. Take Everything Apart
Empty the bottle and remove every washable component:
- Lid
- Straw
- Silicone gasket
- Bite valve
- Mixing ball
- Removable mouthpiece
Do not wash the bottle as one closed unit. Saliva, moisture, and drink residue collect underneath seals and inside lid channels.
Check the manufacturer’s instructions before removing a gasket. Some seals can tear if pulled with a sharp tool.
2. Add Warm, Soapy Water
Fill the bottle or a clean basin with warm water and a small amount of dish soap.
The water should be comfortably hot, not boiling. Very high temperatures can warp plastic, damage coatings, weaken seals, or create a burn risk.
Let heavily coated parts sit in the soapy water for a minute while you scrub the bottle.
3. Scrub the Bottle Interior
Push a clean bottle brush all the way to the base.
Scrub the bottom first. Then move around the walls, shoulders, neck, and opening. Rotate the brush as you work so the bristles maintain contact with the surface.
Do not just swirl soapy water inside.
Friction is what lifts attached residue and disrupts the early buildup that can develop into biofilm.
4. Clean the Lid, Straw, and Gasket
Use a narrow straw brush inside every tube.
Use a small detail brush around:
- Cap threads
- Drinking spouts
- Gasket grooves
- Hinges
- Valves
- Areas beneath silicone seals
These small parts often hold more gunk than the bottle body because they receive direct contact from your mouth and hands.
Squeeze soapy water through flexible valves when possible. Replace any component that remains slimy, cracked, discolored, or musty after proper cleaning.
5. Rinse Thoroughly
Rinse every part under clean running water until no soap, foam, or loosened residue remains.
Run water through the straw and lid openings instead of rinsing only the outside. Check the bottle base for bubbles before placing it on the rack.
A lingering soapy taste usually means the bottle or one of its small parts needs another rinse.
6. Let Every Part Dry Completely
Place the bottle upside down or at an angle on a ventilated drying rack. Keep the cap, straw, and gasket separate.
Do not reassemble the bottle while the parts are damp.
Trapped moisture encourages musty odors and microbial growth. Leave the cap off until the bottle is completely dry inside.
Rinse the brushes after use and let them dry in open air as well.
The Two-Minute Daily Habit
Disassemble. Scrub with warm, soapy water. Rinse well. Dry completely.
This simple routine removes fresh residue before it hardens, controls odors, and makes stubborn biofilm far less likely to develop.
Bottles used for milk, juice, smoothies, coffee, or protein shakes should be washed immediately after use rather than left until the end of the day.
Weekly Deep Clean: About 10 Minutes of Active Work
A daily scrub prevents most buildup. A weekly deep clean handles the stains, odors, and hidden residue that ordinary washing may miss.
Start by completing the daily cleaning routine. Take the bottle apart, wash every component with dish soap, scrub the interior, and rinse away loose gunk.
Then choose one deep-cleaning method.
Option 1: Use a Cleaning Tablet
Fill the bottle with warm water and add one cleaning tablet.
Let it fizz for the time stated on the package, usually 15 to 30 minutes. For stubborn coffee, tea, or protein-shake stains, some products allow a longer or overnight soak.
Pour out the solution and scrub any remaining marks. Rinse the bottle several times until no cleaner or aftertaste remains.
Wash the lid, gasket, and straw separately unless the tablet manufacturer says they can safely soak in the same solution.
Option 2: Try a Vinegar Soak
Mix:
1 part white vinegar
3 parts water
Fill the bottle and let it soak for several hours or overnight.
Vinegar can help loosen mineral deposits, reduce musty odors, and soften light residue. It does not replace physical scrubbing or guarantee complete sanitization.
After soaking, scrub the bottle with a brush. Rinse it thoroughly until the vinegar smell is gone.
Never mix vinegar with chlorine bleach.
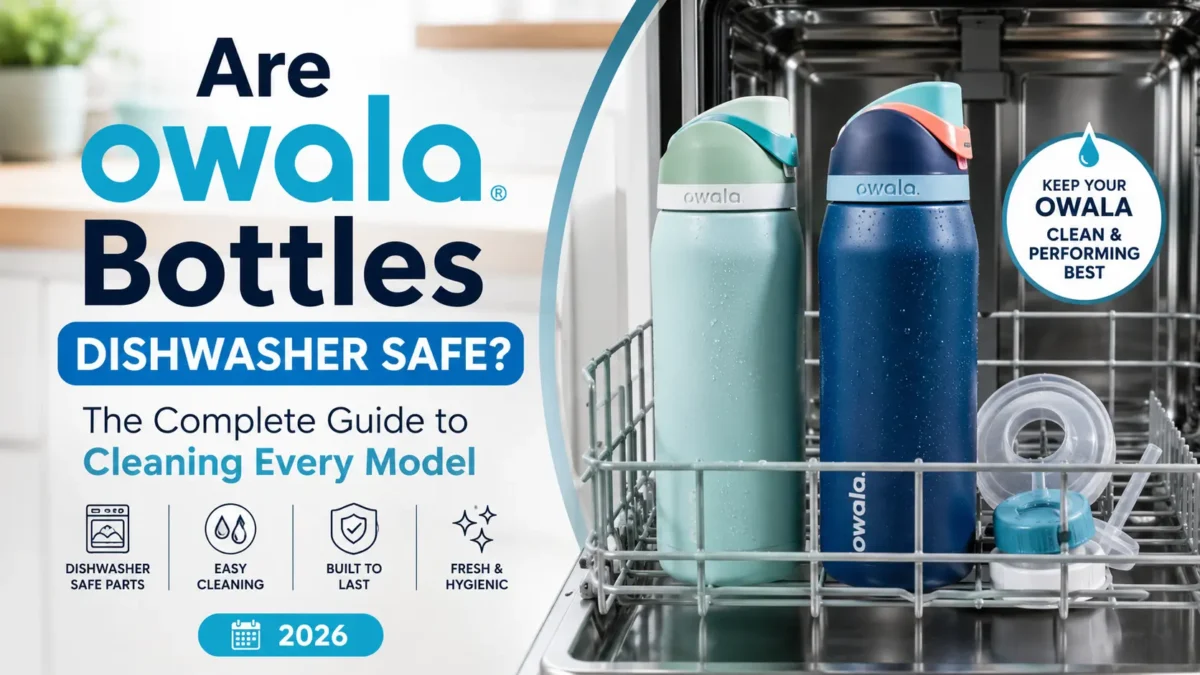
Option 3: Use the Dishwasher
Only use the dishwasher when the manufacturer confirms that the bottle and each separate component are dishwasher-safe.
The bottle body may be safe while the lid, straw, silicone gasket, painted finish, or insulated cap is not.
Place dishwasher-safe bottles securely on the recommended rack. Small lids, straws, and seals should go into a covered utensil basket or mesh dishwasher container so they do not fall onto the heating element.
A heated dry cycle helps remove moisture. However, it should not automatically be described as sanitizing. True dishwasher sanitization requires a labeled sanitize cycle that reaches the temperature and contact-time standards specified by the machine manufacturer.
Even after a dishwasher cycle, inspect narrow straws, gasket grooves, and lid channels. These areas may still need hand scrubbing.
Treat Stubborn Stains First
For dried coffee, tea, or protein residue, make a paste with baking soda and a small amount of water.
Apply it to the stained area with a soft nylon brush. Scrub gently, then rinse before using your chosen deep-cleaning method.
Avoid abrasive powders or aggressive scrubbing on plastic, painted surfaces, and protective coatings. Scratches can trap residue and make future cleaning harder.
Inspect Every Part
Weekly cleaning is also a good time to check for damage.
Look for:
- Black or colored spots beneath the gasket
- Cracks in straws or bite valves
- Warped plastic
- Frayed silicone
- Rust, pitting, or damaged interior coatings
- Odors that remain after washing
Remove and inspect silicone gaskets when the manufacturer allows it. Replace any part that remains moldy, cracked, slimy, or permanently odor-stained after proper cleaning.
Do not keep using a damaged gasket simply because the bottle body still looks fine.
The Weekly Rule
Wash first. Deep-clean second. Inspect every part. Dry completely.
Cleaning tablets are best for convenience and drink stains. Vinegar works well for odors and mineral deposits. A dishwasher saves effort when every component is approved for machine washing.
Whichever method you choose, leave the bottle, lid, straw, and gasket separated until they are completely dry.
Monthly Maintenance and Inspection
Once a month, inspect the entire bottle-cleaning setup.
This takes only a few minutes, but it helps catch worn parts, hidden mold, and damaged surfaces before they become harder to clean.
Check the Bottle Brush
Look closely at the bristles.
Replace the brush if the bristles are:
- Frayed
- Bent flat
- Discolored
- Permanently greasy
- Developing an odor
A worn brush makes less contact with the bottle walls and may leave residue behind.
Also inspect the handle and brush head for cracks. Water and gunk can collect inside damaged areas.
Inspect the Bottle for Damage
Check plastic bottles for deep scratches, cracks, cloudiness, or rough patches.
Scratched plastic can trap drink residue and become difficult to scrub completely. Replace the bottle if the surface remains slimy, stained, or musty after a full deep clean.
Inspect stainless-steel and aluminum bottles for:
- Rust spots
- Pitting
- Peeling interior coatings
- Dents around the mouth
- Damaged threads
Check glass bottles for chips or fine cracks, especially around the opening and base.
Do not keep using a damaged bottle simply because it still holds water.
Examine Lids, Straws, and Gaskets
Remove every part the manufacturer allows you to take apart.
Check silicone gaskets for stretching, splitting, dark spots, or trapped residue. Inspect straws and valves for cracks that may hold moisture.
Replace any part that remains moldy, slimy, or odor-stained after washing and soaking.
Replacement lids and gaskets are often cheaper and more sustainable than replacing the entire bottle.
Deep-Clean the Drying Rack
Your drying rack catches drips from every freshly washed bottle.
Over time, the tray and supports can develop mineral deposits, soap residue, or slime.
Take the rack apart if possible. Wash it with hot, soapy water and scrub the corners, drainage channels, and straw holders.
Rinse well and let it dry completely before placing clean bottles back on it. Use the dishwasher only when the manufacturer confirms that the rack is dishwasher-safe.
Clean the UV-C Device
UV-C caps and sanitizers also need maintenance.
Wipe the exterior and exposed optical surfaces according to the manufacturer’s instructions. Mineral deposits, fingerprints, or residue may block the light and reduce direct exposure.
Do not submerge electronic caps unless the device is specifically rated for it.
Check the charging port, seals, and battery performance. Stop using the unit if the lamp cover is cracked or the device is damaged.
Store the Bottle Open
Once the bottle is clean and completely dry, store it with the cap off or resting loosely on top.
Keep straws and gaskets separate when practical.
Air circulation prevents moisture from becoming trapped inside. This helps control musty odors and makes the bottle less welcoming to bacteria and mold.
The Monthly Check
Inspect the tools. Replace damaged parts. Clean the drying area. Store the bottle open.
A bottle can last for years when it is cleaned consistently and maintained before small problems become permanent.
How to Clean Specific Bottle Parts: Lids, Straws, and Narrow Necks
Lids and Caps: The Germiest Spot
The lid is often dirtier than the part that holds the water.
It comes into direct contact with your mouth, fingers, countertops, bags, and cup holders. Saliva and drink residue also collect around the mouthpiece, threads, valves, and silicone seals.
The problem is not always visible.
Many lids contain small channels and removable gaskets that stay damp long after the bottle appears dry. A quick rinse may clean the surface while leaving gunk underneath.
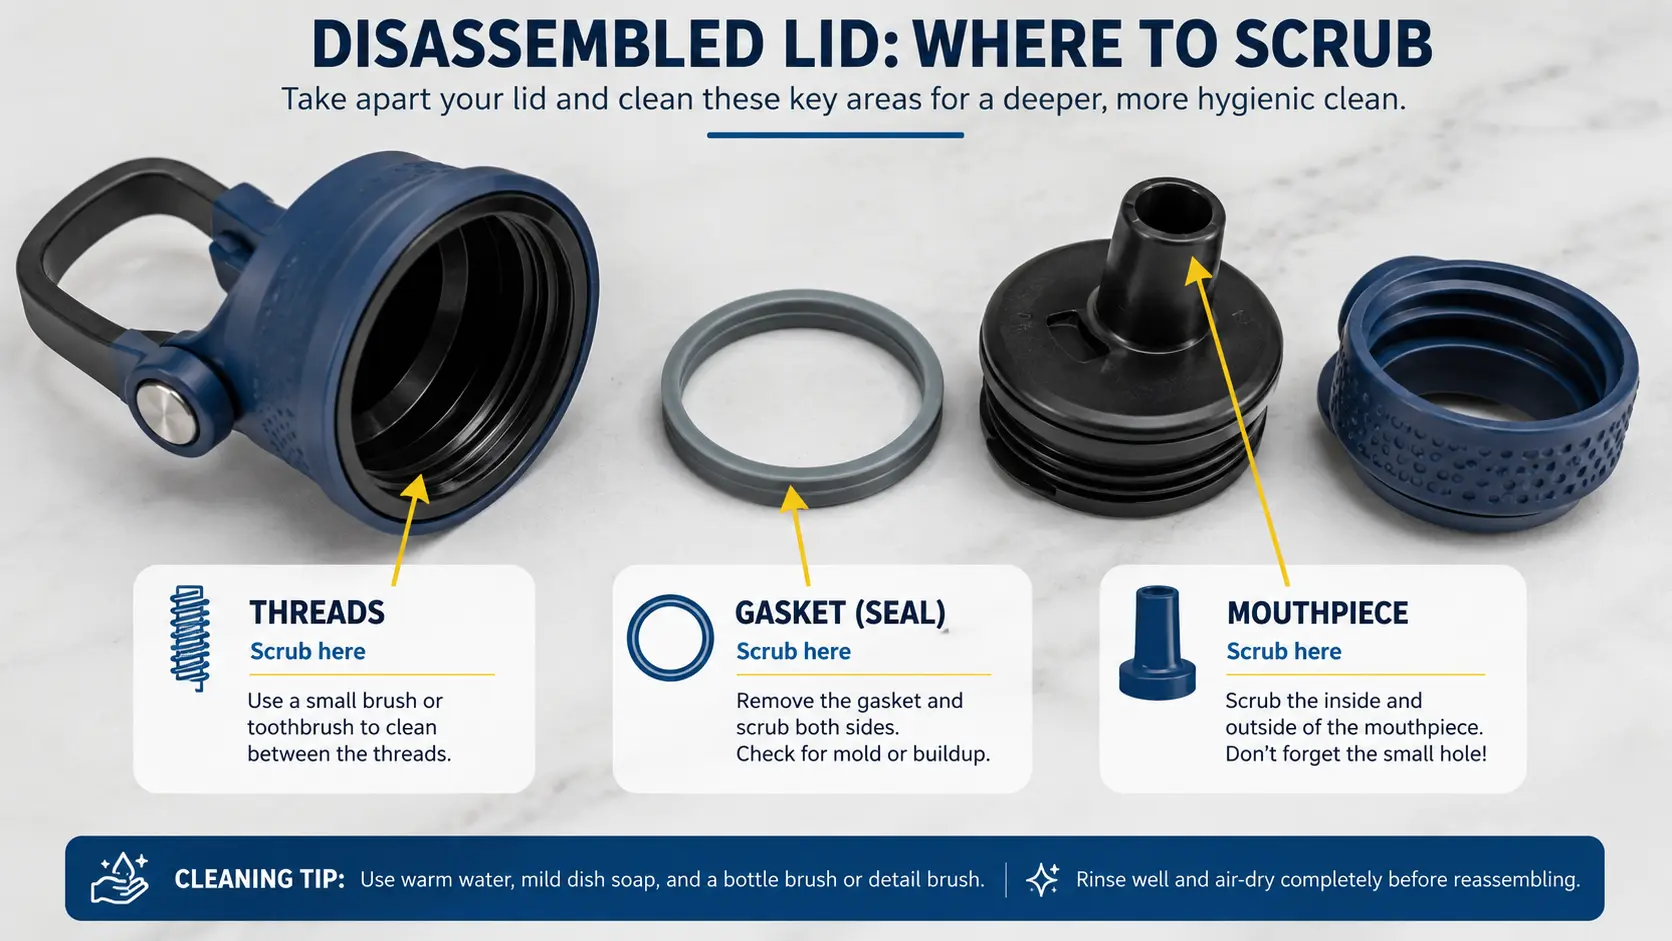
1. Disassemble the Lid
Take apart every component the manufacturer allows you to remove.
This may include:
- Silicone gaskets
- Straws
- Bite valves
- Flip-top mouthpieces
- Vent seals
- Removable handles
Take a quick photo before disassembly if the lid has several small parts. This makes reassembly easier.
Do not pry out a gasket with a knife or sharp metal tool. Use clean fingers or a blunt plastic tool to avoid tearing the silicone.
2. Soak the Parts
Place the lid and removable pieces in warm, soapy water for about five minutes.
The short soak softens dried residue around threads and inside narrow channels. Use hot water only when the manufacturer confirms that the material can tolerate it.
Electronic UV-C caps should never be submerged unless their instructions specifically permit it.
3. Scrub Every Surface
Use a small detail brush or a clean toothbrush reserved only for bottle cleaning.
Scrub:
- Around the drinking opening
- Between screw threads
- Beneath the gasket
- Inside the gasket groove
- Around hinges and buttons
- Through air vents
- Inside flip-up spouts
Move the bristles into every corner rather than brushing only the visible top.
Pay special attention to the groove beneath the gasket. This area often holds trapped moisture, dark residue, and the source of persistent odors.
4. Flush Hidden Channels
Run warm, soapy water through every opening.
For squeeze valves and flexible mouthpieces, gently work the part while it is submerged so the solution moves through the internal channel.
A narrow interdental-style brush or manufacturer-approved detail tool may help with tiny vents. Do not force a brush into a channel if it could puncture the valve.
5. Treat Silicone Gaskets Carefully
For musty odors or light surface staining, soak the gasket in a mixture of one part white vinegar and three parts water.
After soaking, scrub it gently and rinse thoroughly.
Vinegar may help with odor and light buildup, but it cannot restore damaged or deeply mold-stained silicone. Replace the gasket if dark spots, slime, or a musty smell remain after cleaning.
Do not mix vinegar with chlorine bleach.
Only use bleach or boiling-water methods when the bottle manufacturer provides specific instructions for the correct concentration, temperature, and contact time.
6. Rinse and Inspect
Rinse each component under clean running water.
Look closely for:
- Remaining soap
- Black or colored spots
- Cracks
- Stretched seals
- Sticky surfaces
- Persistent odors
Replace worn parts rather than repeatedly trying to clean damaged material. Many bottle brands sell individual gaskets, straws, and lids.
7. Dry Completely
Place the lid and all small components separately on a ventilated drying rack.
Position valves and mouthpieces so water can drain out. Do not reinstall the gasket or close the lid while moisture remains inside the grooves.
A clean lid can quickly become musty again when reassembled damp.
The Lid-Cleaning Rule
Remove the gasket. Scrub the groove. Flush the channels. Dry every part separately.
Cleaning the bottle body matters, but the lid deserves just as much attention. It is the part your mouth touches every time you drink.
Straws and Spouts: The Hard-to-Reach Culprits
Straws and drinking spouts stay damp longer than most bottle parts.
They also trap saliva, sweeteners, protein residue, and small pieces of fruit pulp. A quick rinse may make them look clean while leaving a thin layer of gunk inside.
1. Remove the Straw
Detach the straw from the lid whenever the design allows it.
Separate any silicone tips, bite valves, connectors, or removable mouthpieces. Check how the parts fit together before taking apart a complicated lid.
2. Scrub the Inside
Add dish soap to warm water and dip a narrow straw brush into the solution.
Push the brush through the full length of the straw several times. Rotate it as you scrub so the bristles contact every side.
Clean from both ends when possible.
For protein shakes, smoothies, or milk-based drinks, rinse the straw immediately after use. Dried protein can stick firmly to the inner wall and create a sour smell.
Use a dedicated straw brush with firm nylon bristles for these bottles.
3. Clean Spouts and Bite Valves
Use a small detail brush around the spout opening, air vent, hinge, and base.
Flexible bite valves may hide residue inside the slit. Gently squeeze the valve while running warm, soapy water through it.
Do not force a sharp object into a valve. It may puncture the silicone or make the opening larger.
4. Deep-Clean When Needed
Reusable straws can be soaked in a manufacturer-approved cleaning-tablet solution.
A mixture of one part white vinegar and three parts water may also help with light odors and mineral buildup. After soaking, run the straw brush through again.
Do not rely on soaking alone when residue is visible. Friction is still needed to remove attached buildup.
5. Rinse Thoroughly
Run clean water through the straw until no foam, cleaner, or vinegar smell remains.
Rinse bite valves from both directions when possible. Take a sip of clean water through the straw only after it has been washed and fully rinsed.
6. Dry Completely
Place straws upright or at an angle so water can drain from both ends.
Leave valves and mouthpieces separate from the lid until every part is dry. Trapped moisture is one of the main reasons clean-looking straws develop a musty smell.
Replace any straw or valve that remains slimy, cracked, discolored, or odor-stained after cleaning.
Narrow Necks: When Your Brush Will Not Fit
A narrow-neck bottle is harder to scrub because an ordinary brush may not pass through the opening.
That does not mean soaking is your only option.
Use a Slim or Flexible Brush
Choose a brush with:
- A narrow head
- A long handle
- A flexible or bendable neck
- Soft or medium nylon bristles
The brush should reach the base without becoming trapped in the opening.
The Full Circle Glass Act Cleaning Wand may work for some bottles, but its sponge head is wider than many true bottle-neck brushes. Measure the opening before buying.
Use a Sponge-Head Brush for Glass
A long-handled brush with a soft sponge head works well inside delicate glass bottles.
Move it gently around the base and walls. Do not strike the bottom or force a large sponge through a tight opening, as this can damage thin glass.
Use a Cleaning Tablet for Unreachable Areas
Fill the bottle with warm water and add a cleaning tablet according to the package directions.
Allow it to fizz and soak for the recommended time. The solution can reach shoulders, bottom edges, and curved surfaces that a brush misses.
After soaking, close the bottle securely and gently swirl or rock it to move the solution around.
Avoid vigorous shaking in glass bottles. Pressure, impact, or a loose cap can cause leaks or breakage.
Pour out the solution and rinse several times.
Add Friction When Possible
Tablets help loosen residue, but they do not always remove thick biofilm.
For stubborn buildup, try a bottle-cleaning brush designed specifically for narrow openings. If no tool can reach an area that remains slimy or stained, replacing the bottle may be safer than continuing to use a surface you cannot clean properly.
The Rule for Hard-to-Reach Parts
Use the smallest brush that reaches the surface. Soak when needed. Rinse from both directions. Dry every channel completely.
a pipe cleaner.
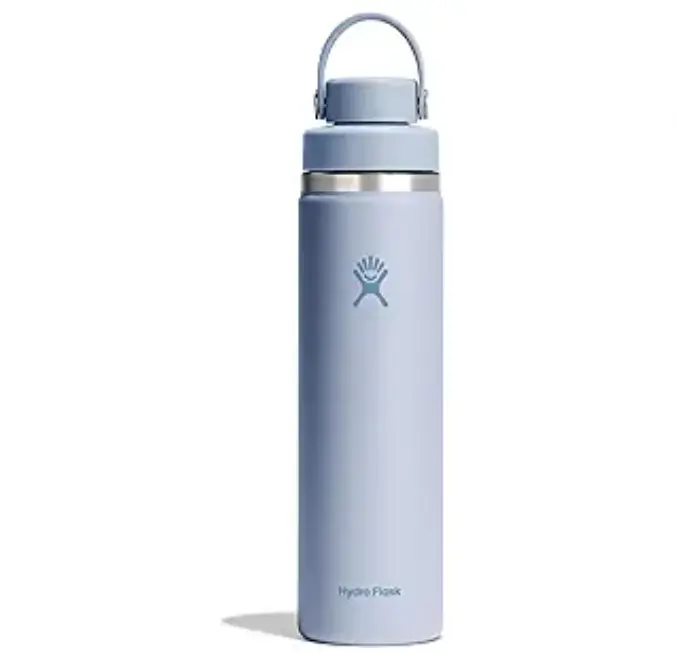
The Hydro Flask Wide Mouth 24 oz is a premium insulated stainless steel water bottle designed for active lifestyles. Double-wall vacuum insulation keeps drinks cold for up to 24 hours, while the leakproof Chug Cap provides fast, controlled sipping. Its wide-mouth opening fits ice easily, and the cupholder-friendly design makes it perfect for commuting, travel, workouts, and everyday hydration.
Eco-Friendly and DIY Cleaning Solutions
Kitchen staples can handle odors, mineral marks, and light stains without creating more single-use waste.
Use them for maintenance—not as a shortcut around soap and scrubbing.
The Vinegar Soak Method: A Natural Deodorizer
Distilled white vinegar contains acetic acid. It can loosen hard-water deposits, cut through light residue, and reduce some odor-causing microbes.
However, household vinegar is not a dependable food-contact sanitizer. It does not consistently reduce harmful germs to recognized sanitization levels.
What You Need
- 1 part distilled white vinegar
- 3 parts warm water
- A bottle brush
- A clean bowl for lids and straws
How to Use It
- Wash first.
Scrub the bottle with dish soap and warm water. Vinegar works better after loose gunk and drink residue have been removed. - Mix the solution.
Combine one part white vinegar with three parts warm water. - Fill the bottle.
Make enough solution to cover the entire interior. - Soak for at least two hours.
For a strong musty odor or visible mineral buildup, leave it overnight. - Treat the small parts.
Place dishwasher-safe, non-electronic lids, straws, and silicone gaskets in a separate bowl of the same solution. - Scrub again.
After soaking, run a bottle brush around the walls, base, neck, and threads. Use a straw brush inside narrow tubes. - Rinse thoroughly.
Rinse every part several times with clean water. - Air-dry completely.
The vinegar smell should fade as the parts dry. Store the bottle with the cap off.
Never mix vinegar with chlorine bleach. Combining an acid with bleach can release dangerous chlorine gas.
Baking Soda Scrub: For Stubborn Stains
Baking soda is a mild abrasive and useful deodorizer. It adds friction without being as harsh as steel wool or metal scrubbers.
It works well on coffee rings, tea marks, and dried drink residue. Baking soda and water are also commonly recommended for controlling stubborn food odors.
How to Make the Paste
Add a small amount of water to baking soda and mix until it forms a thick paste.
It should cling to the brush instead of running down the bottle.
How to Use It
- Wet the stained area.
- Apply the paste to a damp, soft nylon brush.
- Scrub the stain gently.
Focus on the base, inner walls, and area below the neck. - Let it sit for about 10 minutes.
- Scrub once more and rinse well.
Use extra care on plastic, painted finishes, printed designs, ceramic linings, and coated aluminum. Even a mild abrasive may dull or scratch a delicate surface. Some drinkware manufacturers specifically advise against abrasive cleaners, so check the care instructions first.
Do not mix baking soda and vinegar in the bottle expecting a stronger cleaner. The fizz may loosen a little debris, but the ingredients largely neutralize each other. Use them separately.
Lemon and Salt: A Fresh, Light Scrub
Lemon juice contains citric acid, which can help loosen light stains and mineral marks. Salt provides extra friction.
This method is best reserved for wide-mouth, uncoated stainless-steel bottles.
How to Use It Safely
- Cut a lemon in half.
- Sprinkle a small amount of fine salt on the cut surface.
Avoid large, sharp crystals that may scratch the finish. - Rub it gently across accessible stainless-steel surfaces.
For a deeper bottle, squeeze lemon juice into a small amount of fine salt and apply the mixture with a soft brush. - Scrub briefly.
Do not leave the salty mixture soaking inside the bottle. - Rinse immediately and thoroughly.
Salt contains chloride, and prolonged chloride exposure can contribute to pitting or crevice corrosion in stainless steel.
Avoid this method on plastic, aluminum, painted interiors, ceramic coatings, and bottles whose instructions prohibit acids or abrasives.
Lemon leaves a fresh scent, but scent is not proof that a surface has been sanitized.
What DIY Cleaners Can—and Cannot—Do
Vinegar, baking soda, and lemon are useful for:
- Controlling odors
- Removing light stains
- Loosening mineral deposits
- Reducing reliance on disposable cleaners
- Supporting a regular soap-and-brush routine
They are less reliable against:
- Heavy biofilm
- Persistent mold
- Illness-causing pathogens
- Contamination after someone has been sick
- Residue trapped inside damaged seals or scratched plastic
Cleaning with soap, water, and friction removes dirt and most germs. Sanitizing is a separate step that reduces remaining germs to recognized safe levels. The CDC recommends cleaning before applying any sanitizer because debris can stop the sanitizer from reaching the surface properly.
Extra Care for Higher-Risk Users
Someone with a weakened immune system may need stricter hygiene, particularly when another household member is ill. The CDC advises additional disinfection when someone is sick or at increased risk of severe infection.
Use one of these options after washing:
- A dishwasher with a labeled sanitize cycle, when every bottle part is dishwasher-safe
- A manufacturer-approved heat or steam method
- A food-contact sanitizer used at the correct concentration and contact time
- A cleaning product that specifically states it sanitizes, rather than only cleans or deodorizes
Do not assume every oxygen-based cleaning tablet kills 99.9% of germs. Check the label for an explicit sanitizing claim and follow the stated soaking time.
Boiling water can warp plastic, damage silicone, affect coatings, or create pressure inside insulated bottles. Use it only when the bottle manufacturer approves that method.
The Eco-Friendly Rule
Use soap and a brush for cleaning. Use DIY ingredients for odors and stains. Use an approved method when true sanitization is needed.
Natural does not automatically mean germ-free.
But with the right expectations, these low-cost methods can keep a well-maintained bottle fresh, odor-free, and in service for longer.
Preventing Bacterial Growth: Storage, Drying, and Maintenance Tips
The Golden Rule: Dry Completely, Every Time
A clean bottle can become musty again if you seal it while damp.
Even a small amount of trapped water raises humidity inside the bottle. That damp, enclosed environment gives bacteria and mold more opportunity to grow, especially around gaskets, straws, threads, and lid channels.
After washing, place the bottle upside down or at an angle on a ventilated drying rack. Keep the lid, straw, and gasket separate so air can reach every surface.
Do not place the bottle flat on a towel with the opening completely blocked. Air needs to move through the neck.
If you must pack the bottle immediately, shake out as much water as possible and wipe the interior with a clean, lint-free paper towel. Make sure the towel itself does not leave fibers or introduce dirt.
Air-drying is still the better option whenever time allows.
Smart Storage Habits
Once every part is completely dry, store the bottle with the cap off or resting loosely on top.
A tightly sealed empty bottle can trap unnoticed moisture and stale odors.
Use these simple habits:
- Store bottles in a clean, dry, well-ventilated area.
- Avoid damp cupboards, closed gym bags, and humid spaces beneath the sink.
- Keep lids, straws, and gaskets separate during long-term storage.
- Do not store a bottle with leftover water or drink residue inside.
- Wash and dry the bottle thoroughly before putting it away for several weeks.
If a stored bottle smells musty when reopened, wash it again before use. Do not simply refill it and hope the odor disappears.
Do Not Share Your Bottle
Sharing transfers saliva and microorganisms directly to the mouthpiece.
This can spread bacteria and viruses, particularly when someone has a cold, flu-like symptoms, a sore throat, vomiting, or diarrhea.
Keep separate bottles for each household member. Label children’s bottles when necessary, especially at school, sports practice, or daycare.
When to Replace Your Bottle and Accessories
There is no universal expiration date for every reusable bottle.
Replacement depends on the material, frequency of use, cleaning method, and condition of the parts. Inspect everything regularly rather than relying only on the calendar.
Plastic Bottles
Consider replacing a plastic bottle when it develops:
- Deep scratches
- Cracks
- Warping
- Cloudiness that does not wash away
- A rough or sticky interior
- Persistent odors or stains
A one- to two-year replacement window may be reasonable for a heavily used plastic bottle, but condition matters more than age. A well-maintained bottle may last longer, while a damaged one should be replaced sooner.
Scratches and cracks create narrow spaces where gunk and moisture can become difficult to remove.
Silicone Gaskets and Valves
Inspect silicone parts every month.
Replace them when they become:
- Cracked or stretched
- Loose-fitting
- Permanently discolored
- Slimy after washing
- Musty after drying
- Marked with mold that returns after cleaning
Some heavily used gaskets may need replacing within three to six months. Others last much longer. Follow the bottle manufacturer’s instructions and replace based on wear rather than automatically discarding a clean, undamaged seal.
Bottle Brushes
Replace a bottle brush when the bristles become flattened, frayed, discolored, or difficult to rinse clean.
For daily use, this may happen every three to six months.
Let the brush dry fully between uses. A brush left in a wet sink can become part of the hygiene problem.
Straws and Mouthpieces
Replace reusable straws and bite valves when they crack, split, become sticky, or retain an odor after deep cleaning.
Check the inside of clear straws under bright light. Dark spots or residue that cannot be reached with a brush are signs that replacement is the safer option.
Stainless-Steel Bottles
Stainless steel can last for years when properly maintained.
Replace the bottle if the interior develops:
- Rust that returns after cleaning
- Deep pitting
- Flaking or peeling coatings
- Sharp dents around the mouth
- Damage that prevents complete cleaning
Small exterior dents may be cosmetic. Damage to the drinking surface or inner lining is more important.
Glass Bottles
Stop using a glass bottle if you notice a chip, crack, or sharp edge.
Inspect the mouth and base carefully. Fine cracks can expand when the bottle is exposed to temperature changes or impact.
The Prevention Routine
Wash daily. Dry completely. Store open. Inspect monthly. Replace damaged parts.
Good maintenance does more than control bacteria. It prevents odors, extends the life of the bottle, and reduces unnecessary waste.
Final Thoughts: Make Bottle Cleaning a Habit
A clean bottle does not require a complicated routine.
Scrub it daily with warm, soapy water. Deep-clean it once a week. Let every part dry completely. Replace worn brushes, cracked gaskets, and damaged straws when needed.
Once the habit is established, daily cleaning takes only a couple of minutes.
The payoff is simple: fresher-tasting water, no musty smells, less hidden gunk, and more confidence every time you take a sip.
Start with one change today. Clean the lid properly, buy a straw brush, or leave your bottle open to dry overnight.
Small habits keep bottles cleaner for longer.
Ready to upgrade your cleaning kit? Check out our top picks above and choose the brush, tablets, or drying rack that fits your routine. Your bottle—and your peace of mind—will thank you.
Frequently Asked Questions About Water Bottle Hygiene
Can I Put My Water Bottle in the Dishwasher?
How Often Should I Replace My Bottle Brush?
Do Cleaning Tablets Work Without Scrubbing?
Is It Safe to Use Bleach?
How Do I Remove a Metallic Taste From a New Stainless-Steel Bottle?
Can I Use the Same Brush for My Bottle and Baby Bottles?
Use a separate brush for baby bottles to reduce cross-contamination. Follow current CDC guidance for cleaning and sanitizing infant-feeding equipment.
People with weakened immune systems should follow advice from their healthcare professional and current CDC hygiene guidance.