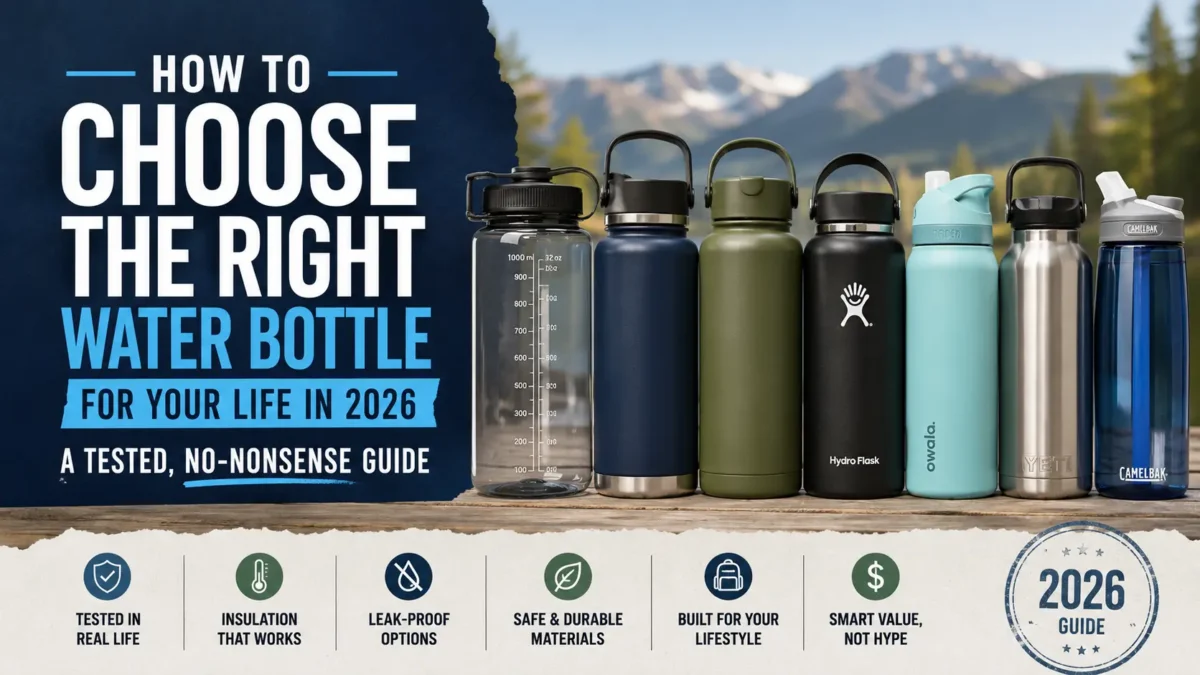

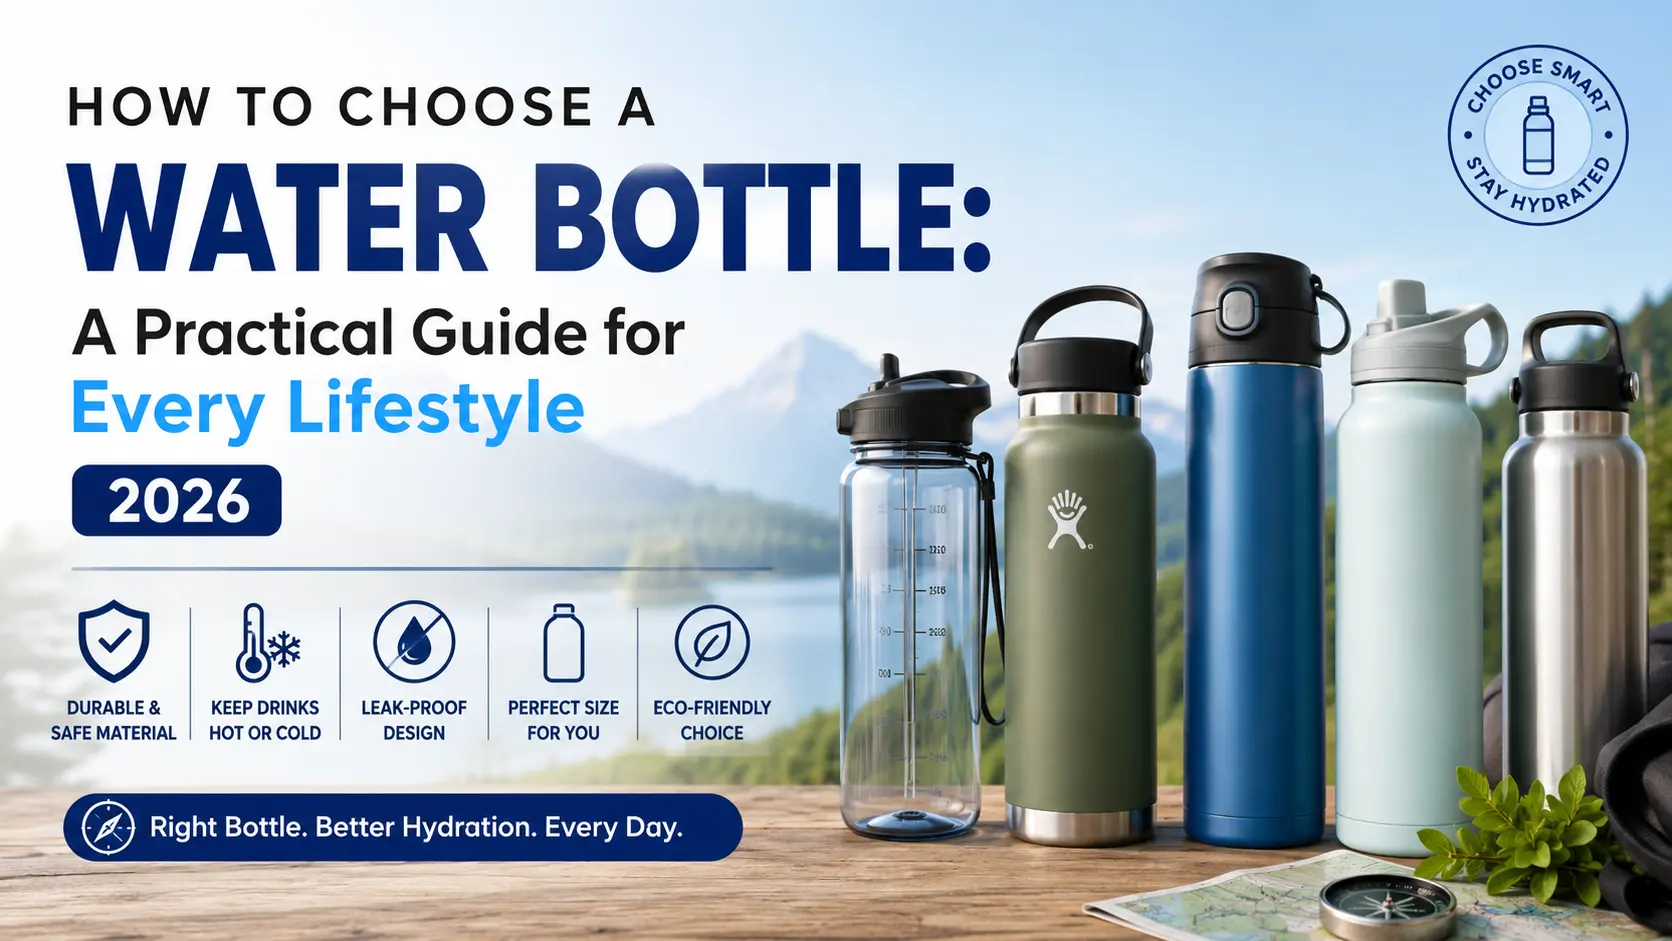
You stand in a store aisle or scroll through a page of reusable bottles, and they all start to look the same.
One costs $10. Another costs $60. Both promise to be durable, leakproof, and easy to carry. The expensive one has more features. The cheaper one looks perfectly fine. After a few minutes, choosing a water bottle somehow feels harder than it should.
The problem is that the wrong bottle rarely looks wrong at first.
You notice it later, when the lid leaks inside your work bag. When the bottle feels too heavy after an hour of carrying it. When your hand cannot fit inside to scrub the bottom. Or when your water starts tasting like plastic or metal by lunchtime.
Small annoyances add up fast. A bottle can be well made and still be completely wrong for your routine.
You do not need the most expensive bottle. You need the one you will actually fill, carry, drink from, and clean without thinking about it.
That is what this guide will help you find.
This is not another product roundup filled with nearly identical bottles and vague praise. It is a practical decision framework built from real use and testing. We will look at the choices that genuinely affect daily use, including material, mouth width, insulation, capacity, weight, cleaning, and portability.
By the end, you will know exactly which type of bottle fits your life and why. You will also know which features are worth paying for, which ones sound better than they work, and where a simple $12 bottle may serve you just as well as a $50 insulated model.
Key Takeaways
- The best bottle fits your real daily routine, not the longest feature list.
- Material, mouth width, insulation, and capacity are the four decisions that matter most.
- Stainless steel is the best all-round choice for most people, while plastic and glass perform better in certain situations.
- A bottle that is difficult to clean will eventually become a bottle you stop using.
- You can spend $12 or $50 and be equally satisfied when the bottle matches your habits.
Step 1: Start With Your Day, Not the Bottle
Do not start with stainless steel, plastic, glass, or insulation.
Start with Tuesday.
Picture a normal weekday from the moment you wake up until the bottle lands beside your bed, on the kitchen counter, or somewhere under the passenger seat. Where does it actually go?
Maybe it sits in a car cup holder during the morning commute. Then it moves to a desk, gets carried into a meeting, and comes home inside a work bag next to a laptop. In that case, the bottle needs to be narrow enough to fit in the cup holder, secure enough to prevent leaks, and light enough that carrying it is not annoying.
That is already more useful than knowing it comes in twelve colours.
Now think about refilling. Do you fill your bottle once at home, or several times from an office dispenser, gym fountain, or public tap? Do you add ice? Can you reach the bottom with a normal brush? Will the lid come apart easily, or will old water collect inside a hidden rubber seal?
These small moments decide whether a bottle becomes part of your routine or ends up forgotten in a cupboard.
A wider opening can make ice, refilling, and cleaning much easier, but it may also feel less comfortable for drinking while walking or driving.
Our guide to choosing a wide-mouth bottle explains the daily trade-offs in more detail and can help you decide whether a larger opening will make your routine easier or simply create a new annoyance.
The bottle needs a job description.
Your life writes it.
The Commuter
The commuter needs a bottle that fits a car cup holder, slips into a backpack side pocket, and stays closed when the bag gets thrown onto a train seat.
A huge insulated bottle may keep water cold all day, but that benefit means little if it does not fit anywhere. Weight also matters. A heavy stainless steel bottle feels manageable at home. Add water, a laptop, lunch, and a charger, and it may become the first thing you leave behind.
For most commuters, a slim bottle between 18 and 24 ounces makes more sense than the largest option on the shelf. A reliable screw lid is often safer than a complicated straw top with several moving parts.
The Parent
The parent needs a bottle that can survive being dropped, rolled under a seat, and handled by someone with sticky hands.
It may need to fit inside a diaper bag. It may need to open with one hand. A toddler may need to use it without help, which makes a simple straw or push-button lid more useful than a tight screw cap.
Cleaning matters even more here. Milk, juice, flavoured water, and backwash can collect inside straws and seals. A lid with six small pieces may look clever in the shop, but it becomes less appealing when you are scrubbing it after bedtime.
For families, easy cleaning usually beats extra features.
The Gym-Goer
The gym-goer needs a bottle that opens quickly, does not roll away, and survives a drop onto a hard floor.
A wide opening helps with ice and protein powder, but a wide bottle can be awkward to drink from between sets. A straw lid is convenient, though it takes more work to clean. A simple spout may offer the best balance.
Capacity depends on the workout. A small bottle works when refill stations are nearby. A larger one makes more sense for long sessions, outdoor training, or gyms where the fountain is always occupied.
The right choice is the one that keeps you drinking without interrupting the workout.
The Outdoor Worker
The outdoor worker needs more than a bottle that looks good on a desk.
It may sit in a hot truck, get covered in dust, or be dropped onto concrete. It may need to keep water cold through a 10-hour shift with limited access to refills.
This is where a larger vacuum-insulated stainless steel bottle earns its weight and higher price. A strong handle matters. So does a lid that can be opened with gloves or dirty hands. A narrow decorative bottle may be easy to carry, but it will not help much if it runs empty before lunch.
Durability, capacity, and temperature control come first.
Give the Bottle One Main Job
One bottle does not need to solve every possible problem.
A bottle made for hiking may feel too heavy for commuting. A glass bottle that works beautifully on a desk may be a poor choice for a gym floor. A lightweight plastic bottle may be perfect for a backpack but disappointing if you expect ice-cold water at the end of a long shift.
Choose the routine that matters most.
Ask where the bottle will spend most of its time, how often you will refill it, how roughly it will be treated, and how much cleaning you are honestly willing to do.
Then shop for that life.
Not the marketing sheet.
Step 2: The Four Decisions That Actually Matter
Once you know where your bottle will go, the product grid becomes much easier to read.
Most bottle listings try to pull your attention toward smaller features. Carry loops. Flip-up straws. Textured coatings. Magnetic caps. Silicone boots. Some are useful. None should decide the purchase.
Four decisions matter first:
- Material
- Mouth width
- Insulation
- Capacity
Get those four right, and you will probably enjoy using the bottle. Get one of them badly wrong, and no clever handle or fashionable colour will save it.
Material affects weight, durability, taste, and price. Mouth width changes how easily you can drink, add ice, refill, and scrub the inside. Insulation decides whether your water stays cold or slowly reaches room temperature. Capacity determines how often you refill and how much weight you carry.
Everything else comes later.
Think of these four choices as the frame of the bottle. Features such as straw lids, carry handles, powder coating, and rubber bases are the finishing details. They can improve a bottle that already suits your routine, but they cannot fix one that is too heavy, too small, difficult to clean, or awkward to drink from.
Start with the decisions you will notice every day.
Material: What Your Bottle Is Made Of, and What It Tastes Like
Material is usually the first big choice.
It affects how the bottle feels in your hand, how it survives a fall, how much it weighs in a full bag, and whether yesterday’s flavoured drink is still noticeable in today’s water.
There is no perfect material.
Stainless steel, plastic, and glass each solve a different problem. The goal is not to find the material with the longest list of advantages. It is to choose the trade-offs you can live with.
Stainless Steel: The Best All-Rounder for Most People
For most adults buying one bottle for daily use, stainless steel is the safest starting point.
It is durable. It does not absorb flavours the way some plastic bottles can. A well-cleaned steel bottle normally leaves water tasting like water, rather than yesterday’s sports drink.
It also handles everyday abuse well.
A quality steel bottle can survive being knocked off a desk, dropped onto a gym floor, or pushed around inside a crowded work bag. It may collect dents and scratches, but those marks are usually cosmetic. The bottle often keeps working.
Vacuum-insulated steel bottles also control temperature better than the other common choices.
Vacuum insulation sounds more complicated than it is. The bottle has two steel walls with most of the air removed from the space between them. That space slows the movement of heat.
Cold water stays cold for longer. Hot drinks stay hot for longer. The outside of the bottle is also less likely to become wet with condensation and leave a ring on your desk.
This makes insulated stainless steel especially useful for long commutes, outdoor work, gym sessions, road trips, and days when you cannot refill whenever you want.
The trade-off is weight.
A large insulated bottle can feel heavy before you add any water. Fill a 32- or 40-ounce model, place it beside a laptop and lunch container, and you may start questioning whether you really need all that capacity.
Steel also costs more. A reliable insulated bottle often sits closer to the $30-to-$50 end of the market than the $10-to-$20 end.
That extra cost makes sense when temperature control and durability matter. It makes less sense when the bottle will stay on a desk beside a cold-water dispenser all day.
Uninsulated stainless steel bottles do exist, but they occupy an awkward middle ground. They lose the temperature control that makes steel appealing while remaining heavier and often more expensive than plastic. They can still suit someone who wants a plastic-free bottle body without added bulk, but an insulated model is usually the better steel purchase.
What About Microplastics?
Concern about plastic exposure is another reason many buyers move toward stainless steel.
A 2024 study involving researchers at Columbia University examined bottled water from three unnamed brands. The researchers detected between 110,000 and 370,000 plastic particles per litre, with an average of around 240,000. About 90% of the detected particles were small enough to be classed as nanoplastics.
That finding does not prove that every reusable plastic bottle releases the same number of particles. It also does not establish exactly what health effects those particles may cause.
It does show that plastic exposure is more complicated than simply checking whether a bottle is labelled BPA-free.
A stainless steel bottle removes the large plastic bottle body from direct contact with your water. That can reduce one potential source of plastic contact, especially when compared with repeatedly drinking commercially bottled water.
It does not guarantee completely plastic-free drinking.
Nearly every stainless steel bottle still uses some plastic in the lid, straw, spout, or internal seal. Plastic particles may also already be present in the water before it enters your bottle. The Columbia researchers noted that some particles could come from the bottle itself, while others may enter during water treatment and filtration.
The practical takeaway is simple.
Choose stainless steel when you want a durable, mostly plastic-free water-contact surface and strong temperature control. Do not buy it because a label promises that it removes every possible source of microplastic or nanoplastic exposure.
Who Should Choose Stainless Steel?
Stainless steel makes the most sense when you:
- Want water to stay cold for several hours.
- Need a bottle that survives regular drops and knocks.
- Dislike water picking up old flavours.
- Prefer less plastic in contact with your drink.
- Do not mind carrying a little extra weight.
- Are willing to pay more for a bottle that should last.
Skip it when keeping your bag light matters more than keeping your drink cold.
Stainless steel is not automatically the best bottle for every person. It is simply the most balanced option for the widest range of routines.
Plastic: Light, Affordable, and Easy to Carry
Plastic wins when weight matters more than temperature control.
A plastic bottle slips into a gym bag without adding much bulk. It is easier for a child to carry. It will not shatter when it falls from a desk, rolls out of a stroller, or gets dropped beside a treadmill.
It also costs less.
That makes plastic a practical choice for school, the gym, travel, and any routine where bottles regularly get lost or replaced. A $12 bottle hurts less to leave on a bus than a $45 insulated steel one.
The main trade-off is temperature.
A standard plastic bottle will not keep water cold through a long shift. Add ice in the morning, and you may have room-temperature water by lunch. The outside can also collect condensation and make nearby papers or electronics damp.
Plastic is not the best choice when all-day cooling is the priority.
It is often the best choice when carrying less weight.
What Is Tritan?
Tritan is a clear, durable type of copolyester plastic made by Eastman. It became popular in reusable bottles because it offers much of the clear appearance of glass without the same weight or risk of shattering.
Eastman states that Tritan is made without BPA or BPS. The company also describes it as dishwasher-safe and resistant to stains, tastes, and odors. Always check the bottle manufacturer’s instructions, though, because the lid, straw, seals, and printed finish may have different washing requirements.
That odor resistance matters in daily use.
Older or cheaper plastic bottles can hold onto the smell of sports drinks, fruit squash, or yesterday’s coffee. Tritan is less likely to do that when it is washed properly. It can still develop smells if liquid sits inside for days or residue collects under the lid seal, but the bottle body is generally easy to scrub clean.
Tritan also feels solid without becoming heavy.
That balance works well for commuters, students, parents, and gym-goers who want something tougher than thin disposable plastic but lighter than stainless steel.
A bottle such as the CamelBak Chute Mag shows why this material remains useful. Its Tritan Renew body is light enough for daily carrying, tough enough for regular knocks, and much less expensive than many vacuum-insulated bottles. Our full review covers its real-world durability, weight advantage, and the situations where a simple plastic bottle makes more sense than steel.
What Is Tritan Renew?
Tritan Renew is the more sustainability-focused version.
It offers similar practical qualities to standard Tritan but is made with up to 50% certified recycled content. Eastman tracks that recycled content through an ISCC PLUS mass-balance certification system. This means the recycled raw material is accounted for through the manufacturing chain rather than every finished bottle necessarily containing visibly separated recycled plastic.
That distinction is worth understanding.
Tritan Renew is not a bottle made by melting down old reusable bottles one by one. Eastman uses molecular recycling to break eligible plastic waste into chemical building blocks that can be used to produce new material.
It is a better sustainability story than virgin plastic, but it is not a perfect circular solution.
Eastman notes that Tritan and Tritan Renew are commonly placed under resin identification code 7 and that suitable recycling infrastructure is not widely available. A bottle made with recycled content may therefore still be difficult to recycle at the end of its life.
The best environmental result still comes from using the same bottle for years.
Where Polypropylene Fits
Polypropylene is another common bottle plastic, especially in lids, straws, simpler sports bottles, and children’s drinkware.
It is light, tough, and inexpensive. It is usually less clear than Tritan, so polypropylene bottles often have a cloudy or opaque appearance. That does not make them worse. It simply makes them feel more functional than glass-like.
Polypropylene makes sense when low cost, low weight, and drop resistance matter most. It is less appealing when you want a crystal-clear bottle or a material that feels substantial in the hand.
Who Should Choose Plastic?
Plastic makes the most sense when you:
- Carry the bottle in a gym bag, school bag, or diaper bag.
- Want the lightest practical option.
- Need something that will not shatter when dropped.
- Do not need water to stay cold for several hours.
- Want an affordable bottle that is inexpensive to replace.
- Prefer a clear body so you can see how much water remains.
Choose Tritan when you want clarity, toughness, and better resistance to lingering smells.
Choose Tritan Renew when you want similar performance with certified recycled content.
Choose polypropylene when simplicity and price matter more than appearance.
Plastic is not the cheap substitute for a “real” bottle.
For the right routine, its low weight is the feature that matters most.
Glass: The Best Choice for a Clean Taste
Glass gives water the most neutral taste.
It does not absorb the smell of sports drinks. It does not leave a metallic note. When the bottle is properly cleaned, yesterday’s lemon water is less likely to appear in today’s plain water.
For people who are unusually sensitive to taste, that can settle the decision immediately.
Glass is also highly resistant to chemical interaction under normal bottle use. It is more accurate to describe it as chemically stable than to promise “zero leaching,” since migration can depend on the glass composition, decoration, cap, storage conditions, and the liquid inside. Research has found that migration from beverage packaging is possible across material types, including glass, although the substances and amounts vary.
For daily plain-water use, taste is the real advantage.
The problem is everything around it.
Glass is heavy. A protective silicone sleeve adds more weight without making the bottle unbreakable. Drop it onto concrete or a hard gym floor, and the day may end with broken glass and spilled water.
The sleeve helps with grip. It softens small knocks. It may contain some pieces if the bottle breaks.
It does not turn glass into steel.
That makes glass best for controlled routines. It works well on a desk, beside the bed, or around the house. It suits someone who fills a bottle in the kitchen, carries it a short distance, and places it somewhere stable.
It is a poor match for hiking, cycling, crowded gym bags, active children, and anyone who regularly drops things.
Glass bottles also need closer inspection.
Look at the base and neck for chips or cracks. Stop using the bottle after a hard impact if the glass appears damaged. Check whether the silicone sleeve can be removed, because trapped water between the sleeve and bottle can become unpleasant over time.
The lid still matters too.
Most glass bottles use a plastic, silicone, bamboo, or metal-topped lid. A glass body does not mean the whole product is plastic-free, and a complicated lid can still hold odors even when the bottle itself does not.
Who Should Choose Glass?
Glass makes the most sense when you:
- Notice unwanted plastic or metallic tastes.
- Mainly drink at a desk or at home.
- Want a bottle body that does not retain odors.
- Do not need all-day insulation.
- Can place the bottle somewhere stable.
- Do not mind carrying extra weight carefully.
Skip glass when the bottle will be thrown into a bag, used during exercise, carried on a trail, or handled by a young child.
Glass delivers the cleanest drinking experience.
It demands the most careful routine.
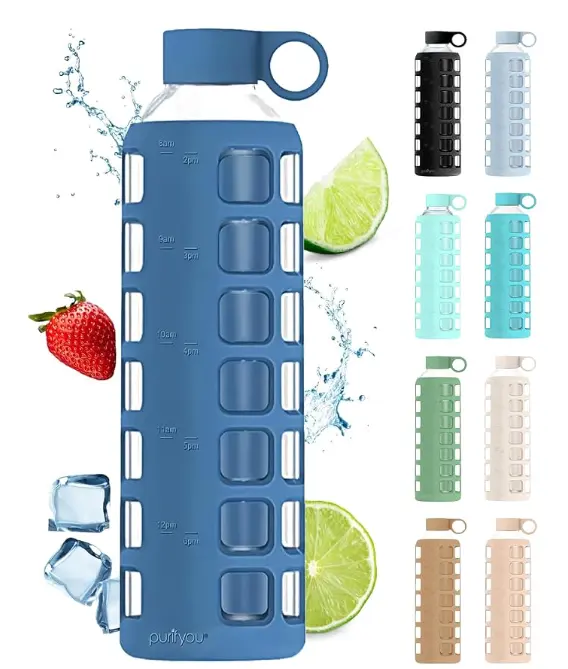
Purifyou 32 oz Borosilicate Glass Water Bottle
The purifyou 32 oz bottle combines durable borosilicate glass with time and volume markers to help you stay on track with your hydration goals. A protective silicone sleeve, leak-resistant stainless steel lid, and wide-mouth design make it ideal for work, the gym, travel, and everyday use.
Water Bottle Materials Compared
No material wins every category.
Stainless steel handles rough daily use and keeps water cold, but it adds weight. Plastic costs less and is easier to carry, but it offers no real temperature control. Glass gives water the most neutral taste, but it needs careful handling.
Material | Weight | Durability | Taste | Insulation | Best For | Typical Price |
Stainless steel, vacuum-insulated | Medium to heavy | Excellent | Neutral | Excellent for hot and cold drinks | Commuters, outdoor workers, long shifts, and all-day cold water | $25–$50 |
Stainless steel, single-wall | Medium | Excellent | Neutral | None | Backpacking, travel, and buyers who want steel without insulation weight | $18–$33 |
Tritan or Tritan Renew plastic | Light | Very good | Usually neutral when clean | None | Gym bags, children, travel, and budget-conscious buyers | $12–$20 |
Glass with a silicone sleeve | Heavy | Breakable | Most neutral | Usually none, although some double-wall models exist | Desks, home use, and people sensitive to plastic or metallic tastes | $18–$35 |
Mouth Width: The Everyday Usability Factor Nobody Talks About
Mouth width sounds like a minor detail.
It is not.
The opening affects how easily you add ice, how quickly you can clean the bottle, and how much water reaches your face when you take a drink while moving.
This is one of those choices that seems unimportant in the store and becomes obvious after a week of use.
Wide-Mouth Bottles: Best for Ice and Cleaning
A wide-mouth bottle is the easiest option to live with if you use ice every day.
You can drop in full-size cubes without forcing them through the opening one at a time. You can refill quickly from a dispenser. You can also reach farther inside with a sponge or bottle brush, which makes it easier to remove residue from sports drinks, electrolyte powders, or flavoured water.
That cleaning access matters.
A bottle may be technically dishwasher-safe, but many people still wash theirs by hand between deeper cleans. A wide opening lets you see the inside clearly and check whether anything is collecting around the shoulder or base.
If you use ice daily, a wide mouth is non-negotiable.
The time saved over a year of pushing cubes through a narrow opening is real. So is the frustration avoided when you can clean the bottle properly without searching for a special brush.
The trade-off appears when you drink.
A wide opening releases water quickly. Tilt the bottle too far while walking, riding in a car, or catching your breath after exercise, and you may get more water than expected. Ice can also slide toward your face.
You learn to control the flow, but it is not the most forgiving design for drinking on the move.
Narrow-Mouth Bottles: Easier Drinking, Harder Cleaning
Narrow-mouth bottles are easier to drink from.
The smaller opening controls the flow, so you are less likely to spill water down your shirt while walking, driving, or sitting on a moving train. Your lips fit naturally around the opening, and ice stays inside the bottle instead of rushing forward.
That makes a narrow mouth useful for commuters and anyone who drinks one-handed while moving.
The problem starts when you refill or clean it.
Large ice cubes may not fit. You may need to use smaller cubes, crushed ice, or fill the bottle from an ice machine with a narrow chute. A normal sponge will not reach inside, so proper cleaning usually requires a long bottle brush.
You also cannot see the interior as easily.
That matters if you use powders, juice, or anything other than plain water. Residue can hide near the bottom even when the bottle looks clean from the outside.
A narrow mouth works best for someone who mostly drinks plain water, rarely uses ice, and values controlled drinking more than easy access.
Mid-Width Openings: The Practical Compromise
A mid-width opening splits the difference.
It is large enough for easier refilling and some ice cubes, but small enough to give you more control while drinking. Bottles such as the CamelBak Chute Mag use a drinking spout that is narrower than the main bottle opening, which combines easier cleaning with a more controlled flow.
The Owala FreeSip takes another approach. Its lid lets you sip through a built-in straw or tilt the bottle back and drink through a larger opening.
These designs are useful because they separate the cleaning opening from the drinking opening.
You can remove the lid and access a wider bottle neck when cleaning or adding ice. Once the lid is attached, the smaller spout or straw controls how the water reaches your mouth.
The compromise is complexity.
A plain screw cap may have only a cap and a seal. A straw or multi-opening lid may include several pieces, small channels, and rubber components that need regular cleaning. The bottle body may be easy to scrub while the lid becomes the part that holds odors.
Convenience while drinking usually creates more work at the sink.
Ask Yourself Three Questions
You do not need to measure openings or memorize product specifications.
Think about how you already drink.
Do you use ice?
Choose a wide mouth if you add normal ice cubes every day. A mid-width opening may work if you use smaller cubes. A narrow mouth is likely to become annoying.
How do you clean your bottle?
Choose a wide mouth if you wash by hand and want easy access. A narrow mouth is manageable if you own a proper bottle brush or place the bottle body in the dishwasher.
Remember that dishwasher-safe does not always mean the whole bottle can be thrown onto one rack. Lids, straws, seals, and painted finishes may need separate care.
Do you drink while moving?
Choose a narrow mouth, controlled spout, or straw lid if you regularly drink while walking, driving, or exercising. A fully open wide mouth is better when you normally stop and take a drink.
The Simple Rule
Choose a wide mouth for easy filling and easy cleaning.
Choose a narrow mouth for controlled drinking.
Choose mid-width when you want some of both and do not mind cleaning a more complicated lid.
Mouth width will not appear in the biggest text on the product page.
You may notice it more often than almost any other feature.
Insulation: Do You Need Your Water Cold, or Your Coffee Hot?
Insulation matters when your drink has to wait for you.
A cold bottle filled at 8 a.m. may feel refreshing at breakfast and disappointing by lunch. Leave it on a sunny desk, inside a warm car, or beside you during an outdoor shift, and the difference becomes even clearer.
But not everyone needs insulation.
If you refill your bottle every hour or two from a cold-water dispenser, a lighter single-wall bottle may serve you better. It costs less, weighs less, and does not take up as much room in a bag.
The decision comes down to time.
How Vacuum Insulation Works
A vacuum-insulated bottle has two walls.
Between those walls is a space with most of the air removed. With less air available to move heat, cold drinks warm up more slowly and hot drinks cool down more slowly.
You do not need to understand the science beyond that.
Two walls and a vacuum slow temperature change.
A single-wall bottle has one layer of plastic, glass, or steel between the drink and the outside air. It can hold cold water, but it cannot keep that water cold for long once the surrounding temperature rises.
The difference is easy to feel.
A single-wall steel bottle filled with ice water may become cold and wet on the outside as condensation forms. An insulated steel bottle usually stays dry and comfortable to hold.
That is useful on a desk.
It is even more useful beside a laptop.
Think About the Next Four Hours
Ask what happens after you fill the bottle.
Will you finish or refill it within two hours? Single-wall is probably enough.
Will it sit untouched through a four-hour meeting, a long commute, a sports practice, or half a work shift? Insulation starts to earn its extra weight.
Will it spend most of the day inside a hot vehicle or in direct sunlight? Choose vacuum-insulated stainless steel.
For many people, four hours is the practical dividing line.
Below that, frequent access to cold water can make insulation unnecessary. Beyond that, an insulated bottle is more likely to keep the drink at a temperature you still enjoy.
This does not mean single-wall bottles are worse.
They are simply built for a routine with regular refills.
Insulation Costs Weight and Space
An insulated bottle needs two walls, so it will usually weigh more and hold less water than a similarly sized single-wall bottle.
A 24-ounce insulated bottle may look much larger than a 24-ounce plastic bottle. The walls are thicker. The base is heavier. The bottle may also be too wide for a standard car cup holder.
That extra bulk is worthwhile when you need cold water all day.
It is unnecessary when you work beside a refrigerator.
Do not carry insulation you do not use.
Hot Drinks Change the Decision
For coffee, tea, and other hot drinks, insulation is not optional.
A single-wall metal bottle can become dangerously hot to hold. It also loses heat quickly, especially through the lid and opening.
A proper insulated bottle or travel mug keeps the exterior more comfortable and slows heat loss. It also gives you more time to drink without reheating.
The quality difference matters more with hot drinks than it does with cold water.
A cheap insulated bottle may keep ice water acceptable for several hours. Coffee exposes weaknesses faster. Thin insulation, a poorly sealed lid, and a wide drinking opening can turn a hot drink lukewarm before the morning is over.
Our guide to bottles that keep coffee hot all day explains how we test temperature loss over time and shows the real performance difference between stronger insulated bottles and cheaper models.
The lid matters almost as much as the bottle body.
Every time you open the top, heat escapes. A permanently exposed sipping hole loses heat faster than a sealed screw cap. A flip lid may retain heat better, but only when its gasket closes properly.
Be Careful With “24-Hour Cold” Claims.
Bottle listings love large numbers.
“12 hours cold.”
“24-hour ice retention.”
“Hot all day.”
Those claims are not always false, but they often come from ideal conditions. The bottle may be filled, kept at room temperature, left unopened, and tested without direct sunlight or movement.
That is not how most people use a bottle.
You open the lid. You drink. You add room-temperature water. You leave the bottle in a car. Warm air enters each time the cap comes off.
Real-world temperature retention is usually shorter.
In our own heat-retention testing, the largest performance differences appeared once bottles were opened regularly and used as they would be during a normal day. The strongest models stayed usefully hot or cold for longer, while budget bottles lost temperature faster through their lids and seals.
That is more useful than an unopened-bottle claim.
When comparing products, look for testing that records starting temperature, room conditions, lid openings, and temperature at several points during the day. Without that information, “24 hours” is mostly a marketing number.
When Insulation Is Worth Paying For
Choose vacuum insulation when:
- Your water regularly sits for four hours or longer.
- You work outdoors or leave the bottle in a warm vehicle.
- You want ice to survive through most of the day.
- You dislike condensation on desks or inside bags.
- You carry coffee, tea, or another hot drink.
- You cannot refill from a cold or hot source easily.
Choose single-wall when:
- You refill frequently.
- Low weight matters more than temperature.
- The bottle mainly stays indoors.
- You have easy access to chilled water.
- You want the least expensive practical option.
The Simple Rule
Pay for insulation when temperature affects whether you will actually drink what you packed.
Skip it when fresh water is always nearby.
A vacuum bottle is not automatically better. It is better when your drink needs to stay ready for several hours without help.
Capacity: The 1-Liter Sweet Spot and When to Go Bigger or Smaller
Capacity decides how often you refill and how much weight you carry.
Choose too small, and you spend the day looking for water. Choose too large, and the bottle becomes a heavy object you leave at home.
For most adults, the sweet spot sits between 32 and 34 ounces, or roughly one liter.
It holds enough water to reduce refill stops without becoming as awkward as a 40- or 64-ounce jug. It works well for commuting, desk use, gym sessions, and ordinary days when water is available but not always convenient.
One liter is not perfect for everyone.
It is simply the most useful place to start.
Why 32 to 34 Ounces Work for Most Adults
A 32-ounce bottle gives you a meaningful amount of water without asking you to carry half a gallon at once.
You can fill it in the morning, drink through part of the workday, and refill at lunch. At the gym, it is usually enough for a standard workout. On a short drive or afternoon out, it reduces the need to buy bottled water.
It also gives you a simple way to track intake.
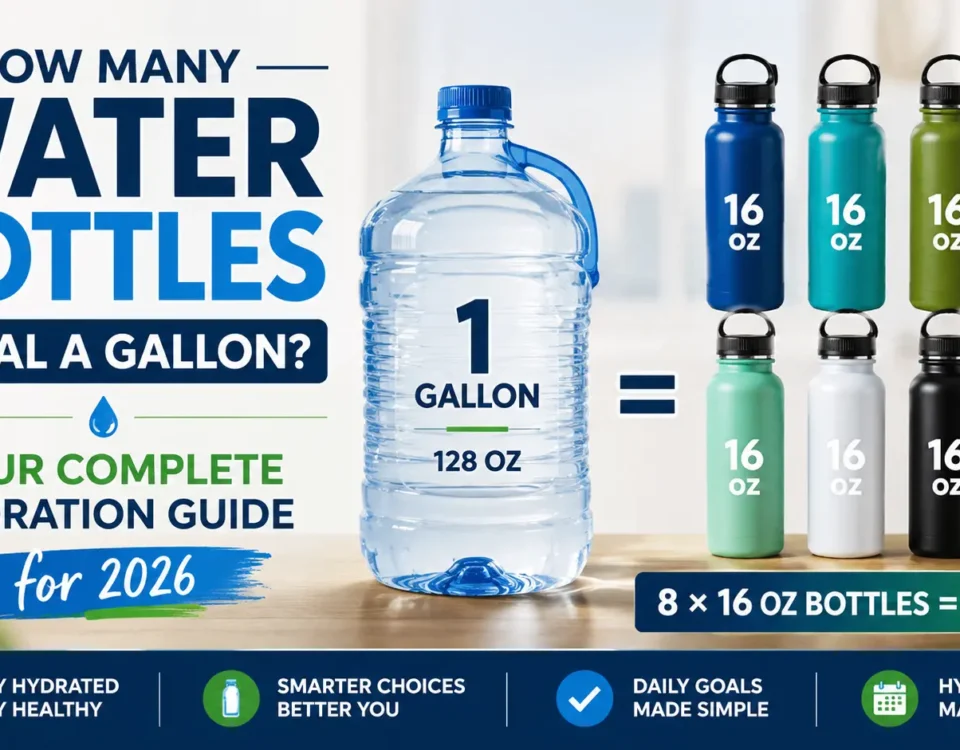
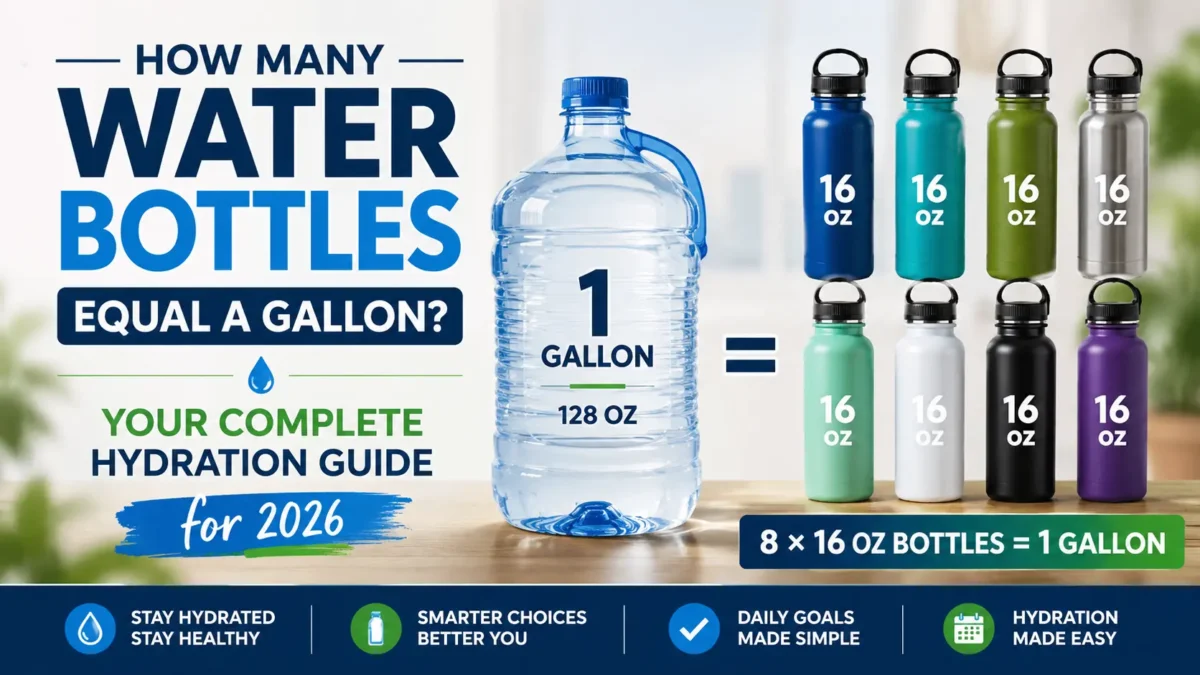
Four full 32-ounce bottles equal one U.S. gallon. You do not need an app or marked timelines. Count the fills.
A 34-ounce bottle is almost exactly one liter, making it equally easy to track. About 3.8 full 34-ounce bottles equal a U.S. gallon.
Our 34-ounce and 1-liter bottle comparison looks at this sweet spot in more detail and compares popular models across weight, diameter, insulation, lids, and ease of cleaning.
Portability still depends on shape.
A slim 32-ounce plastic bottle may slide into a large cup holder or backpack pocket without trouble. A wide 32-ounce insulated bottle may not fit either one. Two bottles can hold the same amount of water and have very different outside dimensions because vacuum insulation adds thickness.
Check the bottle’s diameter before buying.
Capacity tells you how much it holds. It does not tell you where it fits.
Smaller Bottles: 18 to 24 Ounces
Smaller bottles are easier to carry.
An 18- or 20-ounce bottle fits more cup holders, weighs less when full, and slips into compact bags without taking over the entire side pocket. It is a sensible choice for short errands, school days, meetings, and routines with easy access to refills.
It also works well for children.
A full 32-ounce bottle contains about two pounds of water before you count the weight of the bottle itself. That can be too much for a young child to carry comfortably. A smaller bottle is easier to lift, open, and place inside a school bag.
Some adults also drink more consistently from a smaller bottle. A large container can feel like a task. A 20-ounce bottle feels manageable and gets refilled without much thought.
The trade-off is refill frequency.
To reach one U.S. gallon:
- An 18-ounce bottle needs about 7.1 fills.
- A 20-ounce bottle needs about 6.4 fills.
- A 24-ounce bottle needs about 5.3 fills.
That is fine when a clean water source is nearby.
It becomes annoying when the office dispenser is on another floor, the gym fountain has a line, or your route does not include reliable refill points.
Choose 18 to 24 ounces when low weight and easy carrying matter more than avoiding refills.
Larger Bottles: 40 to 64 Ounces
Large bottles solve an access problem.
A 40- to 64-ounce bottle makes sense when you cannot refill easily. Think long drives, construction sites, outdoor work, sports fields, warehouses, and full days at a desk where you tend to forget to get up.
A 40-ounce bottle offers more water without becoming completely unmanageable. It is a popular middle step for people who regularly finish 32 ounces too early but do not want to carry a half-gallon container.
A 64-ounce bottle holds half a U.S. gallon.
Fill it twice, and you have a gallon. That simple math appeals to people who prefer filling once in the morning and once later in the day.
The downside is obvious as soon as you pick it up.
Water is heavy. One fluid ounce of water weighs roughly one ounce, so 64 ounces of water weighs about four pounds. Add a large insulated steel bottle, and the total can approach five pounds.
That is reasonable on a desk or inside a vehicle.
It is less enjoyable on the shoulder.
Large bottles may not fit cup holders, bike cages, backpack pockets, gym machines, or refrigerator-door shelves. They can also be awkward to tip toward your mouth when full. A straw lid or sturdy handle becomes more important as capacity increases.
Go bigger when refill access is poor.
Do not go bigger just to avoid standing up.
Use Refill Math, Not a Motivational Slogan
Bottle brands often print time markers down the side.
“Good morning.”
“Keep going.”
“Almost there.”
Those reminders work for some people, but refill math is more practical.
Start with how much water you realistically expect to drink and divide it by the capacity of the bottle. This tells you how many complete bottles you need rather than leaving you to guess.
For a U.S. gallon, which contains 128 fluid ounces:
Bottle Size | Full Bottles per U.S. Gallon |
18 oz | About 7.1 |
20 oz | About 6.4 |
24 oz | About 5.3 |
32 oz | 4 |
34 oz | About 3.8 |
40 oz | About 3.2 |
64 oz | 2 |
Our guide to how many bottles equal a gallon includes a fuller conversion table and explains why one gallon is not an automatic daily target for every person.
Your actual fluid needs vary with body size, food, activity, weather, pregnancy, health conditions, and other factors. Coffee, tea, milk, and water-rich foods may also contribute to total fluid intake.
Use the gallon as a math anchor.
Do not treat it as a rule everyone must follow.
Match Capacity to Refill Access
Ask one useful question:
When this bottle runs empty, how difficult will it be to fill again?
If the answer is “not difficult,” choose a smaller, lighter bottle.
If the answer is “I may not find water for six hours,” choose more capacity.
For a normal office day, a 24- to 34-ounce bottle usually works. For an hour at the gym, 24 to 32 ounces may be enough. For a long outdoor shift, 40 to 64 ounces is more realistic.
The right capacity removes friction without adding unnecessary weight.
The Simple Rule
Choose 18 to 24 ounces for lighter carrying and frequent refills.
Choose 32 to 34 ounces for the best balance of capacity and portability.
Choose 40 to 64 ounces when water access is limited, or the bottle will stay mostly on a desk, in a vehicle, or at a work site.
Do not buy the largest bottle you can lift.
Buy the smallest one that gets you comfortably to your next refill.
Capacity and Refill Guide
Bottle Size | Full Bottles to Reach 1 U.S. Gallon | Best For | Fits a Car Cup Holder? |
18 oz | About 7.1 | Children, short trips, and the lightest possible carry | Usually |
24 oz | About 5.3 | Commuting, gym sessions, and moderate desk use | Usually |
32 oz | 4 | Most adults, gym use, and full workdays | Sometimes, check the base |
34 oz / 1 liter | About 3.8 | Fewer refills without moving to an oversized bottle | Sometimes, highly model-dependent |
40 oz | 3.2 | Long desk days, road trips, and outdoor work | Often for tapered tumblers; rarely for wide bottles |
64 oz / half-gallon | 2 | Outdoor shifts, long events, and places with no reliable refill access | No, in most vehicles |
A 32-ounce bottle requires four complete fills to provide 128 ounces. That means filling it once in the morning and refilling it three more times.
Cup-Holder Fit Depends on Shape, Not Just Capacity
Capacity alone does not tell you whether a bottle will fit inside a car.
A wide, straight-sided 32-ounce bottle can be harder to fit than a tapered 40-ounce tumbler. For example, a standard 32-ounce Hydro Flask Wide Mouth has a diameter of about 3.55 inches. Its tapered 32-ounce Travel Bottle has a narrower 3.30-inch base and is specifically marketed as fitting most cup holders.
The same issue appears around the 1-liter size. The 34-ounce SIGG Traveller measures approximately 3.19 inches across, while a 32-ounce Nalgene Wide Mouth measures about 3.5 inches. The SIGG may fit some larger holders, but the wider Nalgene is unlikely to fit many standard vehicle holders.
Forty-ounce tumblers are not automatically too large. Many are built with narrow, tapered bases specifically for driving. The Stanley Quencher H2.0 has a 3.1-inch base and is listed as compatible with most car and truck cup holders. Hydro Flask and Owala make similar 40-ounce travel tumblers that their manufacturers also describe as fitting most cup holders.
A straight-sided 40-ounce bottle is a different story.
Those models are usually too wide for an ordinary cup holder, even though a tapered tumbler with the same capacity may fit easily.
Measure the base, not the widest part near the lid.
Step 3: Lid Types and Drinking Mechanisms
The bottle body gets most of the attention.
The lid causes most of the daily frustration.
A good lid opens without a fight, controls the flow, stays closed inside a bag, and comes apart easily when it is time to clean. A bad one leaks, traps old water under a seal, or has so many small pieces that washing it feels like a repair job.
Choose the simplest lid that still works for the way you drink.
The lid is usually the first part to fail. It is also the part most likely to grow mold because water, backwash, and flavored drink residue collect inside small channels and rubber gaskets.
Fewer moving parts usually mean fewer problems.
Screw-Top or Flex Cap: Simple and Reliable
A screw-top cap is the least complicated option.
You twist it open, drink directly from the bottle, and twist it closed again. There are few parts to lose, fewer hidden areas to scrub, and less chance of a hinge or button breaking.
The Hydro Flask Flex Cap is the reference design. It uses a simple screw closure with a flexible carry strap. There is no straw, spring, push button, or exposed drinking mechanism.
That simplicity is the main advantage.
A well-made screw cap is usually the safest choice for throwing into a backpack, gym bag, or suitcase. Once tightened properly, it is less likely to leak than a lid with several openings and moving pieces.
It is also easy to clean. Remove the cap, wash the seal, scrub the threads, and let everything dry separately.
The trade-off is convenience.
You need two hands to open many screw caps safely. You also have to remove the entire lid before drinking, which can be awkward while walking, driving, or exercising.
A wide screw-top opening may release water quickly, especially if the bottle is full.
Best for:
- Hiking and outdoor use
- Gym bags and backpacks
- People who prioritize leak protection
- Anyone who dislikes complicated lids
- Drinks that need a secure seal
Choose a screw cap when durability and easy cleaning matter more than one-handed drinking.
A simple screw cap will usually outlast a flip-top mechanism.
Straw Lid: Easy Drinking Without Tilting
A straw lid lets you drink while the bottle remains upright.
That makes it useful at a desk, in a car, during a workout, or anywhere you want to sip without lifting a heavy bottle toward your face.
It is one reason large tumblers from brands such as Stanley and Yeti have become popular. A 30- or 40-ounce container is much easier to drink from through a straw than it is to tilt when full.
Straw lids can also encourage more frequent drinking.
There is less interruption. You do not have to unscrew a cap, tip the bottle back, or pause what you are doing. The straw is simply there.
The trade-off is cleaning.
A straw lid may include the straw itself, a mouthpiece, an air channel, a gasket, a hinge, and one or more small seals. Each part can hold moisture and residue.
Plain water is fairly forgiving. Smoothies, electrolyte drinks, flavored water, and sugary drinks are not.
Remove the straw and seals regularly. Use a narrow straw brush. Let the lid dry completely before putting it back together.
A quick rinse is not enough.
Straw lids are also a poor choice for many carbonated drinks. Pressure can build inside a sealed bottle and force liquid through the straw or vent when the lid opens. Unless the manufacturer specifically approves carbonation, use a suitable screw-cap container instead.
Best for:
- Desk use
- Long drives
- Large tumblers
- Gym machines and stationary workouts
- People who prefer frequent small sips
Choose a straw lid when easy access matters more than minimal cleaning.
Chute or Spout Lid: Controlled Flow Without a Straw
A chute lid uses a smaller drinking opening attached to a wider bottle neck.
The CamelBak Chute Mag is the classic example. Remove or flip open the spout cap, drink through the mid-width opening, and close it again when finished.
This design balances flow and control.
It releases more water than a straw but less than a fully open wide-mouth bottle. You can take a proper drink without water rushing toward your face.
That makes it useful while walking, commuting, or standing between gym sets.
A chute lid also keeps the main bottle opening wide enough for ice and cleaning. You remove the full lid when filling the bottle, then use the smaller spout when drinking.
It is a practical middle ground.
The downside is that the smaller cap, hinge, magnet, threads, and seal still need attention. It is simpler than many push-button lids but more complicated than a plain screw cap.
Check the area beneath the spout cap. Water often collects there after washing.
Best for:
- Walking and commuting
- Gym use
- People who want a faster flow than a straw
- Ice users who still want controlled drinking
- Anyone seeking a balance between convenience and cleaning
Choose a chute lid when a wide mouth pours too quickly, but a straw feels too slow or fussy.
Flip-Top or Push-Button Lid: Best for One-Handed Use
A flip-top lid opens through a hinge, latch, or push button.
Press the button, and the drinking spout appears. Close it, and the lid locks again.
This is convenient when one hand is busy.
Parents can open it while carrying a bag. Commuters can take a drink without unscrewing a cap. Runners and gym users can operate it quickly between movements.
Some designs also include a lock to stop the button from being pressed accidentally inside a bag.
The convenience comes with more failure points.
Springs can weaken. Hinges can crack. Buttons can stick. Locks can loosen. A lid that works perfectly during the first month may become unreliable after repeated drops and dishwasher cycles.
These lids also contain hidden spaces.
Water can sit beneath the mouthpiece, inside the hinge, under the gasket, or around the button mechanism. Those damp areas can develop smells or visible mold when the lid is only rinsed from the outside.
Take it apart as far as the manufacturer allows.
Do not force apart a mechanism that is not designed to be disassembled, but do inspect the seals and underside closely. If you cannot reach an area that regularly holds water, think carefully before buying.
Best for:
- One-handed drinking
- Commuters
- Parents and caregivers
- People with limited hand strength
- Short workouts and active use
Choose a flip-top lid when fast access is essential and you are willing to clean the mechanism properly.
Avoid it when maximum durability is the priority.
Tea, Fruit, or Coffee Infuser Lid: Useful for the Right Routine
An infuser bottle includes a basket or chamber for loose-leaf tea, fruit, herbs, or coarse coffee grounds.
It is more specialized than the other lid types.
For someone who regularly prepares fruit-infused water, cold-brew coffee, or loose-leaf tea, the built-in infuser removes the need for a separate jar, strainer, or tea bag.
That convenience can make the bottle worth carrying.
Infuser position matters.
A top-loading basket sits near the lid and works well when you want to remove tea leaves after a set brewing time. A bottom-loading infuser may keep fruit or coffee in contact with the water for longer, creating a stronger flavor.
Longer contact is not always better.
Tea can become bitter. Fruit can soften and collect around the filter. Coffee grounds can leave fine sediment if the mesh is not tight enough.
Cleaning is the main trade-off.
An infuser adds a basket, mesh filter, seal, and sometimes a separate lower chamber. Fruit pulp, tea leaves, and coffee oils can stick inside these parts.
Our guide to infusion bottles for fruit, tea, and cold-brew compares top-loading and bottom-loading designs, flavor strength, filter performance, and the extra cleaning each style requires.
Best for:
- Loose-leaf tea drinkers
- Cold-brew coffee
- Fruit-infused water
- People who want flavor without disposable tea bags
- Desk or home use
Choose an infuser bottle when you will use the feature regularly.
Skip it if you mostly drink plain water. An unused infuser becomes one more part to wash and lose.
Match the Lid to How You Drink
Think about the moment when you usually reach for the bottle.
Do you stop, open it, and take a full drink? A screw cap works.
Do you sip all day at a desk? Choose a straw.
Do you drink while walking? A chute or controlled spout is easier.
Do you need to open the bottle with one hand? Consider a flip-top.
Do you make tea, cold-brew, or flavored water several times a week? An infuser may earn its extra parts.
Then think about cleaning.
Be honest.
A lid that needs a small brush, weekly disassembly, and careful drying will not suddenly become low-maintenance because you like its design.
Step 4: Special Cases and Specific Needs
For Parents: Toddler and Kid Bottles
A toddler bottle has a harder job than an adult bottle.
It needs to be light enough for small hands, simple enough to operate without help, and secure enough to survive being turned upside down inside a diaper bag.
It also needs to come apart for cleaning.
That last point matters more than the color, cartoon print, or matching lunchbox.
Milk, juice, food particles, and backwash can collect inside straws, valves, seals, and hinges. A lid may look clean from the outside while old residue sits underneath the mouthpiece.
For young children, simplicity is a safety and cleaning feature.
Start With the Child, Not the Age Label
“Suitable for ages 12 months and up” does not mean every one-year-old will use the bottle comfortably.
Children develop at different speeds. One toddler may manage a flip-up straw independently. Another may need two handles and a softer straw. A child with limited hand strength may struggle with a tight push button or heavy stainless steel bottle.
Watch what your child can already do.
Can they lift a full cup with one hand? Can they close a lid after drinking? Do they bite straws? Do they throw the bottle when frustrated? Can they control the flow without coughing or spilling?
The answers matter more than the age printed on the packaging.
Our guide to safe, leak-proof bottles for 1-year-olds looks more closely at straw, spout, and open-cup designs, along with material safety and age-appropriate features.
Keep It Light Enough to Use
A bottle can be child-sized and still be too heavy.
Twelve ounces of water weighs about three-quarters of a pound before the bottle itself is counted. Add a thick insulated steel body, silicone base, handle, and complicated lid, and a small bottle can become tiring for a toddler to hold.
For younger children, 8 to 14 ounces is usually more manageable than an adult-sized bottle.
A lightweight Tritan bottle is often easier for daycare, short trips, and everyday carrying. A small stainless steel bottle makes more sense when durability or temperature control matters enough to justify the extra weight.
Do not buy a large bottle so your child can “grow into it.”
Buy one they can use now.
Leak-Proof Means Testing It Upside Down
A toddler bottle will not remain upright.
It will be dropped on the floor, pushed beneath a stroller, thrown onto a car seat, and stored sideways beside spare clothes.
Test it as a toddler will use it.
Fill the bottle with water. Close it normally. Turn it upside down over the sink. Shake it. Leave it lying on its side for ten minutes.
A few drops around an open straw may be normal for some designs. A steady leak means the bottle does not belong beside diapers, clothes, books, or electronics.
Check how the seal works too.
Some bottles remain leakproof only when the straw is folded down or the lid is locked. That protection is useless if the child cannot close it independently.
The best design is not merely leakproof in theory.
It is leakproof after your child uses it.
Straw Cup or Sippy Cup?
The straw-versus-sippy debate is often presented as more settled than it really is.
The American Academy of Pediatrics says children can begin practicing with an open cup, straw cup, or spouted training cup when solid foods are introduced, usually at around six months. It treats the sippy cup as an optional transition tool rather than a required developmental stage.
A straw cup is often the more practical long-term choice.
It lets the child drink without tipping the container high. It works well in car seats and strollers. It also avoids the bottle-like sucking action created by many valve-controlled hard-spout cups.
Hard spouts are not automatically harmful. Evidence directly connecting ordinary sippy-cup use with oral or facial development problems is limited. The larger concern is prolonged, exclusive use, especially when the child constantly carries a cup filled with milk, juice, or another sugary drink.
When choosing a spouted cup, look for a simple design without a difficult internal valve. The AAP specifically recommends a valve-free model for parents who prefer a sippy cup, because valve-controlled cups require bottle-like suction and do less to teach ordinary cup drinking.
The practical progression is straightforward:
- Begin practicing with an open, straw, or simple spouted cup.
- Use the design the child can control safely.
- Continue offering supervised open-cup practice.
- Avoid treating a sealed training cup as something the child must use for years.
Children with swallowing problems, developmental delays, physical differences, or frequent coughing during drinking may need advice from a pediatrician or feeding specialist rather than a general bottle recommendation.
Avoid Hidden Valves and Unreachable Channels
The most leakproof lid is often the hardest to clean.
Manufacturers stop leaks by adding silicone valves, narrow vents, flexible membranes, and internal channels. Those parts work until milk or flavored liquid dries inside them.
Before buying, inspect the underside of the lid.
Can the straw be removed? Can the silicone seal come out without tools? Can you reach both sides of the drinking spout? Does the manufacturer show how to disassemble and reassemble it?
A lid that cannot be inspected cannot be cleaned with confidence.
This matters even when the bottle holds only water. Backwash carries food into the straw and lid. A quick rinse may remove what you can see while leaving residue inside the mechanism.
Choose removable parts over sealed mysteries.
Use a narrow straw brush. Wash beneath the gasket. Let every part dry separately before reassembly. Replace straws and seals when they remain discolored, cracked, sticky, or smelly after proper washing.
And label the pieces.
Small silicone valves have a talent for disappearing beside the kitchen sink.
Stainless Steel or Tritan?
Stainless steel and BPA-free Tritan are two practical choices for children, but neither material makes every finished bottle equally suitable.
Stainless steel handles drops well and is useful when drinks need to remain cold. It does not retain odors easily, but it is heavier and can dent. Check that exposed edges remain smooth after hard impacts.
Tritan is lighter, clear, and shatter-resistant. Eastman states that Tritan is made without BPA or BPS and is designed for food-contact products, including dishwasher-safe reusable drinkware. The cleaning instructions for the finished bottle can still vary because the lid, printing, seals, and straw may use different materials.
Do not rely on “BPA-free” as the only quality check.
The FDA regulates substances used in food-contact products, and it notes that small amounts of packaging materials can migrate into food under some conditions. Buy bottles from identifiable manufacturers, follow their temperature and dishwasher instructions, and replace any plastic body that becomes deeply scratched, warped, cloudy, or cracked.
Avoid glass for unsupervised toddler use.
A silicone sleeve improves grip and protects against small knocks, but it does not remove the risk of breakage.
Milk Changes the Cleaning Rules
A bottle used only for water is easier to maintain.
Milk is less forgiving.
It leaves fat and protein behind in straws, seals, and narrow channels. A bottle that looks rinsed can still smell sour the next morning.
When a bottle has held milk:
- Empty it promptly.
- Disassemble the lid fully.
- Wash every part with warm water and dish soap.
- Brush through the complete straw.
- Rinse thoroughly.
- Let the pieces dry separately.
Do not leave milk sitting in a sealed bottle inside a warm car or bag.
For routine sipping between meals, plain water is the easier choice for both bottle hygiene and dental health. The AAP recommends keeping sugary drinks out of training cups and generally using plain water between meals.
What Parents Should Look For
A good toddler bottle should have:
- A size the child can lift when full.
- Handles or a body shape that small hands can grip.
- A lid the child can operate independently.
- A secure lock or cover for travel.
- A removable straw and gasket.
- No hidden valve that cannot be scrubbed.
- Replacement straws and seals that are easy to buy.
- A base wide enough not to tip constantly.
- A material suitable for repeated food contact.
- Clear cleaning instructions from the manufacturer.
The bottle should also survive a drop without creating sharp edges, loose pieces, or a damaged drinking surface.
Inspect it regularly.
Toddlers are excellent durability testers.
The Simple Rule
Choose the lightest bottle your child can use without help.
Then choose the simplest lid that stays closed in the bag and comes apart completely at the sink.
A toddler bottle does not need clever features.
It needs to be carried, dropped, opened, washed, and used again tomorrow.
For Hot Drinks: Coffee and Tea on the Go
A hot-drink bottle is a different animal from a cold-water bottle.
For water, a lid mainly controls spills and drinking speed. For coffee or tea, the lid also protects your face, hands, and bag from liquid hot enough to burn.
Heat retention matters.
Safe drinking matters more.
A wide-mouth water bottle may keep coffee hot for hours, but removing the entire cap exposes a large surface of hot liquid. Take a drink while walking or riding in a car, and one sudden movement can send coffee toward your face.
The best hot-drink bottles use a narrow drinking opening, a controlled sip-through lid, or a small push-button spout.
The insulation keeps the drink hot.
The lid makes it usable.
Vacuum Insulation Works Both Ways
The same double-wall vacuum insulation that keeps ice water cold also slows heat loss from coffee and tea.
A good insulated bottle can keep a drink pleasantly hot through a commute and into the workday. A weaker model may feel hot at breakfast and barely warm by midmorning.
The bottle body is only part of the result.
A large amount of heat escapes through the top. Thin lids, open sipping holes, weak seals, and wide drinking openings all allow warm air to leave faster.
That is why two bottles with similar stainless steel construction can perform very differently.
One has a tightly sealed lid with a narrow drinking channel. The other has a loose slider and a permanently exposed opening.
The second may be easier to sip from.
It will usually lose heat faster.
Choose a Lid That Controls the Flow
Hot coffee should not rush toward your mouth.
Look for a lid that releases a small, predictable amount with each sip. A narrow opening gives you more control and makes it easier to test the temperature before taking a full drink.
Several lid styles work well.
A sealed sip-through lid lets you drink through a small opening without removing the entire top. It offers good flow control and is easy to use at a desk.
A push-button lid can open with one hand while keeping the drinking surface covered between sips. It is useful for commuting, although the mechanism requires careful cleaning.
A screw-top cup lid uses the outer cap as a small cup. This is slower, but it lets the drink cool before it reaches your mouth. It works well for tea, soups, and very hot coffee.
A locking flip lid can provide fast access while reducing the chance of accidental opening inside a bag. Check that the lock is firm and easy to confirm by touch.
Avoid drinking hot liquid directly from a fully open wide mouth while moving.
It may be manageable at a desk. It is a burn risk in a car, on a train, or while walking.
The Zojirushi Approach
Zojirushi travel mugs are a strong example of how lid design and insulation work together.
In our travel mugs for heat, leaks, and taste comparison, Zojirushi delivered the strongest heat retention. Its narrow body, tightly sealed lid, and controlled drinking opening reduced heat loss better than many wider tumblers with simple sliding lids.
That performance comes with a trade-off.
Coffee can remain hotter than expected for several hours. A drink that was unsafe to gulp at 8 a.m. may still require caution later in the morning.
Strong insulation does not mean the drink is ready to consume immediately.
Open the lid carefully. Take a small first sip. Allow very hot drinks to cool before sealing them for a long period.
The guide also compares common lid mechanisms, including push-button tops, rotating covers, sliding lids, and simple screw caps, so you can balance heat retention against cleaning and one-handed use.
Leak Resistance Matters More With Coffee
A leaking water bottle is annoying.
A leaking coffee bottle can ruin a laptop, stain clothing, and burn skin.
Do not assume that “spill-resistant” means leakproof.
A slider lid may stop small splashes while the mug sits upright, but it may still leak when tipped sideways. A straw tumbler may work in a cup holder but should not be placed inside a backpack.
For bag carry, choose a bottle with:
- A fully sealed drinking opening
- A firm locking mechanism
- A gasket that can be removed and cleaned
- No exposed straw hole
- Clear manufacturer confirmation that the lid is leakproof
Test it at home before trusting it beside electronics.
Fill the bottle with warm water rather than boiling liquid. Lock the lid. Turn it upside down over a sink. Shake it gently and leave it on its side for several minutes.
A lid that leaks during this test does not belong in a work bag.
Tea Needs Room to Brew
Tea creates an extra problem.
Leaves and tea bags need room to release flavor, but leaving them inside too long can make the drink bitter. An infuser basket should be easy to remove once the tea reaches the strength you want.
A narrow travel mug may retain heat well but be difficult to clean after loose-leaf tea. A wider bottle is easier to scrub, although the lid still needs a controlled sipping opening.
For milk tea, flavored coffee, or drinks with sugar, cleaning becomes more urgent.
Milk and sugar collect around lid channels and silicone seals. Rinse the bottle soon after use rather than leaving it closed until the next morning.
Coffee oils also build up over time.
If water begins tasting like yesterday’s roast, the lid and gasket probably need more than a quick rinse.
Do Not Overfill
Hot liquids need space below the lid.
Filling a bottle to the very top can force liquid into the cap, vent, or drinking mechanism when the lid is tightened. Heat may also create pressure inside some containers.
Follow the manufacturer’s fill line.
Open the bottle slowly, especially after it has been shaken, carried in a bag, or exposed to a change in altitude.
Never use a bottle for boiling liquid unless the manufacturer specifically says it is designed for that purpose.
The lid, seals, straw, coating, or internal parts may have lower temperature limits than the stainless steel body.
Match the Bottle to the Commute
For a short drive, a simple sip-through travel mug may be enough.
For a long train journey, choose a locking lid that can be carried safely inside a bag. For a full workday without reheating, prioritize heat retention and a tight seal. For desk use, a wider mug may be more comfortable even if it loses heat faster.
Think about when you will actually drink the coffee.
Keeping it hot for ten hours sounds impressive. It is less useful when you want to finish it during a 30-minute commute.
The goal is not maximum heat at any cost.
It is a drink that stays warm for as long as you need and reaches your mouth at a safe, controlled speed.
The Simple Rule
Choose vacuum insulation for heat retention.
Choose a narrow or controlled drinking opening for safety.
Choose a locking, fully sealed lid when the bottle will travel inside a bag.
For hot drinks, the best bottle is not the one that holds the highest temperature for the longest time.
It is the one that keeps the drink hot without making it difficult or risky to dri
For Flavor Motivation: Infusion and Fruit Bottles
Some people do not dislike water.
They simply get bored with it.
A fruit infuser bottle can make plain water more appealing by adding a light flavor from lemon, berries, cucumber, mint, or other fresh ingredients. It can help someone drink more without relying on soda, juice, or heavily sweetened flavor packets.
The key word is light.
Infused water will not taste like fruit juice. It gives plain water a fresher smell and a mild flavor that becomes stronger the longer the ingredients remain in contact with the water.
For the right person, that small change is enough.
How an Infuser Bottle Works
An infuser bottle contains a perforated basket or chamber that holds fruit, herbs, tea leaves, or coffee grounds.
Water moves around the ingredients while the basket keeps larger pieces away from the drinking opening. The design gives you flavor without fruit pulp, seeds, or leaves floating freely inside the bottle.
There are two common layouts.
Top-loading infusers hang down from the lid. They are easy to remove when the flavor becomes strong enough, making them useful for tea and ingredients that can become bitter over time.
Bottom-loading infusers sit near the base or extend through most of the bottle. They usually keep more of the ingredients submerged, even after the water level drops. This often produces a stronger and more consistent fruit flavor.
Bottom-loading designs tend to win on flavor.
Top-loading designs tend to win on control and easier removal.
Who Should Consider an Infuser Bottle?
An infuser bottle makes sense if plain water regularly goes untouched.
It can also help someone replace sweet drinks with a less sugary option. Add sliced strawberries instead of strawberry syrup. Use lemon and mint instead of a canned flavored drink.
The bottle does not remove sugar already present in fruit, but whole fruit generally adds far less sugar to the water than juice or sweetened drink mixes, especially when the fruit remains inside the basket rather than being blended or squeezed.
Infuser bottles work well for:
- People who find plain water boring
- Office workers who sip throughout the day
- Anyone reducing soda or sweetened drinks
- Fruit, herb, and tea drinkers
- People who enjoy preparing drinks in advance
They are less useful for someone who wants the simplest possible bottle.
A regular bottle with a few fruit slices added directly may work just as well if pulp and seeds do not bother you.
Flavor Strength Depends on Time and Surface Area
Thin slices release flavor faster than large chunks.
Soft fruits such as strawberries and citrus release flavor more quickly than firm ingredients such as apples. Crushing mint leaves lightly before adding them can also strengthen the result.
Cold water extracts flavor slowly.
Give it time.
A bottle prepared in the morning may taste mild during the first hour and much stronger by lunch. Leaving the ingredients overnight usually creates more flavor, although citrus peel can become bitter and soft berries may begin to break apart.
Bottom-loading infusers often produce stronger results because the ingredients remain submerged for longer. A short top basket may stop touching the water once the bottle is half empty.
That difference matters if strong flavor is the main reason you are buying the bottle.
More Flavor Means More Cleaning
Infuser bottles have more parts than ordinary water bottles.
There is the bottle body, lid, basket, filter, gasket, and sometimes a removable bottom section. Fruit juice and pulp can settle into the holes of the basket or collect beneath a silicone seal.
A quick rinse is not enough.
Remove the fruit as soon as you finish drinking. Wash the basket with dish soap and use a small brush to clear blocked holes. Take out removable seals and allow every part to dry separately.
Pay special attention to berries, citrus, and cucumber.
Soft fruit can break down inside the filter. Citrus oils cling to plastic and silicone. Cucumber seeds can block narrow openings.
Do not leave fruit sitting in a warm bottle all day after the water is gone.
Fresh ingredients spoil. A sealed bottle creates a damp environment where odors and residue develop quickly.
Fruit, Tea, and Cold-Brew Need Different Filters
A basket that works for lemon slices may not work for loose tea.
Fruit needs larger openings so water can move freely around the pieces. Tea requires finer mesh to stop leaves from reaching the drinking spout. Cold-brew coffee needs an even finer filter to reduce sediment.
Some bottles claim to handle all three.
Few handle all three equally well.
Choose based on what you will prepare most often. A large fruit cage is better for berries and cucumbers. A fine stainless steel mesh basket is better for tea or coarse coffee grounds.
Do not buy a complicated multi-purpose bottle for one use you may try once.
Start With Simple Combinations
You do not need a recipe book.
Start with combinations that are easy to prepare and easy to clean:
- Lemon and mint
- Cucumber and lime
- Strawberry and basil
- Orange and blueberry
- Apple and cinnamon
- Peach and ginger
Avoid crushing fruit into a paste. Small particles escape the filter more easily and make the bottle harder to wash.
Remove citrus peel if the water becomes bitter.
And remember that fresh fruit changes the storage rules. Keep prepared water cold when possible, and do not continue drinking it after it develops an unusual smell, cloudiness, or fermented taste.
The Simple Rule
Choose a bottom-loading infuser when stronger fruit flavor matters most.
Choose a top-loading infuser when you want to remove tea or ingredients easily.
Choose neither if you know you will not clean the extra parts.
An infuser bottle can make water easier to enjoy.
It only works when the fruit basket does not become another neglected piece at the bottom of the sink.
Step 5: Cleaning and Maintenance, the Chapter Most Guides Skip
A bottle you do not clean properly can become a hygiene risk.
It touches your mouth several times a day. It collects saliva, skin oils, food particles, and whatever was on your hands when you opened the lid. Then it stays warm and damp between uses.
A quick rinse does not reset the bottle.
It only makes it look less dirty.
A peer-reviewed study of 90 reusable bottles found bacterial counts ranging from undetectable levels to 8.03 million colony-forming units per milliliter. The median was much lower, at 1,115 CFU/mL, which is important context: not every bottle contained millions of bacteria, and a high general bacterial count does not automatically mean dangerous pathogens were present. Still, the researchers found clear contamination and concluded that improperly cleaned bottles can act as reservoirs for microbial growth.
The study also found that bottles recently used for coffee, tea, soda, juice, sports drinks, or fruit-infused water tended to have higher contamination than bottles used only for water. Sugar, milk, fruit residue, and drink powders leave nutrients behind for microbes to use.
You do not need to panic.
You do need to wash the bottle like the food-contact item it is.
That Slippery Layer Is Not Just “Stale Water”
Run a clean finger around the inside of a neglected bottle.
If the surface feels slippery or slimy, you may be touching biofilm.
Biofilm is a community of microorganisms attached to a surface and surrounded by a sticky layer they produce themselves. In plain English, bacteria and other microbes settle on the bottle wall, hold onto it, and build a protective home around themselves.
That layer makes them harder to remove with water alone.
Biofilm can begin before it becomes visible. Early warning signs include a musty smell, an odd taste, a cloudy film, or a bottle wall that no longer feels clean after rinsing. By the time you can clearly see thick buildup, the bottle is overdue for a full clean.
The academic bottle study notes that microorganisms naturally grow as biofilms on surfaces that remain in contact with water. Bottle design can make the problem worse when narrow openings, built-in filters, straws, and hidden channels are difficult to reach.
This is why rinsing is not enough.
Water removes loose debris. Soap helps break up oils and residue. A brush provides the physical scrubbing needed to lift material from the walls, base, threads, and corners.
Our guide to the best water bottle cleaners looks more closely at rapid bacterial growth, biofilm formation, brush designs, cleaning tablets, and UV-C products, including which tools actually reach the areas where residue collects.
The Most Important Accessory Is a Bottle Brush
Forget the matching carry loop.
Buy a brush.
A long bottle brush reaches the bottom and presses against the inside walls with more force than shaking soapy water around. It also lets you scrub beneath the bottle’s shoulder, where residue often remains hidden from view.
Look for a brush with:
- A head that fits through the bottle opening
- Bristles or a soft cleaning surface that reaches the walls
- A long handle that reaches the base
- A separate narrow brush for straws and spouts
- A small detail brush for threads, seals, and lid corners
Do not use a rough metal scrubber inside a coated or plastic bottle. Deep scratches create more places for residue to collect and can damage the surface.
A brush with a straw-cleaner attachment may cost about $3 more.
Pay it.
It is more useful than most lid upgrades.
Tier 1: The Daily Quick Wash
Wash the bottle after each day of use.
Clean it sooner when it has held anything besides plain water. Coffee, tea, juice, milk, protein shakes, electrolyte mixes, and fruit-infused water should not sit inside until the following morning.
Start by taking the bottle apart.
Remove the cap, straw, mouthpiece, infuser, and any gasket designed to be removed. Do not assume that running water over the assembled lid cleans what sits underneath it.
Add dish soap and warm water.
Scrub the bottle body with a brush. Pay attention to the bottom corners and the area immediately below the neck. Wash the cap threads, drinking surface, straw, and both sides of each removable seal.
Rinse until no soap remains.
Then let the parts dry separately.
Do not close a damp lid onto a damp bottle. Sealing moisture inside creates the exact environment you are trying to avoid. Place the bottle upside down or at an angle so air can circulate, and leave the lid off until everything is fully dry.
BBC Science Focus recommends cleaning reusable bottles with detergent after each use, or at least several times each week, with equal attention given to lids and straws. It also stresses thorough drying because lingering moisture supports microbial growth.
If the bottle is labelled dishwasher-safe, the dishwasher may be the easiest daily option. Check each component separately. The steel body may tolerate the dishwasher while a painted finish, bamboo cap, straw, or silicone component requires hand washing.
Tier 2: The Weekly Deep Clean
Daily washing handles ordinary use.
A weekly deep clean catches what the daily routine misses.
Completely disassemble the lid. Remove the gasket if the manufacturer designed it to come out. Separate the straw from the mouthpiece and open every locking or flip mechanism.
This is where neglected bottles usually reveal the problem.
You may find dark spots beneath the seal, slippery residue inside the straw, or an unpleasant smell around the hinge. Those areas stay damp longer than the main bottle body and receive less airflow.
For the deep clean, use one of these methods:
Use a bottle-cleaning tablet. Fill the bottle according to the tablet instructions, allow it to soak for the stated time, and rinse thoroughly. Tablets are useful for odors and residue in areas that are difficult to reach, but they should not become an excuse to stop brushing accessible surfaces.
Use diluted white vinegar for stubborn odor or buildup. BBC Science Focus recommends a half-vinegar, half-water soak for heavily neglected bottles, followed by normal detergent cleaning. Vinegar is not a no-scrub shortcut. Wash and rinse the bottle properly after soaking.
Use a dishwasher sanitizing cycle when appropriate. Only do this when every part is dishwasher-safe. NSF states that residential dishwasher cycles certified to NSF/ANSI Standard 184 must deliver at least a five-log bacterial reduction and reach a final rinse temperature of 150°F. A standard wash cycle does not necessarily meet the same sanitizing requirement.
Never mix vinegar with bleach or other cleaning chemicals.
Follow the bottle manufacturer’s instructions when using any sanitizer, tablet, or diluted bleach solution. Using a stronger concentration than directed does not make the bottle safer and may damage seals, finishes, or plastic parts.
Straw and Flip-Top Lids Need Extra Work
A screw cap may have one gasket.
A straw or flip-top lid can have a straw, mouthpiece, valve, vent, hinge, button, lock, and several silicone seals.
Every added part creates another place for moisture to remain.
Once a week, disassemble the lid as completely as the manufacturer allows. Push a narrow brush through the full length of the straw. Scrub the underside of the mouthpiece. Remove and wash the gasket on both sides.
Inspect the hinge and button mechanism with the lid open.
Do not force apart pieces that are not designed to be removed. Breaking the mechanism may make the lid leak. Instead, follow the manufacturer’s cleaning diagram and replace the lid when inaccessible areas remain dirty or develop a persistent smell.
Dark spots that return after cleaning are a reason to replace the affected straw, gasket, or lid.
Replacement parts are cheaper than replacing the entire bottle.
Tier 3: UV-C Is an Optional Extra
UV-C light can reduce microorganisms when the correct wavelength and dose reach them.
It cannot scrub away dirt.
It cannot remove protein residue, coffee oils, fruit pulp, or an established layer of biofilm. UV-C is also less reliable around lids and spouts because hinges, threads, gaskets, and curved channels create shadows.
The Centers for Disease Control and Prevention notes that UV effectiveness is reduced when organisms sit in cracks, shadows, or beneath material that blocks the light.
Use UV-C only as a supplement after physical cleaning.
Choose an enclosed product with clear safety controls and credible independent performance testing. Follow the stated exposure time and position every part exactly as directed.
Do not shine an exposed UV-C lamp toward your skin or eyes.
For most bottle owners, soap, a brush, full disassembly, and thorough drying will matter more than a UV-C gadget.
Do Not Forget the Outside
The inside is not the only surface that gets dirty.
Your hand touches the bottle after using door handles, gym equipment, keyboards, shopping carts, and public transportation. Then you touch the cap or drinking surface.
The 2017 study found contamination on bottle exteriors as well as interiors and warned that outside surfaces may transfer microorganisms back to the user’s hands. Straws and nozzles that must be touched to open or close deserve particular attention.
Wash the handle, carry loop, outer cap, button, and base.
Clean the rubber boot too. Moisture can become trapped between the boot and the bottle, creating odor even when the inside remains clean.
Clean More Often in These Situations
The daily routine becomes non-negotiable when:
- The bottle contains milk, sugar, juice, protein powder, or fruit.
- More than one person drinks from it.
- It has been left in a hot car.
- The user has recently been ill.
- The bottle belongs to a young child, older adult, or immunocompromised person.
- The lid has a straw, valve, or push-button mechanism.
- The water develops a different taste or smell.
Do not try to rescue badly cracked plastic, permanently smelly silicone, a rusted interior, or a lid with unreachable mold.
Replace the damaged part.
The Simple Cleaning Schedule
Every day: Wash with dish soap and a bottle brush. Clean the lid, straw, and gasket. Rinse and air-dry everything separately.
Once a week: Fully disassemble the lid. Deep-clean with an appropriate tablet, dishwasher sanitizing cycle, or manufacturer-approved soaking method.
Occasionally: Inspect for scratches, cracks, rust, damaged seals, persistent odors, and dark spots. Use a validated enclosed UV-C system only as an optional supplement, not as a replacement for washing.
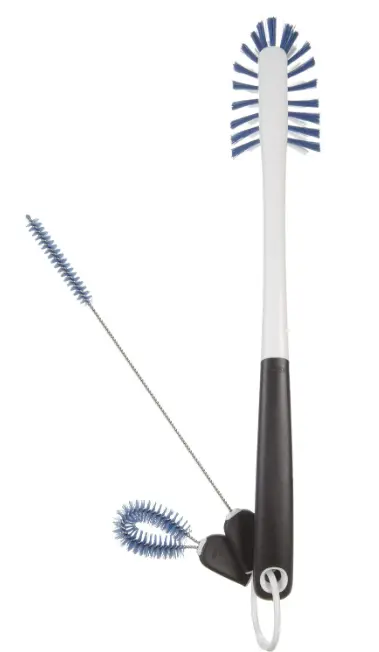
OXO Good Grips Water Bottle Cleaning Set
The OXO Good Grips Water Bottle Cleaning Set includes a long bottle brush, straw brush, and detail cleaner to tackle every part of your reusable bottle. Durable nylon bristles remove buildup from bottles, straws, and lids, while the compact snap-together design keeps all three tools organized and ready to use.
Step 6: Putting It All Together, Your Personal Bottle Match
You have now made the decisions that matter.
You know where the bottle will go. You understand the trade-offs between steel, plastic, and glass. You know whether you need insulation, how wide the opening should be, and how much water you are willing to carry.
Now turn those choices into one clear bottle type.
Do not restart the search by comparing every feature on every product page.
Follow your routine.
Decision 1: Choose the Material
Start with what matters most.
Choose stainless steel if you want durability, neutral-tasting water, and temperature control.
Choose Tritan plastic if low weight, low cost, and drop resistance matter more than keeping water cold.
Choose glass if taste is your top priority and the bottle will mostly stay on a desk or at home.
For most adults who want one bottle for several parts of the day, insulated stainless steel remains the safest all-round choice.
Decision 2: Choose the Mouth Width
Think about ice, cleaning, and how you drink.
Choose a wide mouth if you use ice every day, add powders, or wash the bottle by hand.
Choose a narrow mouth if you often drink while walking or want slower, more controlled flow.
Choose a mid-width spout or dual drinking lid if you want easier filling without pouring water down your shirt.
Still stuck? Our guide to [wide-mouth versus narrow-mouth bottle trade-offs] compares ice access, cleaning difficulty, flow rate, and everyday spill risk.
Decision 3: Decide Whether Insulation Is Worth Carrying
Ask how long the drink will sit.
Choose an insulated bottle if your water needs to remain cold for four hours or longer, the bottle sits in a warm car, or you carry coffee or tea.
Choose a single-wall bottle if you refill regularly from a cold-water source and would rather save weight and money.
For hot drinks, use a dedicated travel mug or bottle with a narrow, controlled sipping opening. Our comparison of [bottles that keep coffee hot throughout the day] can help you narrow down the strongest performers.
Decision 4: Choose the Smallest Capacity That Reaches Your Next Refill
Do not choose capacity based on the largest bottle you can find.
Choose it based on how far away the next refill is.
An 18-to-24-ounce bottle works for short trips, children, and people who value a lighter carry.
A 32-to-34-ounce bottle is the best starting point for most adults. It reduces refill stops without becoming as awkward as a half-gallon container.
A 40-to-64-ounce bottle makes sense for outdoor work, long drives, sports fields, and places where clean water is difficult to find.
Match 1: The Daily Commuter
You carry a backpack, use ice, and want cold water through the afternoon.
Choose:
- Vacuum-insulated stainless steel
- A 24-to-32-ounce capacity
- A wide opening for ice and cleaning
- A fully leakproof screw or spout lid
- A base diameter that fits your car cup holder or bag pocket
That points toward a bottle such as the Hydro Flask Wide Mouth or Takeya Actives.
Both follow the right general formula: insulated steel, a wide filling opening, and lids designed for secure daily carry. The final choice comes down to shape, cap preference, and whether the base fits your car and bag.
Match 2: The Lightweight Gym or Travel User
You refill often, dislike heavy bottles, and do not need water to stay cold all day.
Choose:
- Tritan or Tritan Renew plastic
- A 24-to-32-ounce capacity
- A chute or controlled spout
- A shape that slips into a gym or backpack pocket
- A lid with few enough parts to clean easily
That points toward the CamelBak Chute Mag or a simple Nalgene.
The CamelBak gives you a more controlled drinking opening. The Nalgene gives you maximum simplicity and easy cleaning. Neither adds the weight or cost of vacuum insulation.
Our CamelBak Chute Mag everyday bottle review looks more closely at its Tritan Renew body, weight advantage, durability, and practical lid design.
Match 3: The Desk Sipper
Your bottle spends most of the day beside a laptop. You take small drinks regularly and have easy access to refills.
Choose:
- Tritan, glass, or insulated steel
- A 24-to-32-ounce capacity
- A straw or dual-opening lid
- A stable base
- Parts that can be removed for cleaning
That points toward an Owala FreeSip, a straw tumbler, or a silicone-sleeved glass bottle.
Choose the Owala-style lid if you want the option to sip through a straw or tilt the bottle for a faster drink. Choose glass if you notice even slight plastic or metallic tastes. Choose an insulated tumbler if cold water keeps you drinking more consistently.
Do not ignore cleaning.
A straw bottle used every day needs more maintenance than a plain screw-cap bottle.
Match 4: The Outdoor Worker or Long-Drive User
You may go most of the day without a refill. The bottle sits in heat and gets knocked around.
Choose:
- Vacuum-insulated stainless steel
- A 40-to-64-ounce capacity
- A strong carry handle
- A leakproof screw or spout lid
- A wide opening for ice and cleaning
A large insulated bottle makes sense here because the weight solves a real problem: limited water access.
Do not choose a delicate glass bottle or a small plastic bottle that will run empty before lunch. Look for a replaceable lid, a handle that works with gloves, and a base that remains stable inside the vehicle or work area.
A Few Final Shortcuts
If you use ice every day, choose a wide mouth.
If you carry the bottle inside a backpack, choose a fully sealed lid.
If you refill every two hours, skip insulation unless you strongly prefer cold water.
If the bottle stays on a desk, capacity matters more than portability.
If you hate washing small parts, avoid straws, buttons, and complicated valves.
If you notice unwanted flavors, choose stainless steel or glass.
If you regularly leave bottles behind, do not spend $50.
These shortcuts will remove most unsuitable products before you start comparing colors, coatings, and accessories.
Your Final Check Before Buying
Before placing the order, answer five questions:
- Will it fit where I plan to carry it?
- Can I lift it comfortably when full?
- Can I clean every surface that touches water?
- Does the lid match how I normally drink?
- Am I paying for insulation or features I will genuinely use?
If the answer to all five is yes, you have probably found the right bottle.
Not the best bottle for everyone.
The best bottle for your day.
Frequently Asked Questions
Is stainless steel or plastic better for a water bottle?
How often should I clean my water bottle?
What size water bottle should I get?
Do insulated water bottles keep drinks cold for 24 hours?
Are wide-mouth bottles harder to drink from?
Can I put hot coffee in any insulated water bottle?
Conclusion: Choose the Bottle That Fits Your Day
At the beginning, every water bottle looked almost identical.
A wall of stainless steel, plastic, glass, straws, handles, colors, and prices made a simple purchase feel harder than it should. Now you have a better way to choose.
Start with your day.
Think about where the bottle will go, how often you will refill it, how you prefer to drink, and how much cleaning you are honestly willing to do. Then make the four decisions that matter.
Material determines weight, durability, taste, and price. Stainless steel is the best all-rounder, Tritan plastic is the practical lightweight choice, and glass works best when neutral taste matters most.
Mouth width affects ice, cleaning, and drinking control. Choose wide for easy filling and scrubbing, narrow for slower drinking, or a mid-width spout for a balance of both.
Insulation matters when your drink needs to stay cold or hot for several hours. Skip it when you refill frequently and would rather carry less weight.
Capacity should get you comfortably to your next refill. A 32-to 34-ounce bottle suits most adults, while smaller and larger sizes make sense for specific routines.
Do not let secondary features distract you.
Carry loops, powder coatings, magnetic caps, and clever lid mechanisms can improve the right bottle. They cannot fix one that is too heavy, too difficult to clean, too wide for your cup holder, or too small for your workday.
Cleaning belongs in the decision too.
A bottle you can scrub easily is a bottle you are more likely to keep using. A basic $10 brush set with a full-size bottle brush, straw cleaner, and small detail brush may be the best accessory investment you make.
The right bottle is not necessarily the most expensive one.
It is the one you will fill before leaving home, carry without resenting the weight, drink from without spilling, and wash without putting it off until tomorrow.
That may be a $12 plastic bottle.
It may be a $45 insulated steel bottle.
Both can be the right answer when they match the person carrying them.
Browse the comparison that matches your biggest priority, whether that is insulation, low weight, easy cleaning, cup-holder fit, hot drinks, or large capacity.